Table of Contents
Introduction
Printable integrations can be used to produce a PDF containing information from your form. We appreciate that sometimes generating a PDF is necessary, however due to the limitations of printable integrations, we advise you to avoid using them where a more efficient option is available.
We especially advise that if you are reliant on PDFs for back office workflow, to consider other options. There are options available to you through your govService Firmstep Platform which reduce PDF dependency. This is even more important under GDPR legislation. Features and products that can help you reduce your PDF reliance include:
You can use these integrations in a number of ways. Most commonly, printable integrations are used by:
-
Attaching them to emails
-
Generating them on the click of a button in a form
-
Producing them for integration into an EDRMS
-
Overwriting the default Submission PDF generated by the form
Creating A Printable
Before you start creating your PDF, please ensure that you have read through the known issues with the PDF generator below.
To create a printable integration, add a new integration in the Integrations Manager and select Printable as the type.
- In PDF name, enter a name for your PDF. This is the title the PDF will have when it is downloaded (in other words, the document's name). It can contain tokens.
- Using Tokens in Output (Printable/email)
- For V2 integrations you will need to use a hash in token names to render html e.g {#textarea1}.
- A subform only renders as html where referenced directly as a token eg if in a printable you had {subform1} it would not display the html unless used as {#subform}. However when being used in af:repeat you do not need to use the #
- You can check Remove Print Margins, or leave blank to retain the margins. You will need to play with this setting to see what works best for your PDF, but normally we recommend leaving this blank.
- You can set the paper type to US or A4 using the Set Paper Type option. The default is US as this renders better for most users.
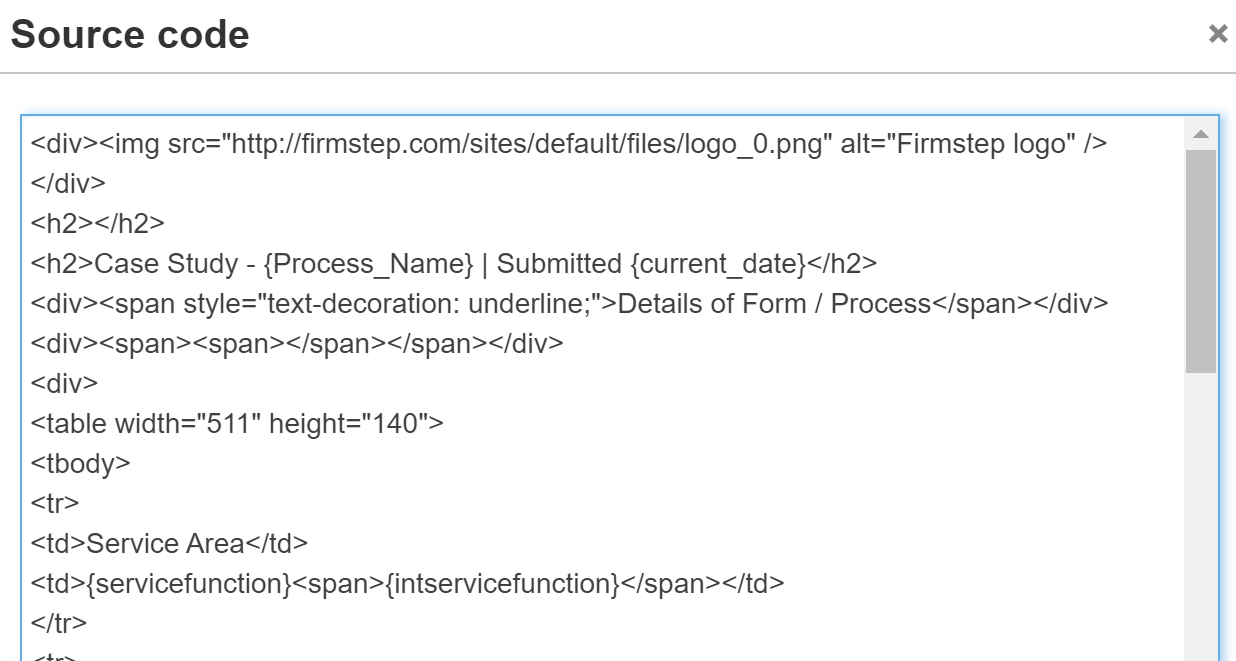
In PDF content, type the content of your PDF. This can also contain tokens. Tokens such as {unhiddensummary}, {allsummary}, {allfields} or {alltokens} can be used, however we advise against this due to known issues affecting the way these tokens render the content. We recommend creating a printable using the specific tokens from your form.
- If you need to use tokens which contain HTML that needs to be encoded, prefix the token with a # symbol. For example, {#textField}. The # will tell the integration to encode, not print, the HTML. (This can be used with <br/> tags to preserve line breaks)
- You cannot transfer static text or the content of HTML fields from the form into your PDF as these field types cannot be tokenised. Therefore, any static text you require needs to be typed as you require it into the PDF content itself.
- If you need to use conditional content, ie. only show certain content based on the selection made in the form itself, please read our guide on using af:if in printable and email integrations.
- If you need to use repeating content, ie. the content of a repeatable subform, please read our guide on using af:repeat in printable and email integrations.
- When creating tables - the advanced tab of the table properties option will allow you to add spacing in cells and define the cell borders etc as required
- Uploaded images can be used in integrations, please read the guide for base 64 and adding images
We strongly recommend building your PDF in HTML first and using the Source Code functionality of the content editor to tweak it into its desired shape. There are multiple known issues which occur because the content editor adds unnecessary HTML tags (eg. <span></span>) to the Source Code while you are typing. These are easier to avoid if you create the printable in HTML from scratch. This will also give you more flexibility in terms of design.
Note: The PDF generator no longer uses the font family as displayed in the printable editor - information on how to change the font in a printable
Please note, the printable generator strips anything between <style> tags automatically, therefore elements must be styled individually - eg. <div style="your styles here"></div>.

If you do build the printable in HTML first, please do not build this in software like Microsoft Word, but use a proper text/code editor like Notepad, Notepad++ or VS Code. This ensures that special characters are not unintentionally included in your printable.
If you are not familiar with basic HTML, there are some excellent resources and guides here:
You can test the output of your PDF using the 'Test V2' button in the Test Assistant, but please note that some of the known issues will not be present here, but will affect the printable in the process or email.

Attaching a Printable to an Email
Once you have created and saved your printable integration, attaching it to an email is easy. Go to your email integration and click in the 'PDF attachments' field. You will see a drop-down list appear of all your printable integrations. Select the correct PDF from the list and save your email integration. Now, when the email integration runs, the PDF will be generated and attached. There is no need to add the printable integration to your process, you only need to add the email integration.
Generating a Printable on a Button Click
Once you have created and saved your printable integration, you can add it to a button in your process. Navigate to your process and add a Button by clicking on the 'magic wand' icon and then 'Button'.
Edit the button, and click in the 'Lookup' field. You will see a drop-down list appear of all your integrations. Select the correct PDF from the list and save your Button settings. Press Fill to try it out.
Writing a Printable to a Document Management System
Once you have created and saved your printable integration, you need to create a File Integration. This file integration must have the content field set to {prev_data}. This token will tell it to use the data of whatever integration runs before it - which we will make our printable integration. Add your printable integration to the process stage to run on Submission. Then add your File integration underneath it, also to run on Submission.
Overwriting the Default Submission PDF
When you submit a form, the submission message is displayed. If the 'Show Download PDF Button' is checked in your form settings, you will also see a 'Download PDF' button on this page. The default PDF generated will produce the contents of the submitted form.
If you want to overwrite this PDF with your own printable integration, select it in the 'Submission Message PDF Integration' field in Form Settings > Submission.
Further useful reading:
top of page

