Introduction
Firstly a payment integration/connector will need to be set up by Firmstep and they will document the mandatory fields and respective datanames which will need to be included within the form. For security reasons - payment integrations should only be used when operating over SSL.
When using a payment integration on submission of the process JSON data is sent to the payment connector - the specifics will depend on the connector itself but they will include a selection of mandatory values eg. amount, fundcode, transactionId, mode etc. and optional values e.g: customerName, Address, City, PostCode etc.
By passing the relevant information from the process to the payment integration using tokens it is possible to have one reusable payment integration which will work with any process where payments can be made.
Designing Process
When designing the process, care needs to be given to ensure that the relevant fields are included on the forms as required by the payment connector, some may also require default values, obviously many of the fields can be hidden from the form filler. Each third party connector will have some specific requirements these will be highlighted by the consultant when setting up the integration. Some payment integrations can also accept in an indicator to distinguish between self-service-online transactions and mediated 'cardholder not present' transactions (MOTO, Mail Order Telephone Order).
The following are some points that may need to be considered based on your specific connector:
- {amount} - check if required as pounds or pence (may need a calculated field to create {amount} from what is displayed to Citizen
- {fundcode} - generally required so payment can be allocated to correct funds within payment system for accounting purposes
- Payment amount in the integration maybe mandatory - but may not be required so could be set to default to zero. Note if some services/products "purchased" via a form are Free of Charge then need to consider setting the Payment integration run behaviour (through conditions) to be inactive if the payment amount is 0, or customers will be transferred to payment portal for no reason, and will be concerned that a payment will be taken.
- {sessionid} needs to be a unique reference - this can be done using the {reference} token
- Where multiple items are supported, each may have a separate amount/fundcode/description etc, these need to be included within the form design
- If you have sections on your form with special characters (1. Address) then the payment connector may error and throw an error message of "No Payment Site Returned". To fix this remove the full stop or other special characters.
- Forms payment handling logic has been updated to insert into a submission any tokens passed back by a payment connector that are prefixed with data_. So if you would like to pass back the IncomeManagementReceiptNumber from a payment connector, then the payment connector will need to return the token as data_IncomeManagementReceiptNumber and Forms will read it in to fields name IncomeManagementReceiptNumber or containing the default value of {IncomeManagementReceiptNumber}.
- You can add as many values/tokens to the Custom Fields (JSON) field as you wish.
- You can return extra data by adding the following to your payment connector:
"return_extra_data": "true"
What this returns depends on your payment provider. For example, in Civica, the extra values returned are:
originatorsreference
incomemanagementreceiptnumber
responsedescription
paymentauthorisationcode
cardscheme
cardtype
paymentamount
- You can use the tokens {transaction_reference} and {transaction_status} after payment, both in forms and integrations.
Note: You cannot use logic in the payment connector - i.e. You cannot use af:if or af:repeat functionality in the integration.
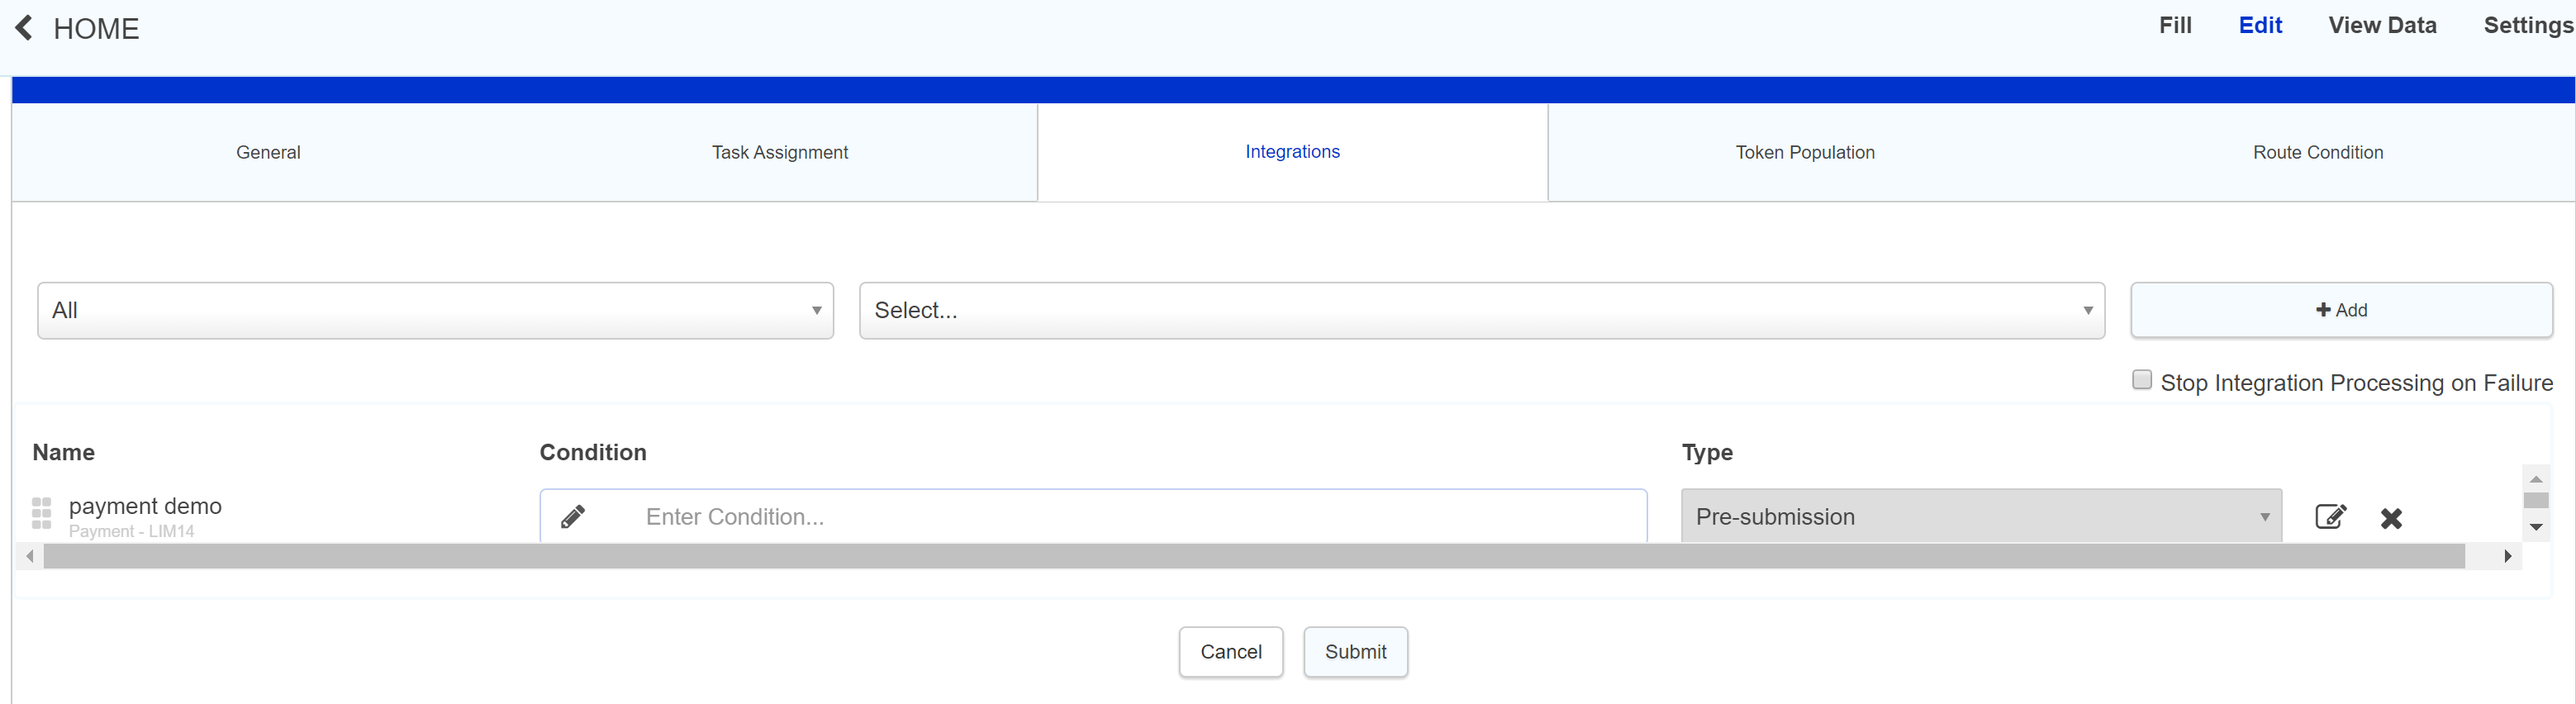
Adding the payment integration to the process is the same as adding an email integration/printable. The payment should be set to run on presubmission.

Payment Server Side Amount Validation
Payment server side amount validation will allow you to validate the amount that is being passed to your payment integration, to ensure that it has not been tampered with or changed. By definition we do advise that ALL payment integrations should by default use Server Side Amount validation.
To enable this you need to check the Server Side Amount Validation box on the relevant payment integration.
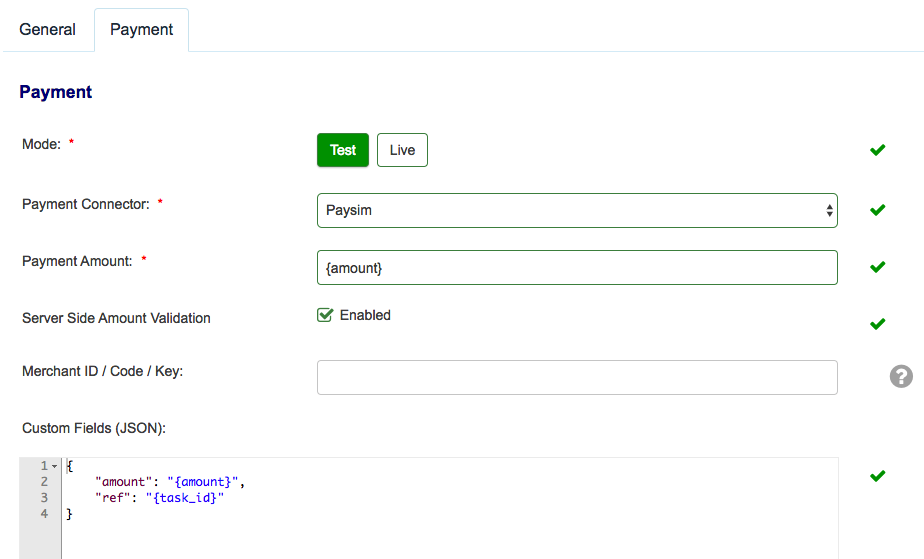
Where in above example {amount} is the payment amount passing to the payment integration
Where Server Side Amount validation is enabled the validation will check what value is set to amount (token used in this example), and then compare that with what is actually passed from the form, if the two values do not agree then an error will be displayed as shown below.

Although you can calculate the final amount field on the form and server-side validation will still operate, there is an exception: you cannot reference the token of a second calculation in that final calculation. Essentially, if the calculation goes through more than two steps then the amount is considered to have been tampered with.
As it stands, the solution to this is either to simplify how you calculate the final amount or ti combine all the calculations leading up to the final amount into one larger calculation.
Testing
Most payment providers will supply separate URLs for Live/Test eg
- paymentUrl_test
- paymentUrl_live
Once the process has been completed with the necessary mandatory fields, the payment process can be tested using a dummy card (your payment system provider will be able to supply the relevant magic card details), when using the test card numbers, you can use any date in the future for the expiry date (e.g., 11/18) and any 3 digit number for CVV code
When testing from with form designer - it is important to ensure you test from the form site eg https://yoursite-forms.achieveservice.com/
Note: you cannot use the test facility in Integration manager to test a payment integration - they must be tested in situ as above
Live
In the live environment if the values entered are correct the payment portal processes payment onto the Merchant’s bank, and the results of the payment are then sent back to payment connector through specified callbackURL, are decoded to check if the user has tampered with the result and then appropriate response is displayed to customer.
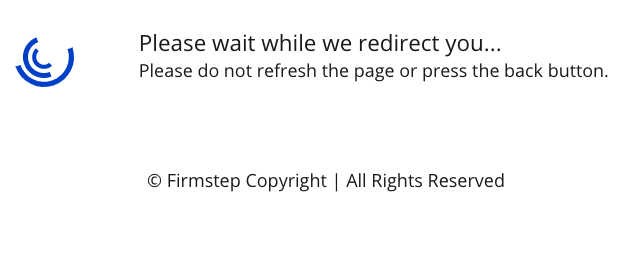
The payment integration gets run at the 'Pre Submission' status in the Forms process. A HTML form is generated, with substituted form data from the form (amount and various user information). This form is then automatically submitted and the HTTP POST action is called to the payment provider, sending the values and the user to the payment portal on that action. If the payment is made correctly then the form will be submitted, if the payment is abandoned the user is taken back to the form and it is not submitted.
Note: You can only have one payment integration at anyone time on a given process - this is because Payment integrations work differently to the other types. The process does a validation check against the Payment integration and allowing two would break this. Most of the payment integrations though have a test/live mode built in. You can just switch between the two on the integration.
Typical User Journey
A typical user's journey when filling in a form.
1. User fills in form
2. User submits.
3. Submit API begins processing pre-submission API's.
4. A payment integration is encountered - There are in effect three possible outcomes:
- Payment is successful, user is returned to form and submission takes place (case updated)
- Payment is abandoned - but user is not returned to form - eg exits browser (no case) - the payment landing page serves to remind the user not to close their browser.
- Payment is completed - but user does not return to form eg exits browser or session timed out (no case)
For the latter two scenarios at this point the workflow stops, a save is generated in our temp bucket, but the case has not been progressed to completion. This can be done through the payments admin, however the product itself is not aware of the state of the payment (so it won't tell you its been cancelled or not), and this means that local checks are required to ascertain if the payment has been made and if the form submission should be progressed to completion.
Integration Logs
For successful payments there will be two entries in the Integration logs for each instance of the payment, both are marked as Success at the top

The start of the payment is then identified with "Payment Started"

Then once the payment has completed and returned to the platform the second log entry will display

Payments are actually handled differently from other integrations created in the product and whilst they run at a specific time in the integration queue they do not actually use either v1 or v2 at any point. They have their own code base and are executed separately, so any reference to V1 in the logs can be ignored.
Payment Admin/Failed Payments
There are some cases where a payment has been successful but a response has not been returned to the firmstep platform.
In these cases when the payment connector does not send a response to the platform we are unable to associate the payment to the case due to no data being received, in these cases the payment status will need to be checked manually and the case progressed as necessary from Payments Admin.
When a payment fails, the form filler will be returned to the form, faced with the following message: 'Payment cancelled'. This message cannot be edited. However, this form can be reloaded and submission completed.
Auto Reconcilation
For a number of the popular Payment connectors - there is an auto reconciliation process - which is an automated tasking running periodically to detect any unfinished payment submissions and cross check to the payment provider and update the form submission as applicable, thus reducing the manual processing for abandoned payments.
View Data and Payment Status
If you wish to be able to see at a glance if a payment has been successful when using the Dashboards - it is possible to add hidden Payment Status field to the forms which will report the payment status - spending on the codes used by the payment connector, and included these fields in the summary field displayed on the Dashboard.
Payment Landing Page
The payment landing page decreases the issues arising when customers close the browser window after payment (available 3/5/18). This will appear to the customers after they leave the payment portal and before they are returned back to the form submission. This will not be available for customers using RRC at the moment.
Processing Time
At times, there may be a long processing time for a payment, delaying the moment the citizen is returned to the form. This is caused by presubmission integrations that run after the payment is taken. This can therefore be solved by reorganising your integrations so that all presubmission integrations run before the payment integration.
Hints and tips
There are instances when there is a need to remove citizen access to forms with payment integrations (eg. when payment provider carries out maintenance/upgrades etc). This can be achieved by adding an environment token (>admin>integrations>tokens) which indicates if the payment connector is available or not. Then by adding this environment token (hidden field) on each payment form and adding validation conditions based on the environment token it is possible to either warn a citizen that a form is currently unavailable and/or to prevent submissions based on the environment token. This can be specifically usefully to be able to prevent any payment form being used if there are issues with a payment connector - as by editing a single token in the admin screen you can affect all payment forms utilising that token, see below for more details.
Further information for controlling availability of a form for completion where an payment integration is unavailable
body {<br /> font-size: 15px;<br /> line-height: 22px;<br /> }<br /> <br /> li {<br /> padding-bottom: 10px<br /> }<br />
Further useful reading:
top of page
- You may experience a situation where the correct payment was not taken when a form was submitted. This can be caused by flicking back and forth through sections in the form. For example, a user might get to the end of their form and then decide that they wish to change a field value in another section. If this field value changes the amount that is to be charged, the section that has the final fee value field has to be clicked on again for the changes to render. If this section is skipped, then the amount will not be updated.

