Introduction
Timed conditions/escalations are used to escalate a stage or change user when the set time is exceeded. Both can only be used inside a process.
You may set an escalation to switch the user when the current user has not completed the stage by a set time, this will then automatically assign the user next in line to complete the stage. Similarly you may set an escalation to move to a different stage when the set amount of time is exceeded, escalations can also be used to close a case.
An example of escalations being used could be for holiday requests where the first user submits the first stage but stage two is not completed within the required time. This then automatically switches to the next user or next stage (depending on the type of escalation created).
Note: Once a case has started, changes made to the escalation timings will not be applied. Only new cases will be affected.
Setup
Create an escalation integration in Integrations Manager.
On the Escalations Tab, if you are creating an escalation to change the assignee then click Change Assignment, and from the dropdown select the user that the form should be escalated to if the deadline is missed.
In the fields 'User Assignment (Token)' and 'Group Assignment (Token)', you can use a token which will be the data name of a field that pulls back users within your form. The token options will take priority but the users selected from the dropdown list will be used as backup.
Please note that when creating an escalation integration, when selecting either 'Change Assignment' or 'Change Stage', you are selecting the target stage or assignee. You must apply an escalation integration to the stage from which you wish to escalate, by clicking 'Edit stage properties' on the appropriate stage in the design of the process.
When a stage is created from an escalation the process in effects is just moved to the stage, the stage does not behave as if it was submitted, so an escalated stage has no data effectively.
It is also possible to set the escalation to close a case for a given process
Please do note that you must create a new escalation each time you would like to apply an escalation.
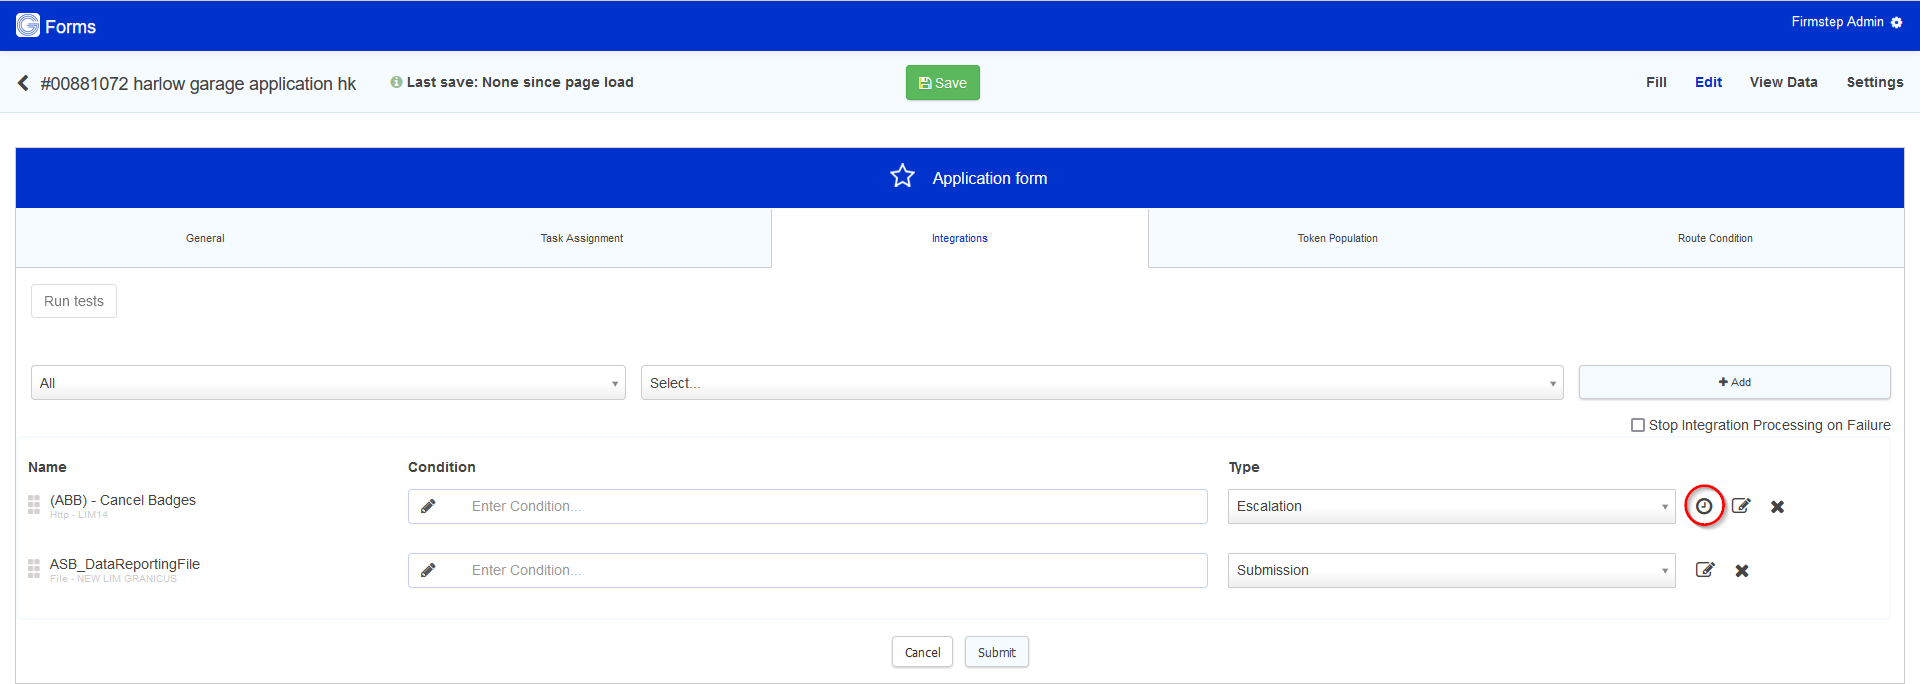
Once you have added the escalation integration to a stage, you must select the escalation type. 'Creation' type escalations will be executed as that stage is created. Selecting 'Escalation' as the type allows you to add a timer by clicking the clock symbol.

You can enter a number and in the dropdown select from minutes/days/months etc to decide when the escalation should run. You also have the option to select a token from the field (this is likely to be a date or datetime field).
Note: If using a token, please use a date/time field.
If you set a repeat interval, this will re-run the escalation according to the time you set.
If a completion condition of a stage is met before the stage is escalated, then the case will continue onto the next task. This means that escalations can be manually overridden.
Note: You cannot set an escalation to occur any less than a period of every 10 minutes, despite the interface suggesting that you can.
Send Integrations Based on a Timer
You can use the escalation run function to run any integration based on a timer (note: Server does not use BST). Timers only continue while a stage is open. Once a stage is closed, the escalation timer will stop, regardless of the conditions set. Due to this, these cannot be used on the first stage of a process.
To add the timed condition integration to a stage, navigate to Firmstep Admin > Service Designer (Forms Designer) > [Process to edit].
Select the pencil icon on the desired stage.
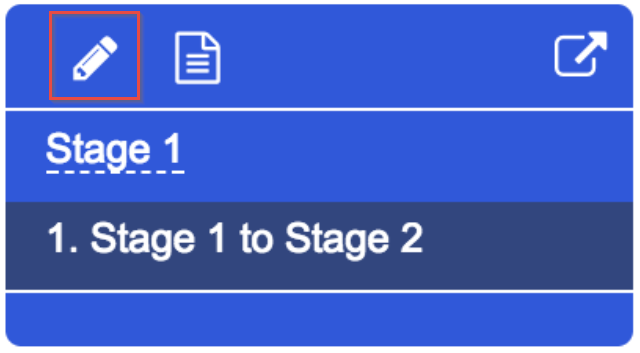
Select the Integrations tab.
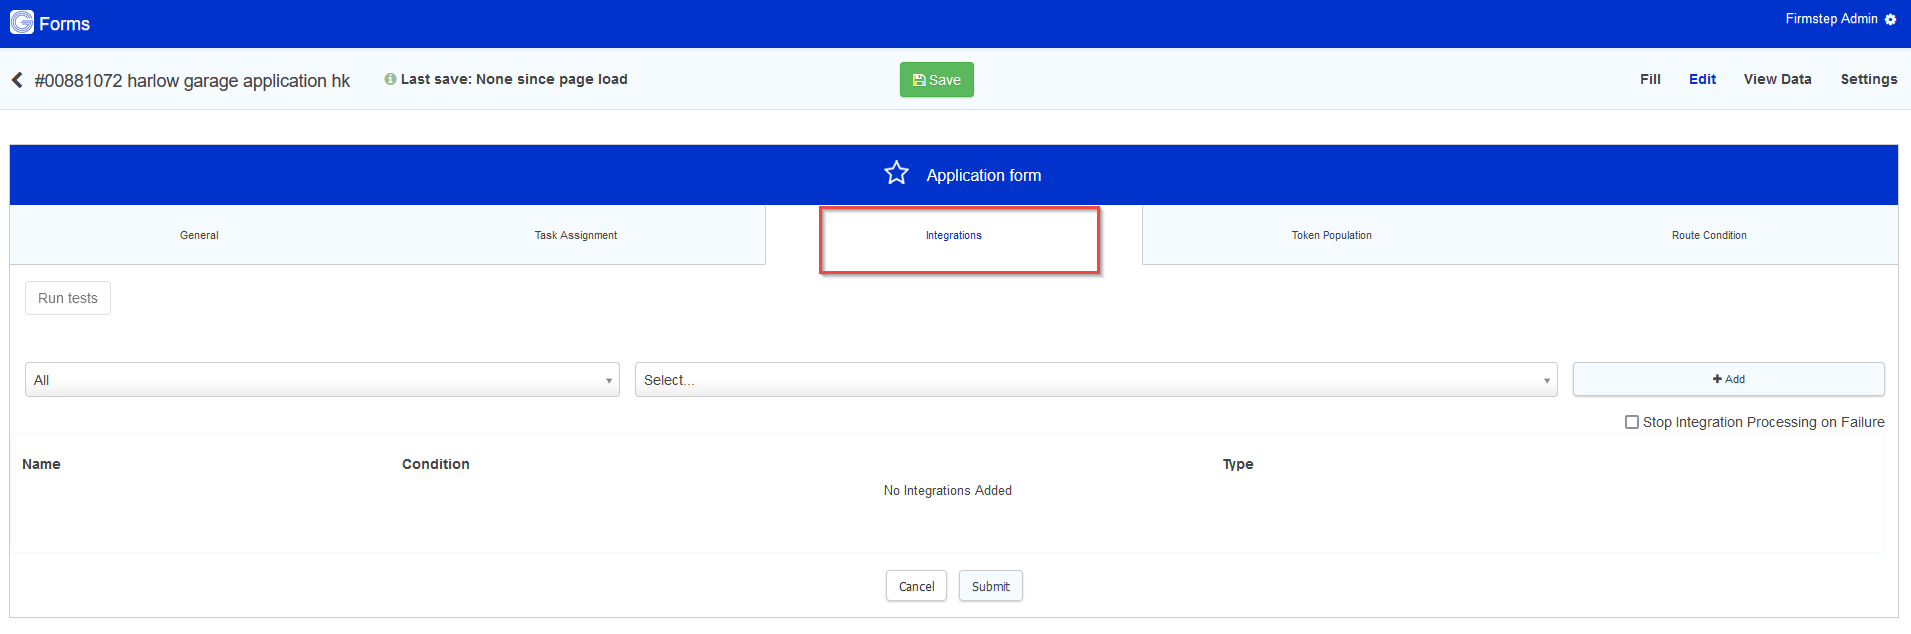
Click the clock to set a condition after selecting Escalation as the type.
How to fill in the fields:
- Left: Enter a number. This field's logic will refer to the middle field.
- Middle: Select the time designation. (Minutes, Hours, Days, Weeks, Working Days) This field's logic will refer to the right field.
- Right: Select the reference point for the prior two fields.
Example:
- Left: 3
- Middle: Days
- Right: After Case Start Date
- Outcome: Three days after the date on which the case is started, this integration will be triggered to run.
Please Note:
- The servers on which we run escalations use UTC time. Please be aware of this when using timed integrations
Using Tokens with Escalation Conditions
If you wish to use a token in the first field, then you will have to set the select field to 'Enter Text/Token', as seen in the screenshot below. When adding a token in this fashion, the token must be pulling through a date. If the token pulls through a number, it will not work. The select field in the middle is always ignored if 'Enter Text/Token' is selected in the far right select field.

You can also use tokens with the repeat interval. If you set a repeat interval, this will re-run the escalation according to the time you set. You do not need to select 'Enter Text/Token' and the token can in fact pull through a number when being used with the repeat interval part of the escalation condition.

Further useful reading:
top of page

