Introduction
Simple branding options can be used as required on thev mobile/offline solution. Note the offline solution is intended for use where there is limited/no internet connectivity. Where Internet access is not an issue then Dashboard should be used.
Before processes can be used offline they need to be added to the offline/mobile app through Offline Admin (Please note that only processes will work on the offline/mobile).
To access Admin you will need to put /admin/mobile/ at the end of your self site URL. eg https://Sitename-self.achieveservice.com/admin/mobile/
The mobile admin page will be as displayed as below;
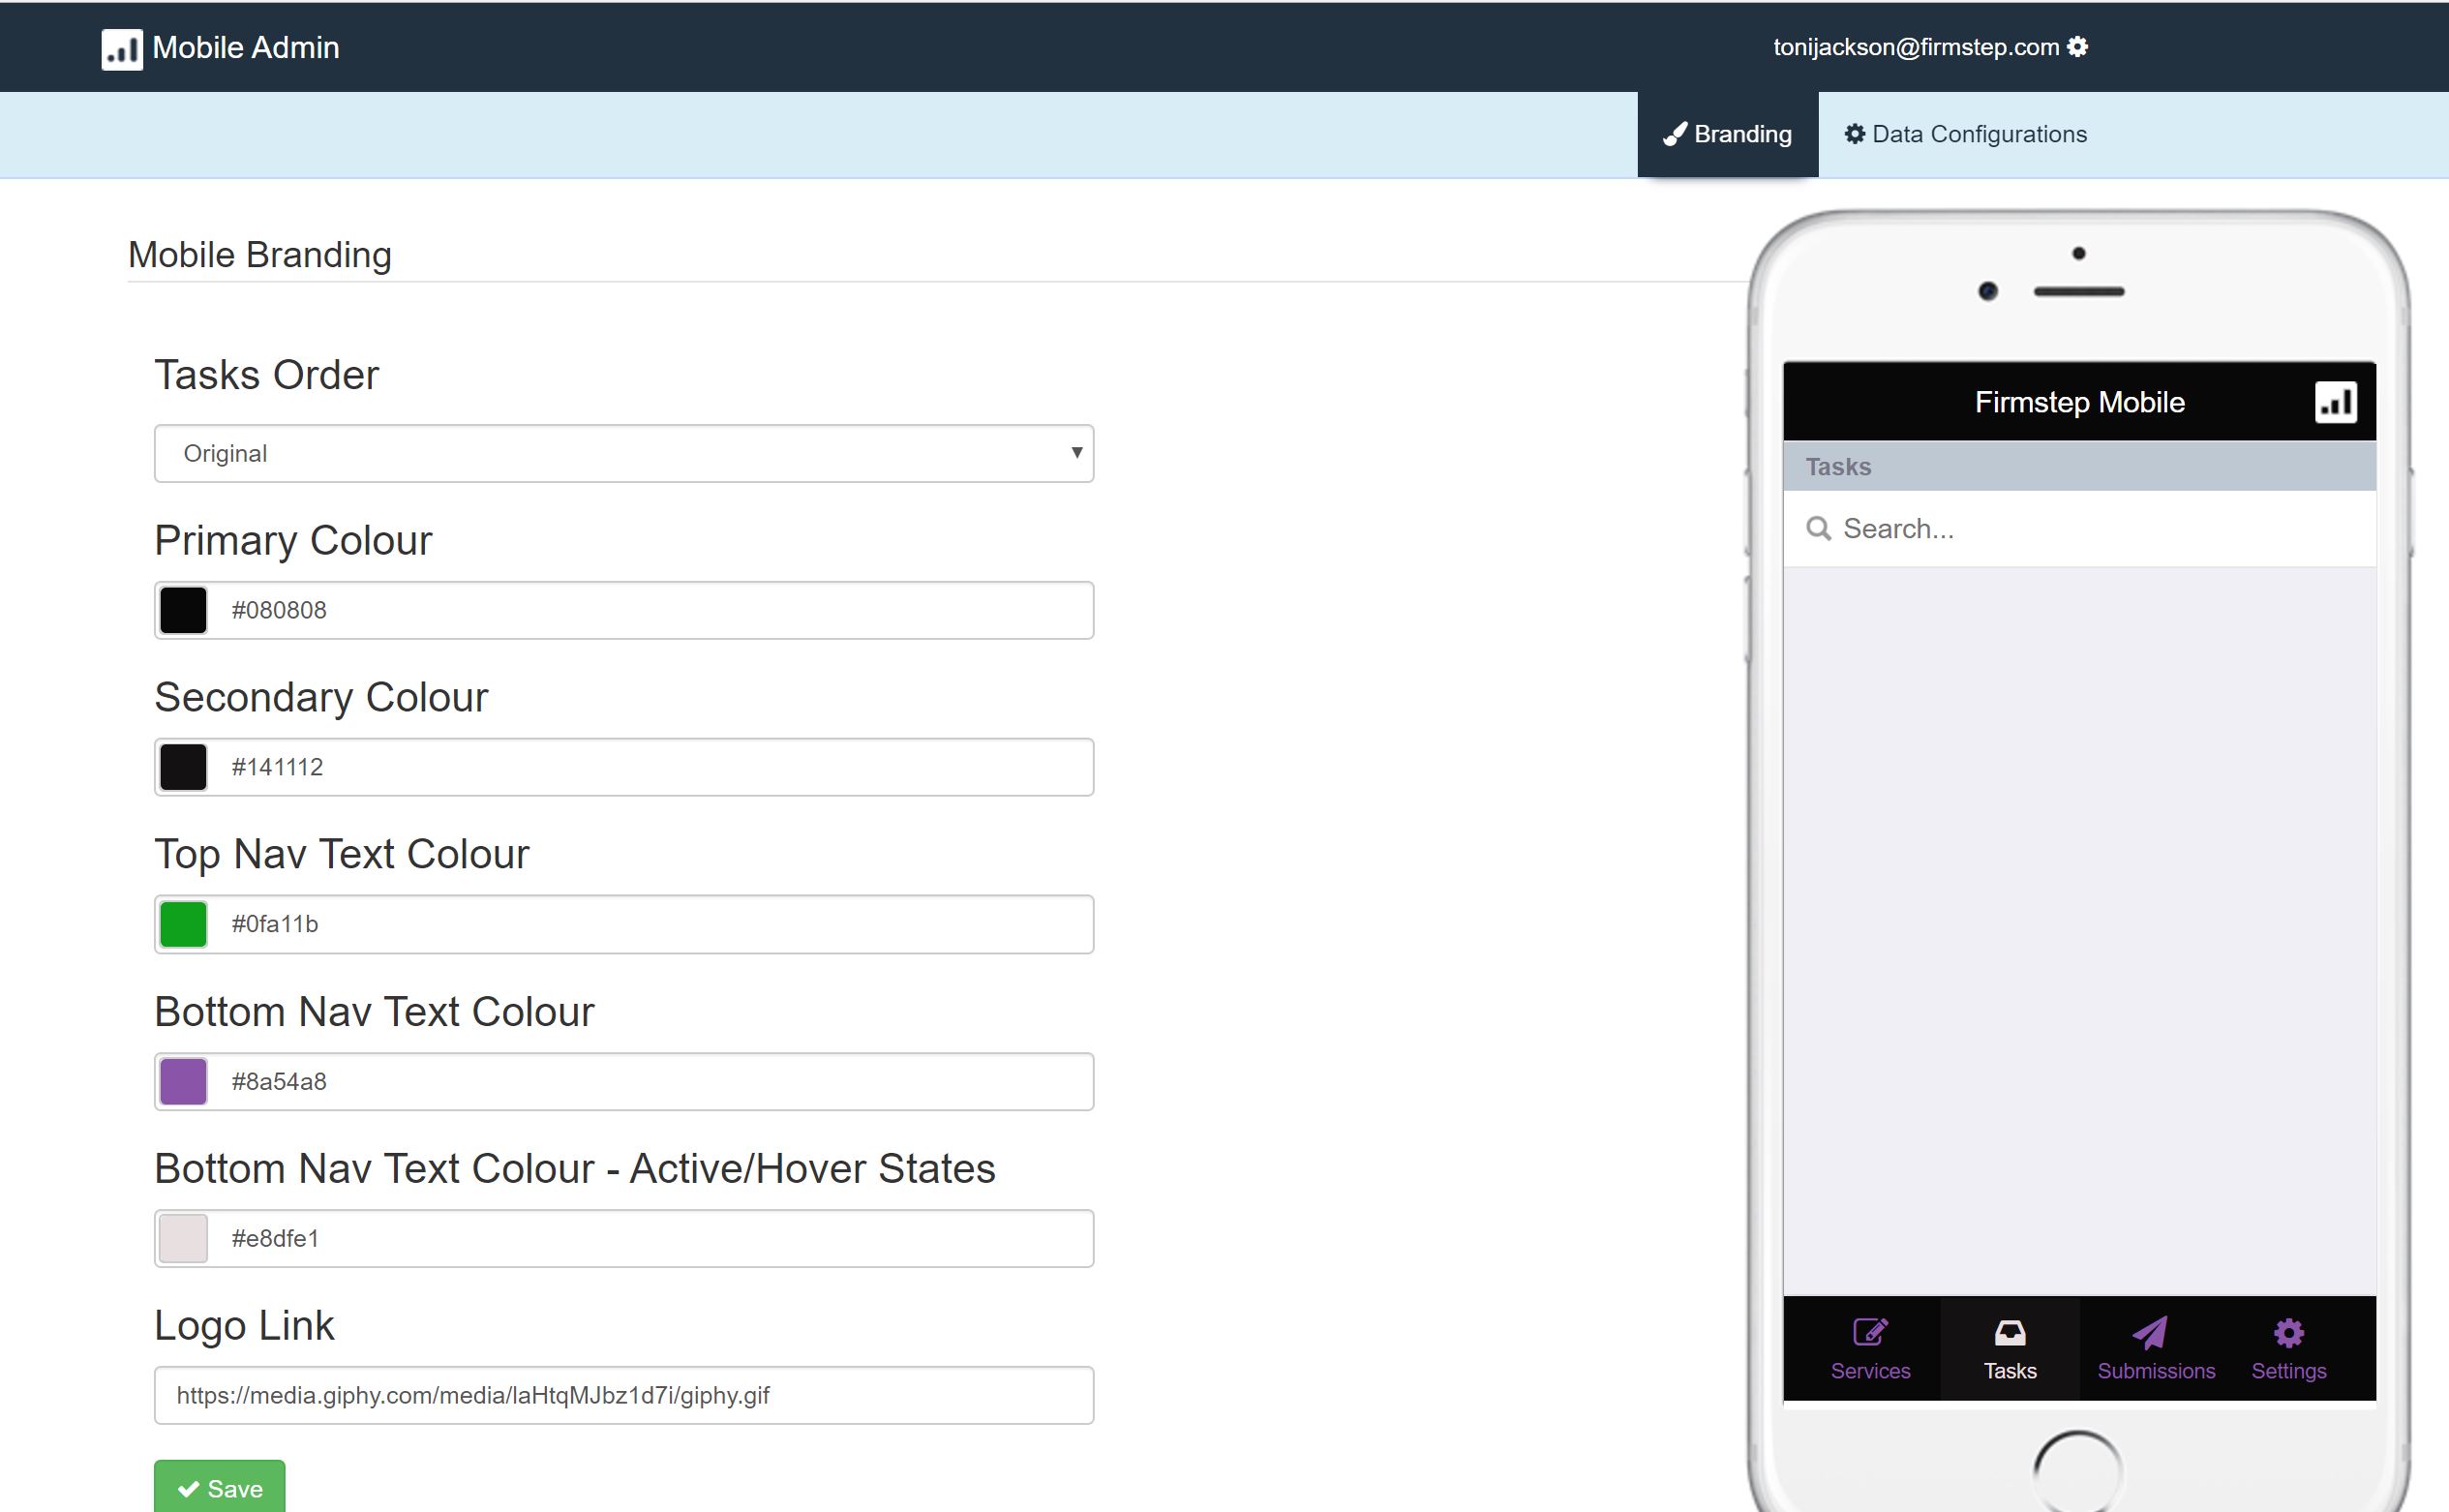
Branding
You can use this admin page to set the branding of your mobile app. This allows you to change the colour theme of the app and add a logo. You will see a mini version of a mobile phone on the right, this allows you to see the impact of your changes. However if you are not logged into the Forms Offline module this emulator will only show you the login screen. You can then login on this mini mobile and carry out the tasks as if it was a real mobile. (providing you have relevant permissions)
Primary colour: Changes the top and bottom background colour of the screen
Secondary Colour: Changes the background colour of the bottom of the screen when you hover over a button or click on a button.
Top Nav Text Colour: Changes the colour of the text at the top of the screen (this is also a clickable area.
Bottom Nav Text Colour: Changes the text colour of the buttons at the bottom of the screen.
Bottom Nav Text Colour: Active/Hover States: Changes the text colour of the buttons at the bottom of the screen when you hover over them
You can also change the logo using the logo link. If you add a logo then when a user logs in or looks at the settings screen of the Offline module they will see a message saying “This App is approved by:“ and your logo underneath it.
Once you have the required look and feel click the save button to save your settings and all of the mobile devices will use those settings.
Adding a process
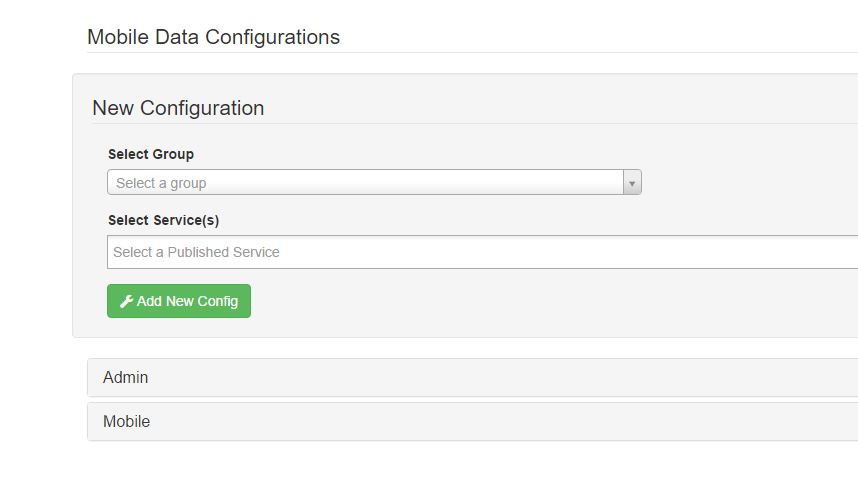
To add a process onto the mobile app, click on Data configuration in mobile admin.
Select a mobile group that has previously been defined in permissions manager
Once the group has selected then you are prompted to enter your process name in Select Service(s).
To complete adding a process, please press Add New Config and this will be added on to the mobile system.
Please see screenshot below;
Now you will need to go to the mobile site which you will need to input /mobile at the end of your URL
Once you have logged into mobile, you will be directed to the settings page.
This is where you will need to update and sync your services. It is just a simple click on button procedure. Firstly download services then upload and sync.
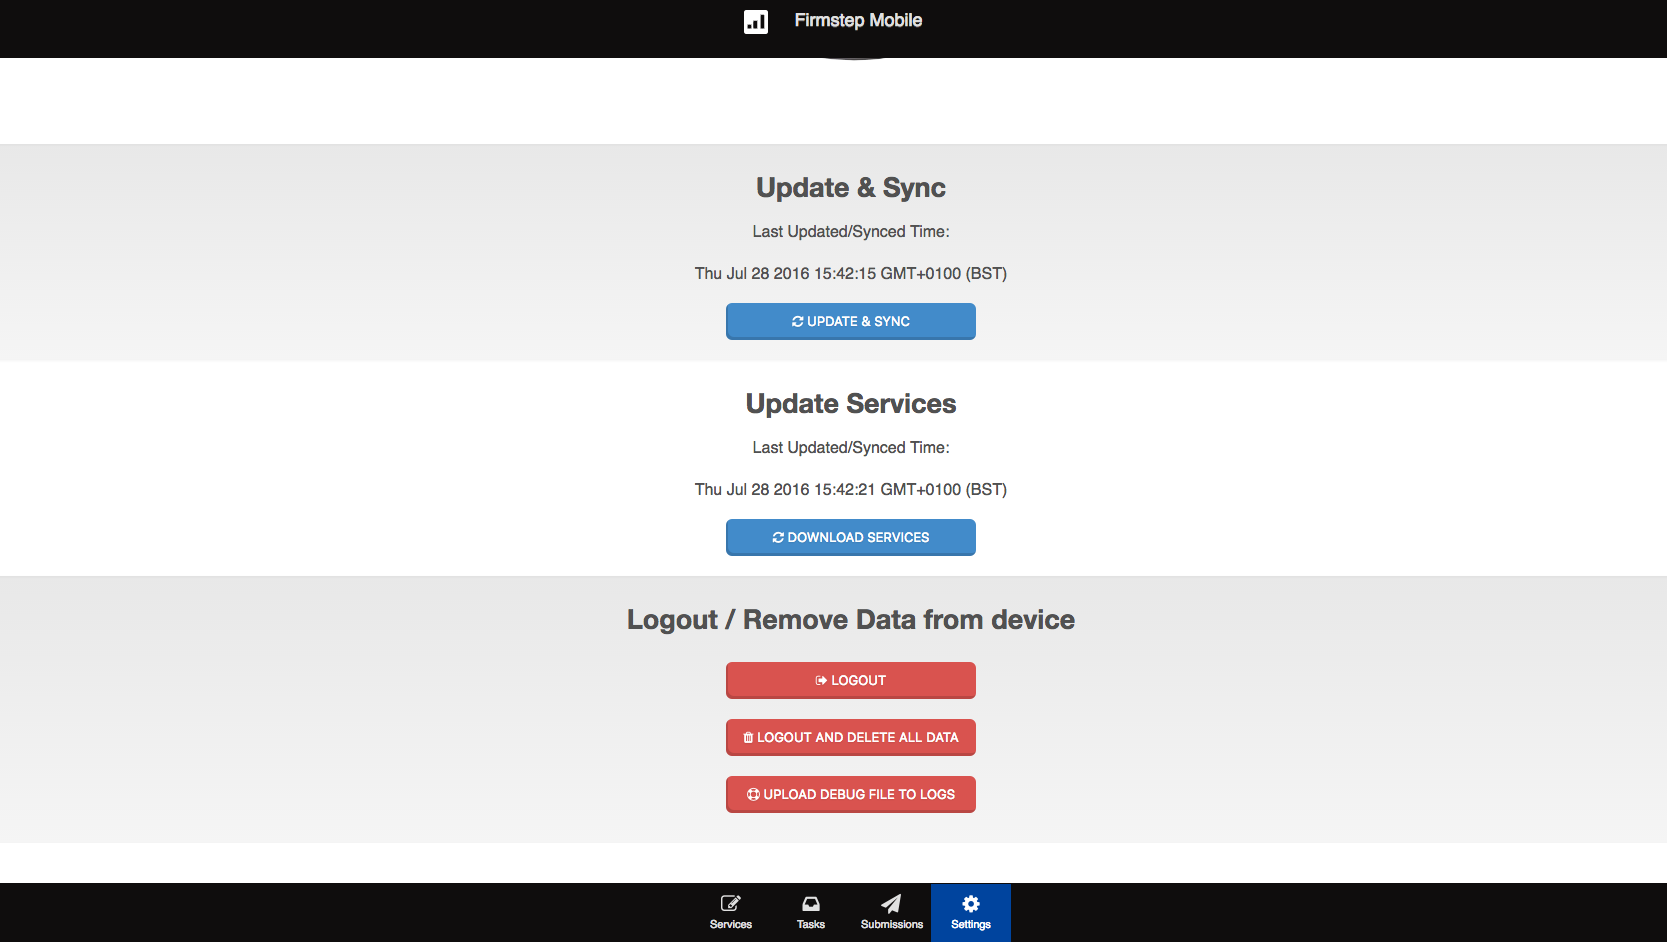
Once this has been downloaded and synced, if you click on the Services tab, this will re-direct you and you should be able to view your processes.
Now if you fill in a form and are not connected online, this will still allow you to fill in the process stage it is currently on.
Once this has been done, to update the submitted form, you will require to be connected to the internet and then update and sync. This will then update the submission.
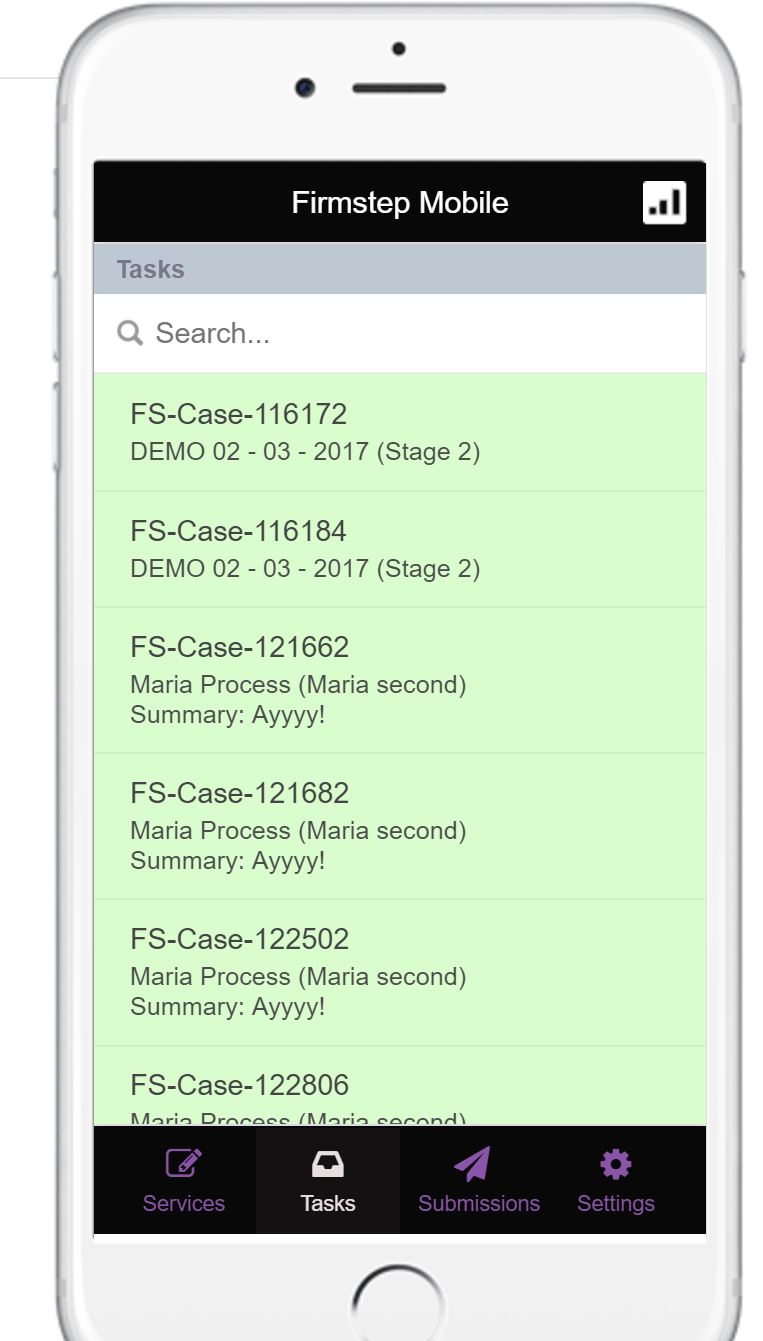
Order of Tasks
You can now sort the order in which the tasks come back when using mobile. The default order is Reference Ascending.

To view tasks in the new order you need to re synchronise
Further useful reading:
top of page

