One of the most significant changes with the Developer Toolkit is granting users the ability to create DIY (Do-It-Yourself) Subsites that can be managed within their larger main Site.
What Defines a DIY Subsite?
A DIY Subsite is effectively separate from the Main Site in the following ways:
- Can create a homepage that utilizes the "Home" Page Template Layout.
- Can create new "Home" Page Templates.
- Can utilize a unique logo for desktop, mobile, and sticky header (if applicable).
- Can be set as a "root page", meaning its main navigation only displays sub-pages of the DIY subsite.
As best practice, we recommend using these types of pages for the following purposes:
- Large Department Homepages
- Special Events
- Landing Pages that citizens often visit first
How to Create a DIY Subsite
Once the Developer Toolkit has been enabled and the proper Security Roles assigned to non-Super Users, DIY Subsites can be created. To create a new DIY Subsite, Add or Edit a Page.
Page Details
The following options have been added or updated on the Page Details view:
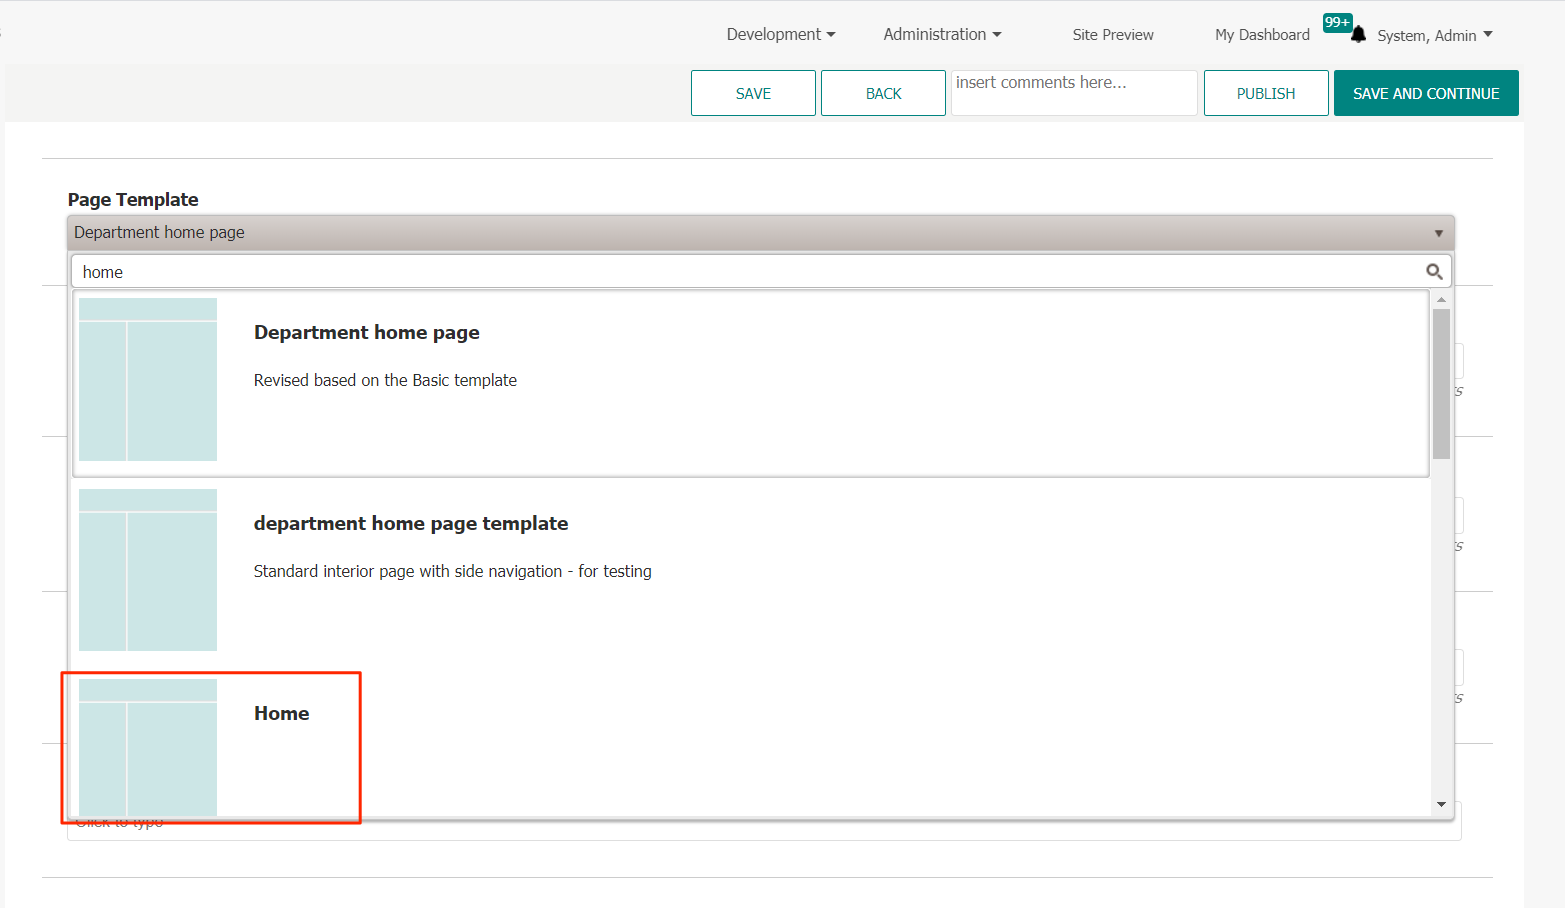
Page Template
Users can now select the "Home" Page Template.
Department Branding
This section has been expanded upon and provides additional options to users for the creation of DIY Subsites.
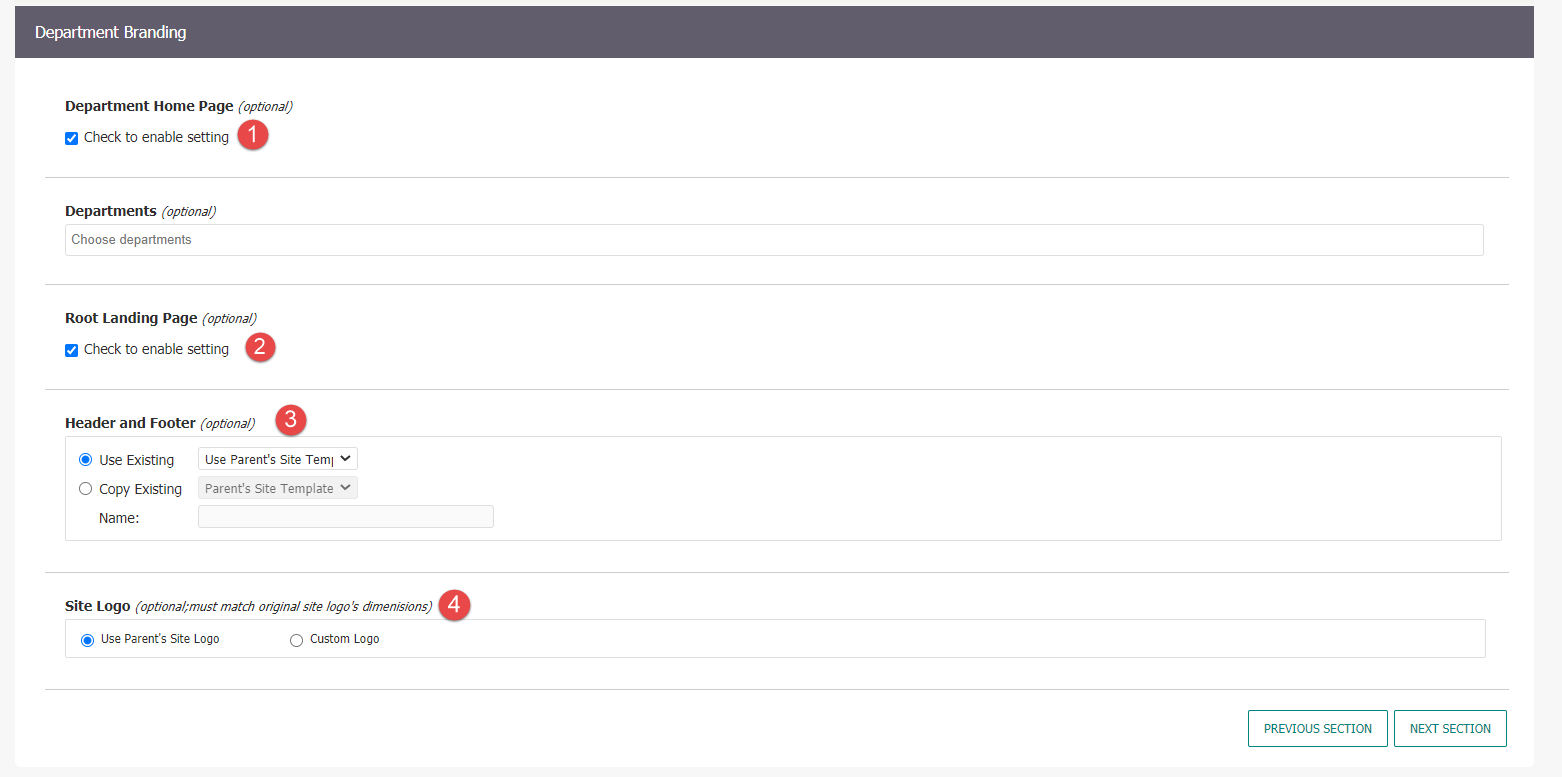
- Department Homepage: The current behavior for pages with this designation remains unchanged; It will "reset" the side-navigation menu to display sub-pages more clearly. Checking this box will reveal an additional option: Root Landing Page.
- Root Landing Page: Checking this box designates the Department Homepage as a Root Page, effectively making the Main Navigation for this particular page tree unique. Up to six first-level subpages will be displayed in the Main Navigation menu as the top-level subpages.
- Header and Footer: Users can now customize the Header and Footer of the site for individual DIY Subsites. This functionality is explained below.
- Site Logo: DIY Subsites can use customized logos. This functionality is explained below.
Users can now customize certain Header and Footer content at the individual page level, as well as create a unique template by copying an existing Header/Footer Site Template. Even if a unique template is not created, sub-pages of a DIY Subsite homepage will inherit the Header/Footer appearance from its parent page.
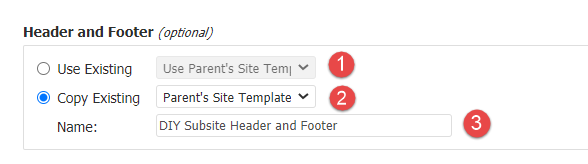
- Use Existing: Select an existing Header/Footer Site Template from the drop-down menu.
- Copy Existing: Create a new Header/Footer Site Template by copying an existing one.
- Name: If copying an existing Header/Footer, provide a name for it in the text box that appears.
Editing the Header/Footer Content will be expanded upon in the Page Design section below.
Page Design
Users with the DIY Subsite permissions are able to do the following on the Page Design view:
Users can now edit header/footer widgets. This is particularly useful for any widgets that utilize Custom Content. To change the Custom Content displayed by a given widget, take the following steps:
- Locate the particular section/widget.
- Edit the widget and select the desired Custom Content item.
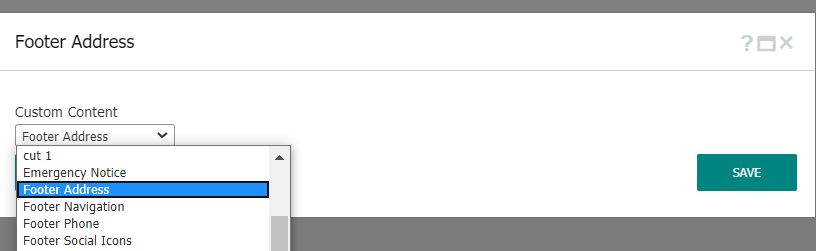
Note: Adding or Editing Custom Content items must be done before creating/editing the page by navigating to Configure > Custom Content.
Widgets can be added or removed from the Page area, but not the Header or Footer section.
To delete a widget, simply click the "X" in the upper right corner of the widget, as you normally would.
To add a new widget, take the following steps:
- Locate the Widget in the Widget Library in the Control Panel.
- Drag and Drop the desired Widget onto the Page
- Configure the Widget to display the desired content.
Once finished, Publish the page.
Page Template
To create a new Home Layout Page Template, take the following steps:
- Navigate to Configurations > Page Templates, and then add a new Page Template.
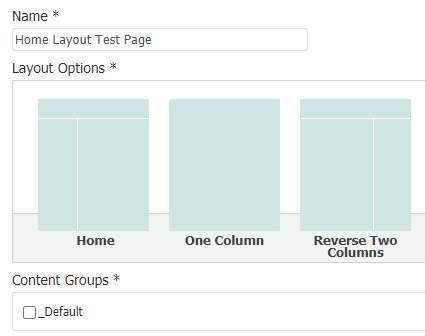
- Provide a name for the Page Template.
- Select the Home layout
- Select the applicable Content Groups.
- After saving the Details, configuring the Widgets follows the same process outlined in the Page Design section.

