| Solution |
The audience of your bulletin is composed of your bulletin Recipients and any Bulletin Channels (such as social media platforms or text messages) you elect to use. As you build your audience, remember that relevancy is a key factor for audience engagement.
Selecting Your Recipients
When using the standard bulletin editor or the Advanced Bulletin Editor, you select your recipients in the Recipients section.

On the Send to Topics tab, you can select topics and categories to build your recipient list. You can also select ad hoc criteria to refine your recipient list on this tab. If your account is using the advanced Segments feature, you will also see the Send to Segment tab. On this tab, you can select pre-built segments to build your recipient list. These tabs are mutually exclusive, meaning that, for example, you could not select both a topic and a segment for a bulletin.
Sending to Topics
To build your bulletin recipient list using topics and categories
- Create a bulletin.
- Go to the Recipients section:
- When using the standard bulletin editor, this is the first section available.
- When using the Advanced Bulletin Editor, navigate to the Audience page.
- On the Send to Topics tab, click the black plus symbol next to To.
- This expands to show all topics and categories, based on your permissions. Click the plus sign next to a category to see any topics included in it.
- Select the check box next to any topics or categories you want.
- If you select a category, all topics included under it will be automatically selected.
- (optional) Select criteria to refine your recipient list from the Criteria drop-down menu, then select the appropriate conditions.
- For more information about working with Bulletin Recipient Criteria, see Using Filtering Criteria.
- To Remove a filter, click the remove button and the filter is deleted.
- Save your changes.
Sending to Segments
To build your bulletin recipient list using a segment:
- Create a bulletin.
- Go to the Recipients section:
- When using the standard bulletin editor, this is the first section available.
- When using the Advanced Bulletin Editor, navigate to the Audience page.
- Click the Send to Segment tab.
- Select the appropriate segment from the drop-down menu.
- You can only see segments in this list that include at least one topic for which you have access.
- You can only use one segment at a time.
- Save your changes.
Selecting Your Channels
The Channels section gives you the option of pushing the bulletin content to multiple channels. By default, your bulletin is always sent to your Email subscribers and you can (optionally) decide to publish your bulletin to a shared bulletin page, send it via text, publish it to social media sites, or include it in your govDelivery-hosted RSS feeds. The channel options available to you are determined by your account settings and user permissions. If you do not see an option you want to use, contact your account administrator to request appropriate permissions
To define your bulletin channels:
- Create a bulletin.
- Select your recipients.
- Go to the Bulletin Channels sections:
- When using the standard bulletin editor, this comes after the Email Message section (where you create your content).
- When using the Advanced Bulletin Editor, navigate to the Audience page.
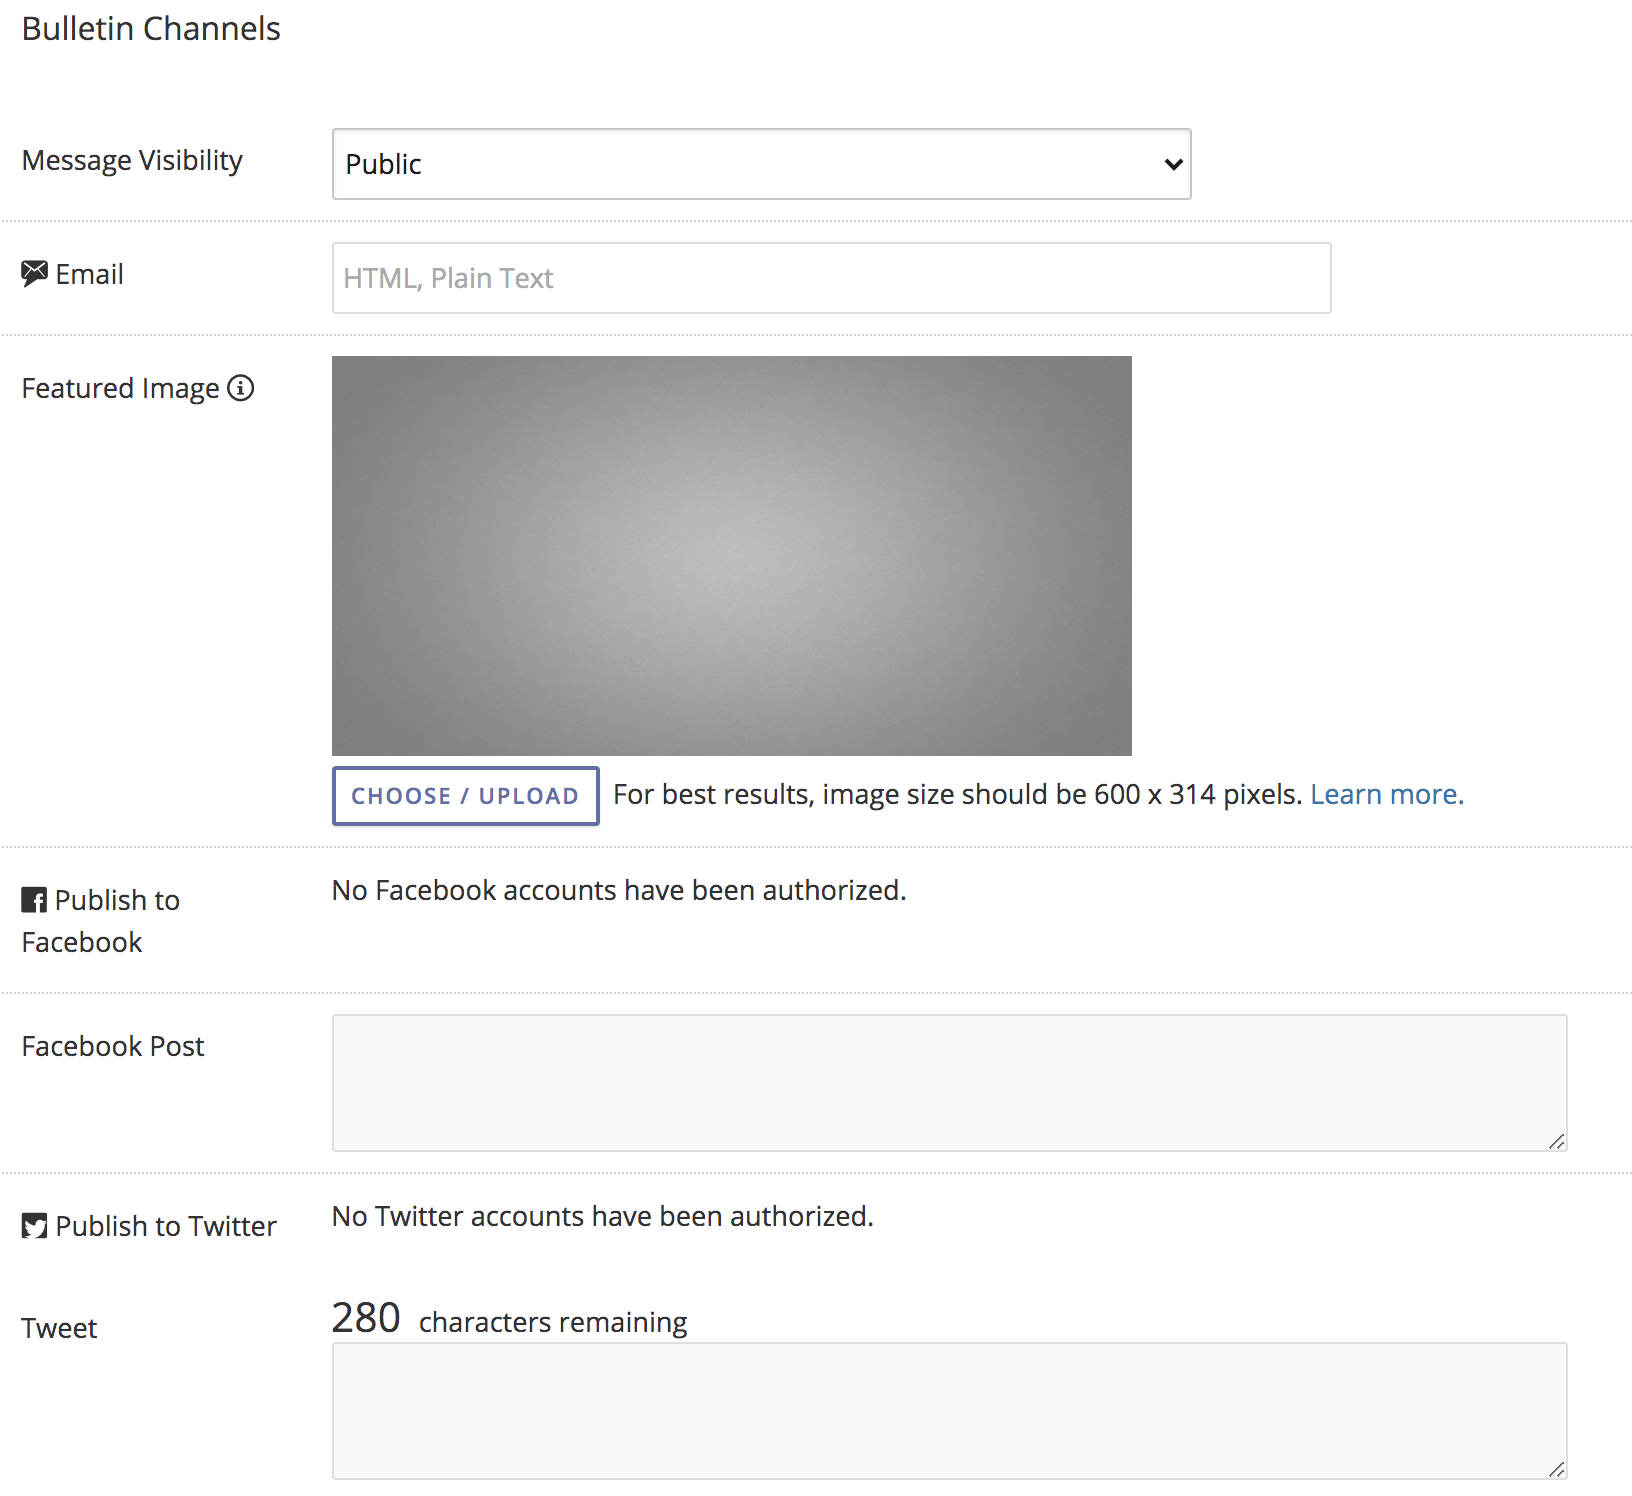
- Set your Message Visibility to Public or Private (see Multi-Channel Bulletins for more information).
- Enter your Text Message content, up to 160 characters.
- Select if you want to publish the content to Facebook. If yes, select the Facebook page and (optionally) enter a Facebook Comment.
- Select if you want to publish the content to Twitter. If yes, select the Twitter account and enter text for your Tweet.
Tip: When entering a Facebook post, Tweet, or text message, the template used for your bulletin may include a default message, which might pull in default text (or macros depending on the field). You can edit this default text if desired.
- Choose a Featured Image to be used as a preview on your social media post(s). For best results, we recommend uploading an image that is 600x314 pixels, and under 1MB in size. The minimum image size Facebook will display is 200x200 pixels. If no featured image is selected for a bulletin, then the content sharing icon for the account will be used. (The content sharing icon must be added to your account by our support team.) If no featured image is selected for a bulletin, and no content sharing icon is set for the account, Twitter will display a blank preview and Facebook will "scrape" the page for any image of adequate size to use as the preview image.
Note: in order for the Featured Image to be displayed on Twitter, you must include a link to the shared bulletin page (using the [[SHORT_URL]] macro) within the text of the tweet. The link will automatically be included when posting to Facebook. 
You can also add macros to customize your tweet or wireless message. Some macros you might use include:
Please note, these macros do not work in the Facebook post field as the Facebook post will already include the link to your shared bulletin page.
-
[[SUBJECT]]
This populates the full subject of your bulletin. If you include this macro, govDelivery will display the recalculated number of characters remaining after subtracting the full bulletin subject. -
[[SHORT_URL]]
This populates a shortened URL to the bulletin’s shared bulletin page. If you choose to include this macro for a Tweet, the character count for your Tweet is limited to 100 characters.
- Select if you want to Publish in RSS Feed.
Note: Your Email preferences cannot be changed. All bulletins are sent via HTML and Plain Text email.

|
|
|---|


