Table of Contents
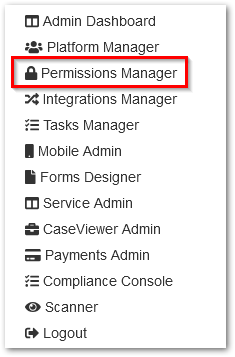
To navigate to Permissions Manager: Click the cog next to your login details (located at the top right-hand corner of the page) to display the Administration Menu > Select Permissions Manager.
There are three sections in the Permissions Manager:
- Users
- User Groups
- User Permissions
Users Section
The Permissions Manager allows you to see all of the users on the system, their email address, and the permission groups that they belong to. You are able to search for a specific user in the search bar by name, email address, or group.
Users in Permissions Manager refer to both Customer and Internal accounts.
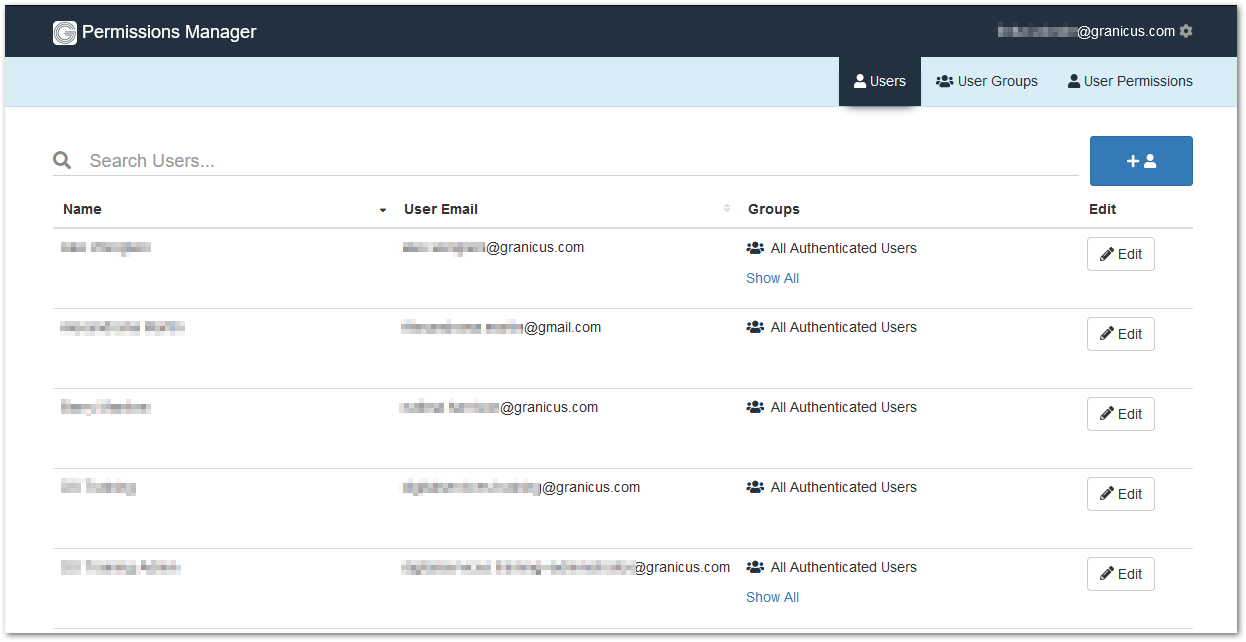
Click the blue button with a + and a head and shoulders icon (displayed below) to display the User Configuration Screen.

Here you can create a new account.
Note: This is the same screen that displays when you select the pencil icon Edit button to the right of an existing account.
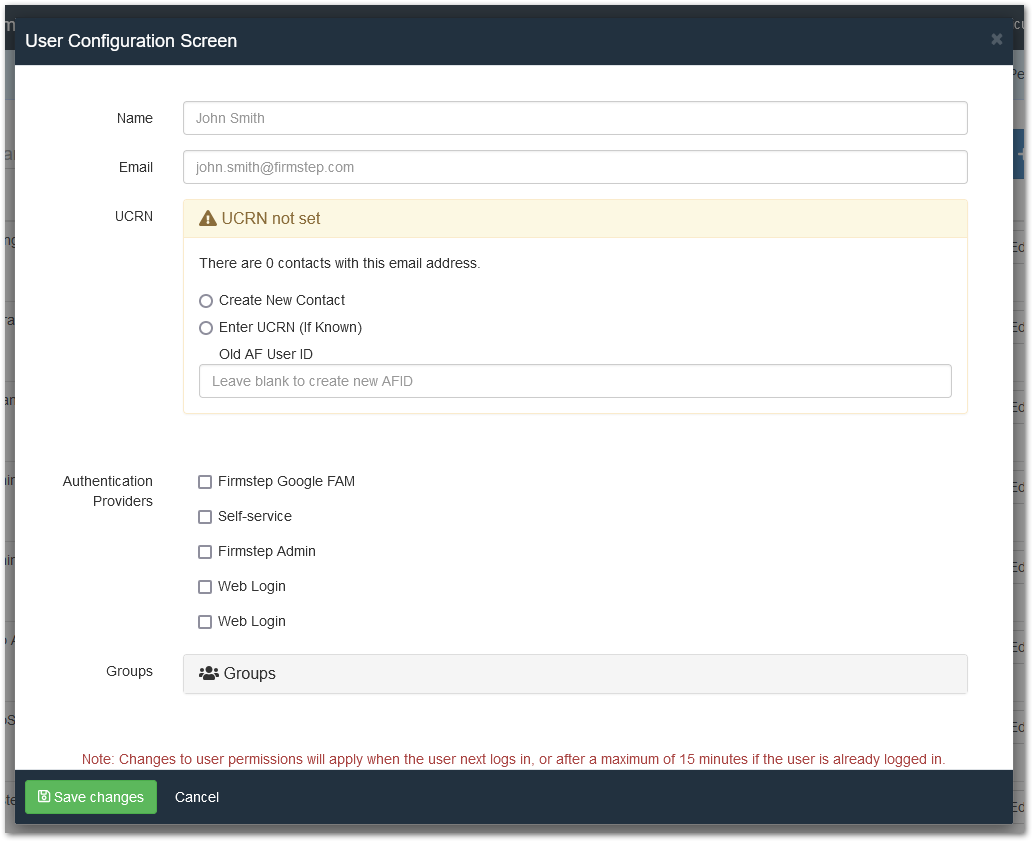
UCRN
The UCRN (the Universal Customer Reference Number) is used as the customer reference in Customer Service Hub and Customer Portal/Self. When creating a new account, you may be given the option to select the UCRN from an existing account with the same email address. Enter the UCRN or click Create New Contact, which will create a new UCRN for the user or customer.
(A note on old language to avoid confusion for those using AFID's in the past: CSA's do not require an AFID to have a Service account. The UCRN and a Self User ID are enough to make them a CSA.
New CSAs will have an AFID set to 0. This will be set as a default, as the AFID is no longer used).
Authentication Providers
Deselecting an authentication provider does not stop the user or customer from logging in with that provider*. It does, however, strip the account's permissions that were related to that authentication provider, so the user's permissions are removed for some things.
Self-service: This option creates a reference between the account and the authentication provider. This lets you see whether the email address is linked to a Customer Portal/Self account. Also, when running a permissions check, it checks the authentication provider.
- Please Note: Make sure that you select the Authentication providers that each account uses to log in.
When finished, click the green Save Changes button at the lower left-hand corner of the User Configuration Screen.
* unless it is Granicus_Azure_INTAUTH. Deselecting this option from an External Access user updates their Azure B2C account and prevents them from logging in to Internal sites that use that Authentication Provider option.
User Groups Section
Select the User Groups Tab to view all user groups and to allocate permissions to each group. This is a powerful yet simple way to deal with permissions. (Note: Do not assign any users to the root.)
(A note on old language to avoid confusion for those using the General API broker group in the past: This group is now renamed All Authenticated Users. Do not change permissions on this groups A warning will display if you attempt to edit these. Control permissions by using new local permission groups or through Active Directory groups.)
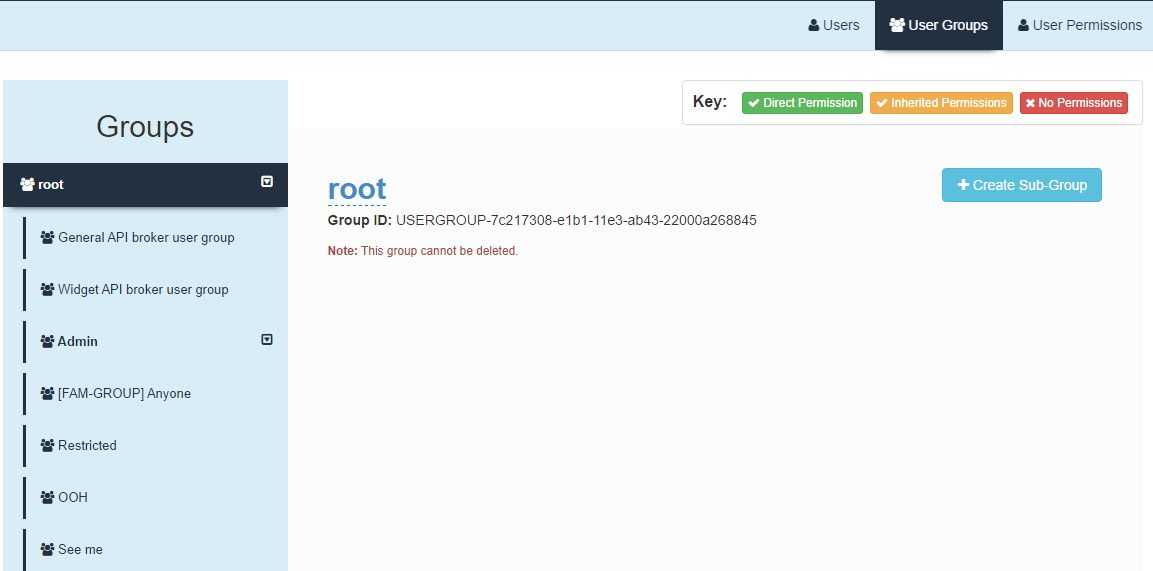
A Permissions Key displays at the top of the screen. In each section and under each permission, the permissions are displayed for your immediate visual review using this color-coded information:
-
Abilities with direct permissions display in green. These are added directly to the user group to grant access.
-
Abilities with inherited permissions display in amber. These relate to sub-groups. A sub-group is considered a child to the group above it, which would be considered its parent. All children inherit all permissions assigned to the parent.
-
Abilities with no permissions display in red. Default users will be assigned No Permissions for all abilities until permissions are assigned to them.

To grant CSA permissions to internal users:
- Create a group in the Active Directory with the name FS-Integrated-CSA-Users.
- Add users to that group.
- The next time any of those users logs in to Service, they are automatically also added to the CSA group. This causes them to obtain CSA permissions.
To add a new sub-group:
- Click the name of the group to which you want the sub-group to belong from the blue list on the left-hand side of the User Groups display.
- Click the blue +Create Sub-Group button.
- Enter the desired Group name.
- Click the green +Create New Group.
Edit the Group permissions by scrolling down the page to the various categories.
Firmstep Products
AF Designer
This gives the group permission to access and create new forms.
AF Integration
This gives permissions to Integrations Manager.
Achieve Service UI
This gives access to the Achieve Service CSA Workspace page.
Permissions UI
This gives access to the Permissions Manager page.
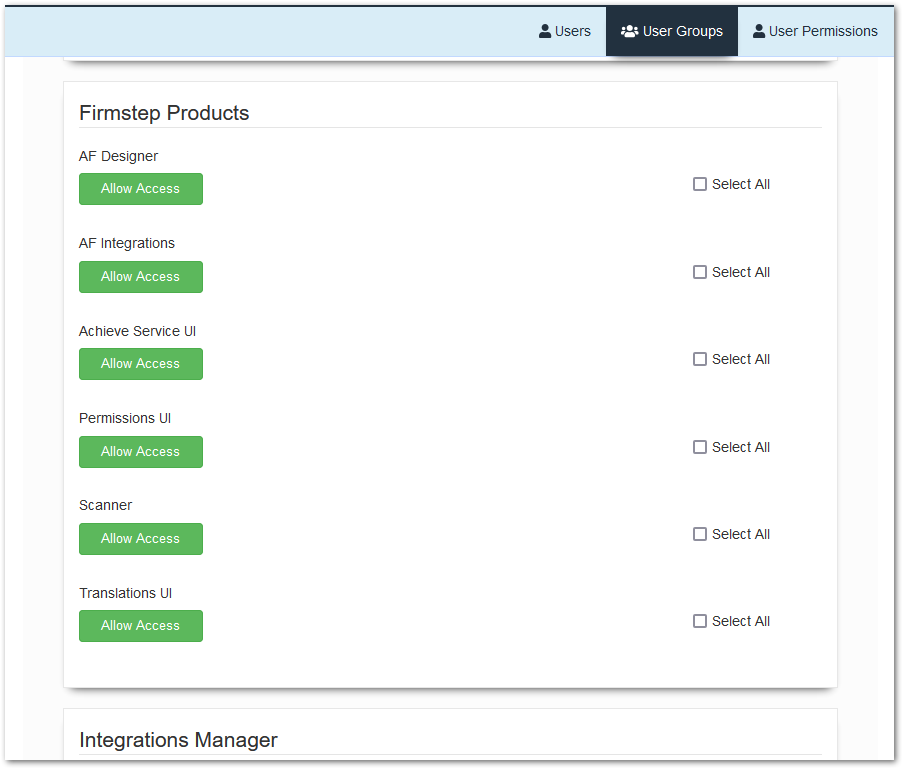
Please Note: Don’t forget to click Update Group at the top of the page to save your changes.
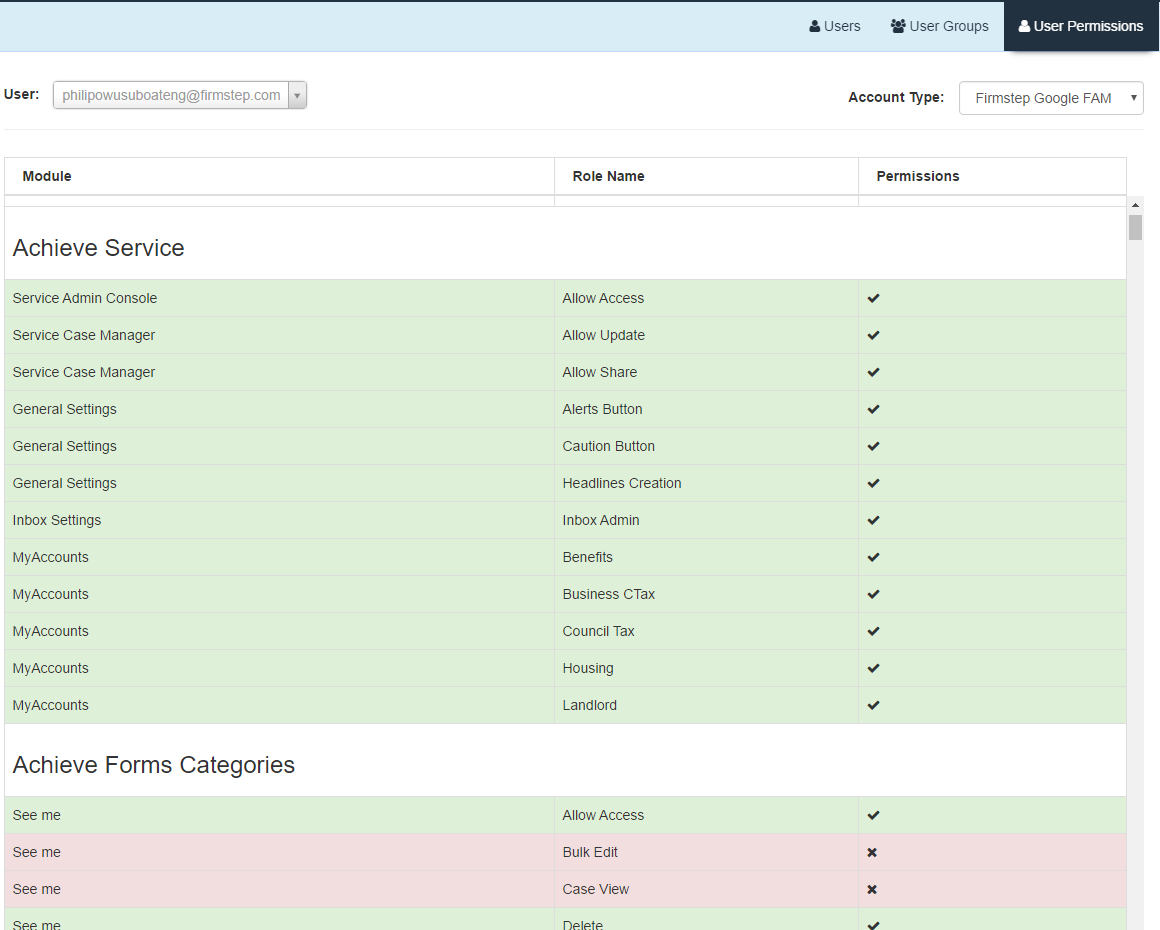
User Permissions Section
Here you can view the permissions for individual users and customers. To view an individual account, enter the associated name and/or email address and its authentication type.
Deleting Accounts
When you delete an account in the Permissions Manager, the account no longer appears in the Permissions Manager, but the account information still exists in the govService Firmstep database.
Deleting a customer's Self account in the Permissions Manager does not delete their customer record in Service. Because of this, the customer is still able to log in via their Customer/Self Portal, and this will create a new entry in Permissions Manager for them.
To completely delete a customer account from the system, please contact Granicus Support. When you submit your case, provide the name and email address associated with the account that needs to be deleted.
Your citizens/customers are not able to delete their own Self accounts.
It is possible to delete a customer's cases. This can be done on a process-by-process basis via View Data.
Deleting Permission Groups
Deleting the group will not update any cases or tasks. The cases or tasks will still have the same group assigned to them. The View Data group will show up as Restricted, and the tasks will display the group ID, as they cannot find a name match.
Viewing open cases that were assigned to a deleted group
You can amend the view data group of open cases by setting a new view data group in the process and then migrating the open cases on publish. You can reassign the open tasks in the Task Manager.
Viewing closed cases that were assigned to a deleted group
If a Permissions Group that was assigned to a closed case is deleted, then the case will have to be reassigned in order for you to be able to view it. Please contact Granicus Support with details of the relevant Group and specific cases.
Note: Changing the name of a Permission Group will have no impact on the tasks that are assigned to the Group.

