Introduction
HTTP Integrations are used for executing an HTTP request to a third party.
The methods available for HTTP integrations are 'Get', 'Post', 'Put' and 'Delete'. You can read more about these methods here.
Methods
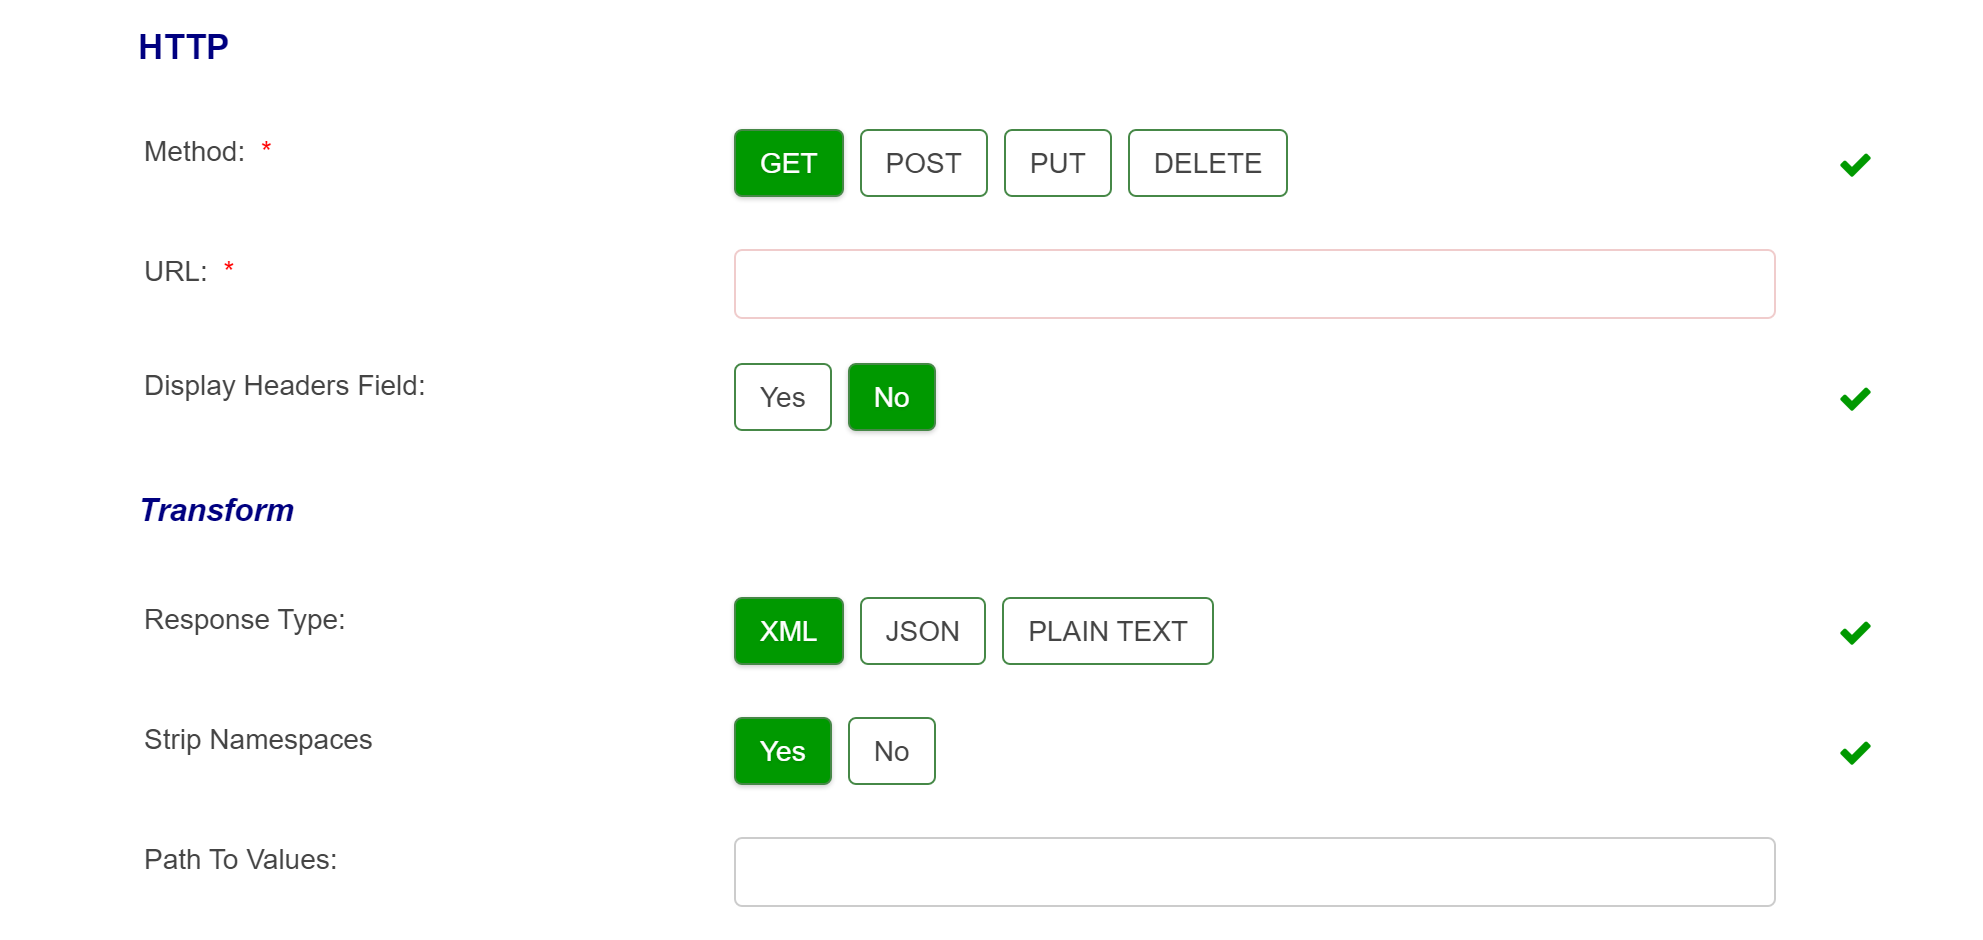
URL - The URL specified will be called either from the New Forms platform server or by the LIM acting on behalf of the platform server, and not by the form filler's browser.
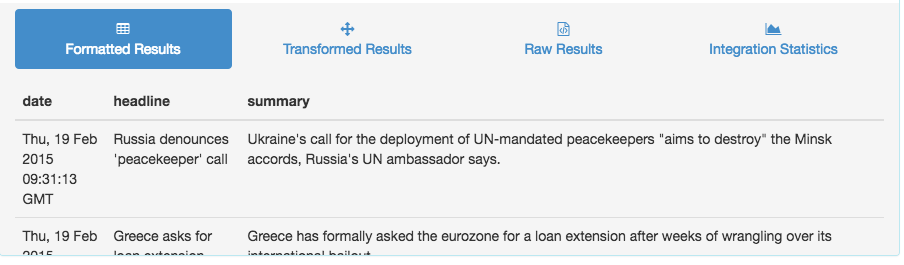
GET - Once you add the URL and then Run Test, you can select your Path To Values from the Transformed Results. Run Test again and the Formatted Results will be displayed.
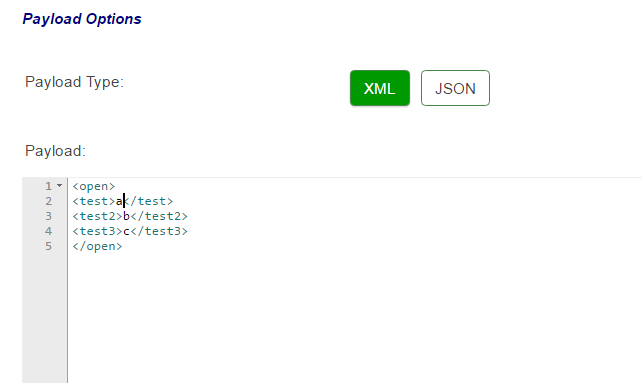
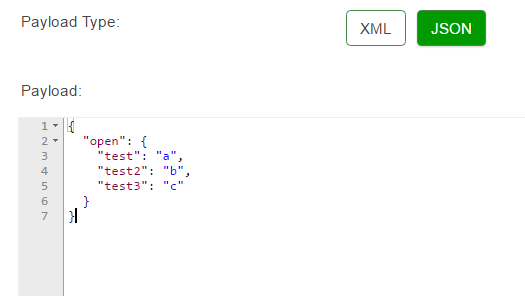
POST - You can choose the Payload Structure depending on whether you pick JSON or XML as the Payload Type. When doing a post you can choose to post the data in XML format or in JSON.
PUT - You can choose the Payload Structure depending on whether you pick JSON or XML as the Payload Type. When doing a post you can choose to post the data in XML format or in JSON
DELETE - requires URL you can define Path to Values
Example Post XML:
Example JSON:
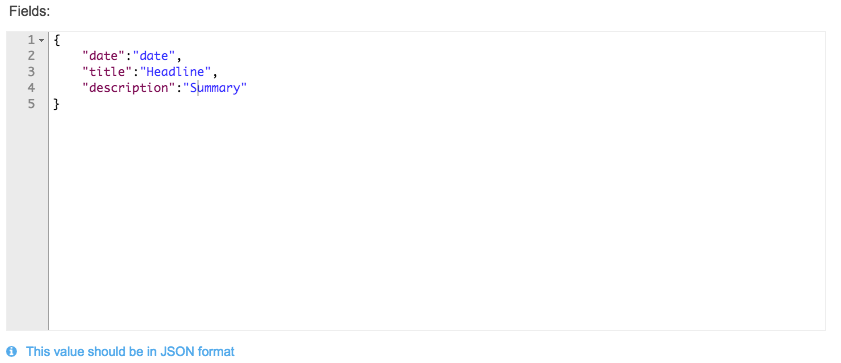
In the 'Fields' box, you should enter fields in JSON format to edit how the Formatted Results are displayed.
The XSLT Stylesheet should only be entered in XML format and this is used to change the output of an XML using another XML.
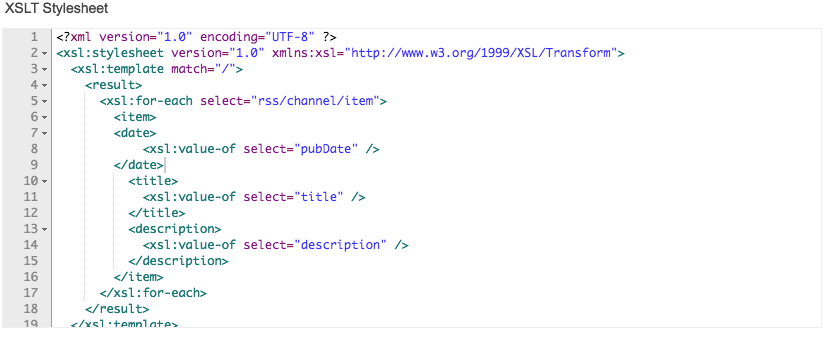
Occasionally a Web Service or HTTP integration can potentially return either single records or multiple records of data. Single results are not wrapped inside a “RepeatableNode” whereas multiple records are. This can potentially cause issues with the “Path to values” field when trying to parse data from the integration response due to the discrepancy in the XML.
When this is the case, the attached XSLT can be pasted into the XSLT box against the integration which will wrap the single response in a RepeatableNode to ensure all responses are handled the same way
URL Hashing
As a security measure, many websites and APIs hash portions of their URLs, to keep things such as account numbers or keys secret. If you're building an HTTP integration to connect to a URL that requires its parameters be hashed, you can use the URL hashing button to hash the required portions of your URL and enable your connection.
The URL Hashing feature allows you to choose from four of the most commonly used hashing algorithms, with Secure Hashing Algorithm 2 - 256 Bit (SHA-2 256) chosen as the default. You may need to check with the owner of the target endpoint to ensure you have selected the correct hashing algorithm.
Enabling URL Hashing
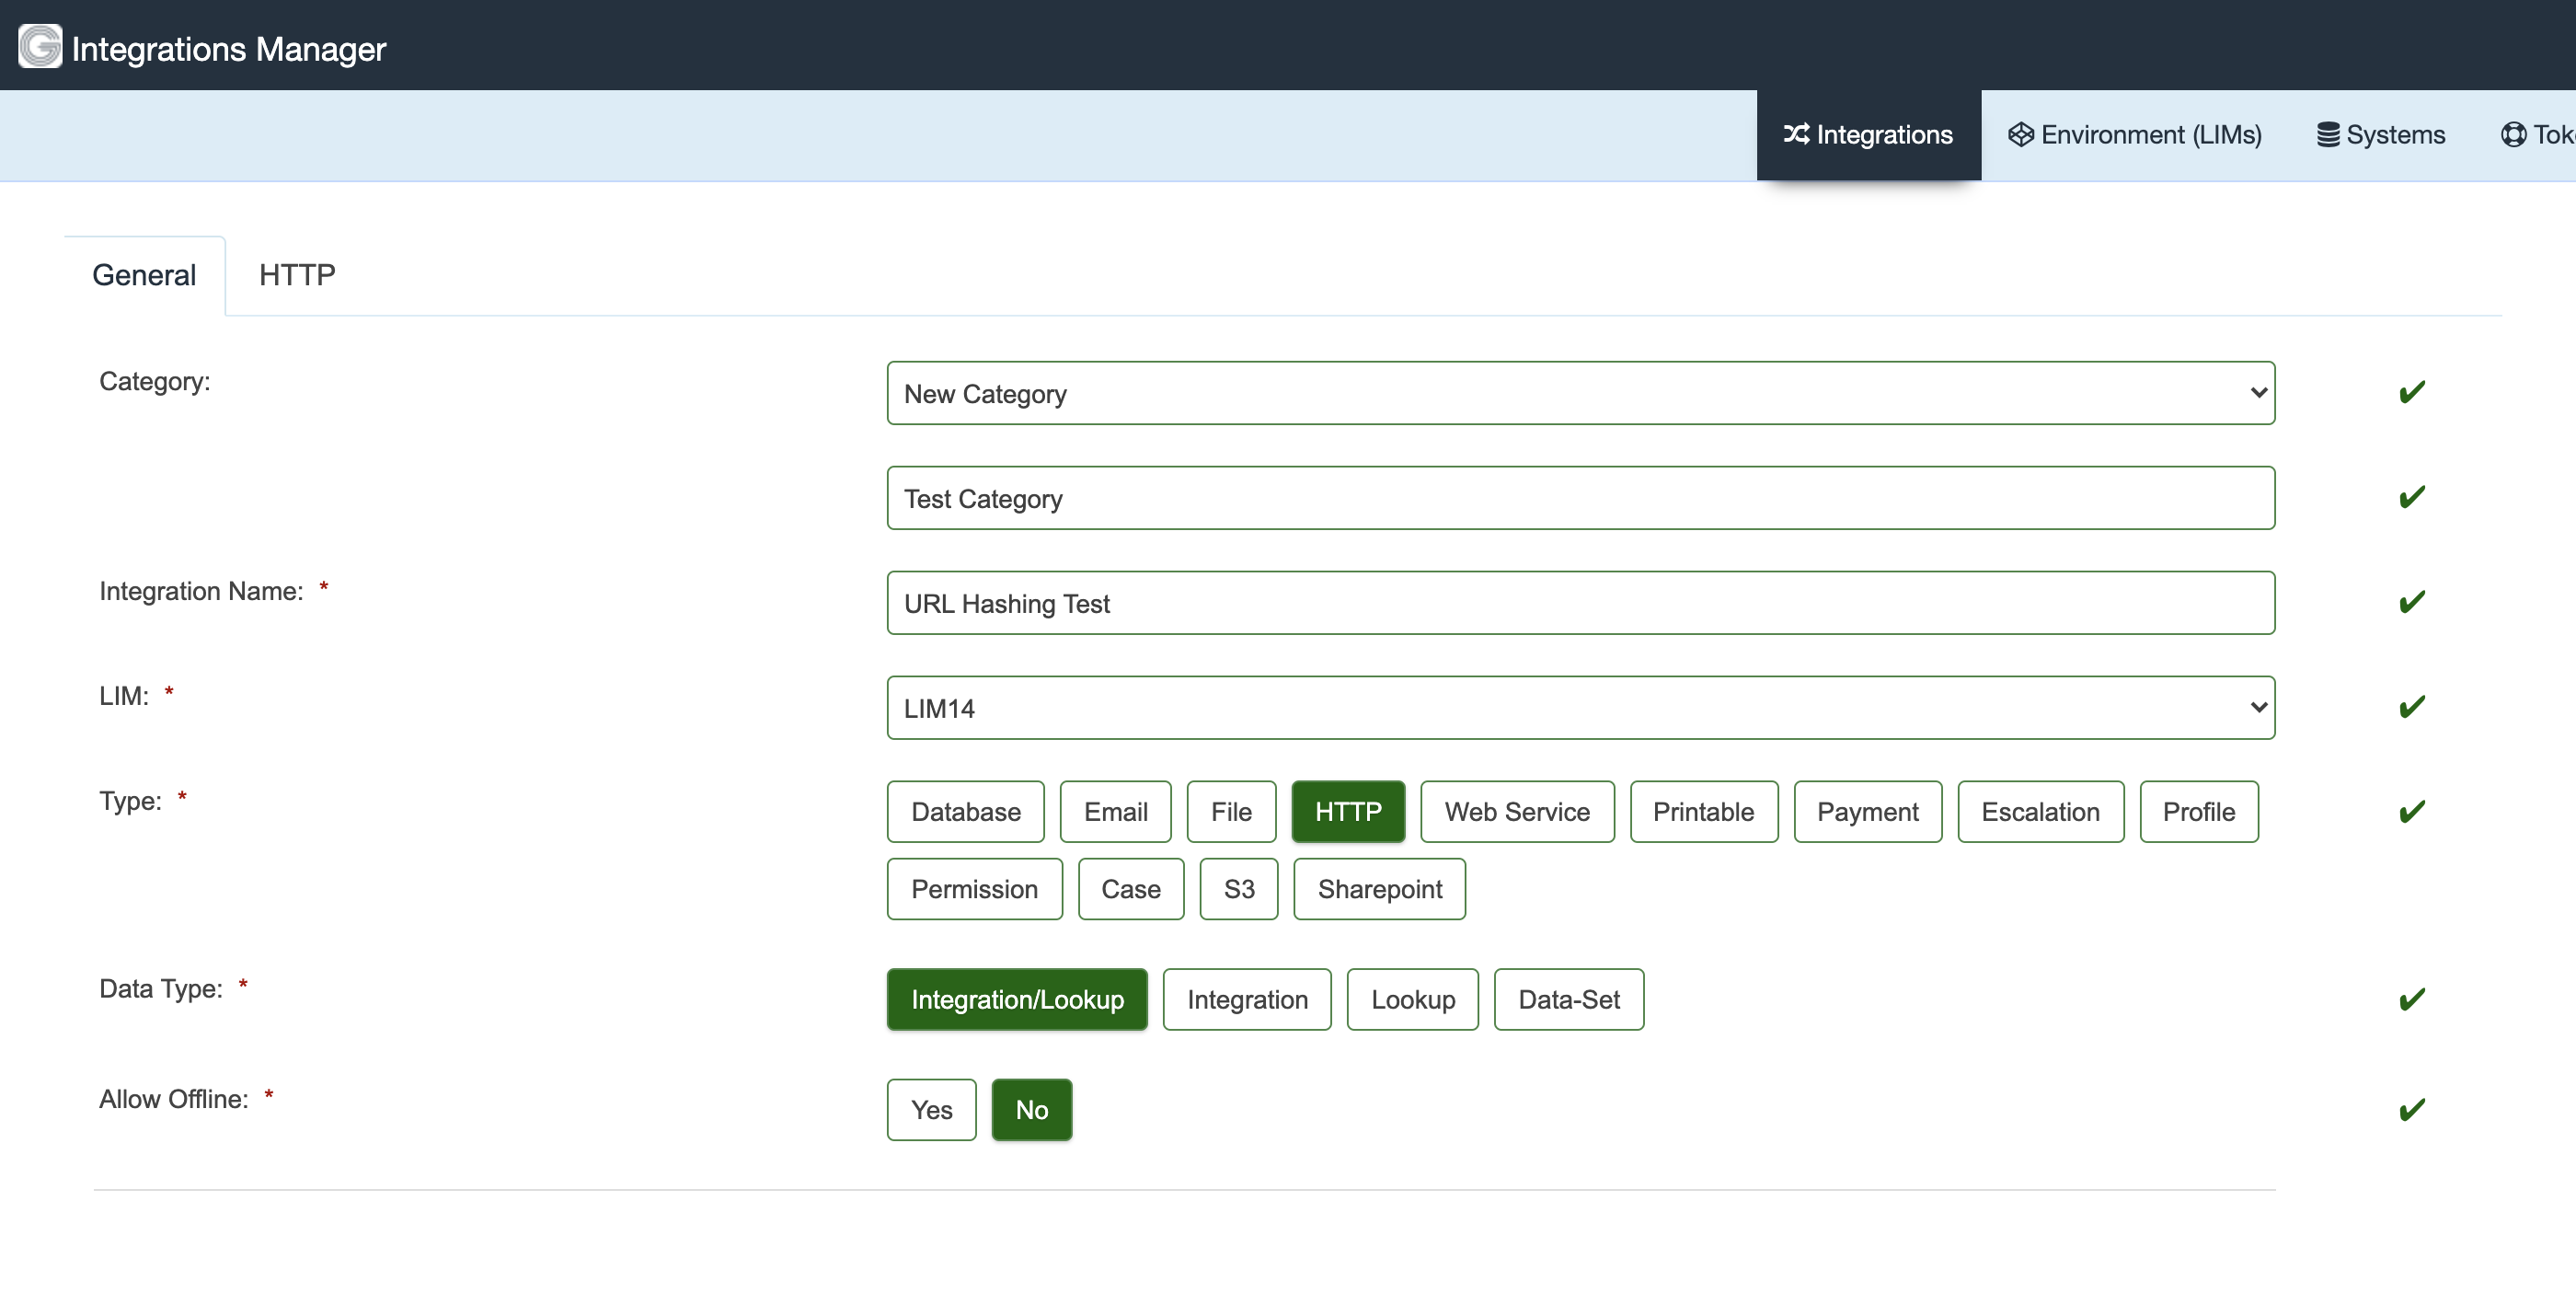
- In the Integration Manager, open an HTTP Integration, or create a new one with the type 'HTTP'.
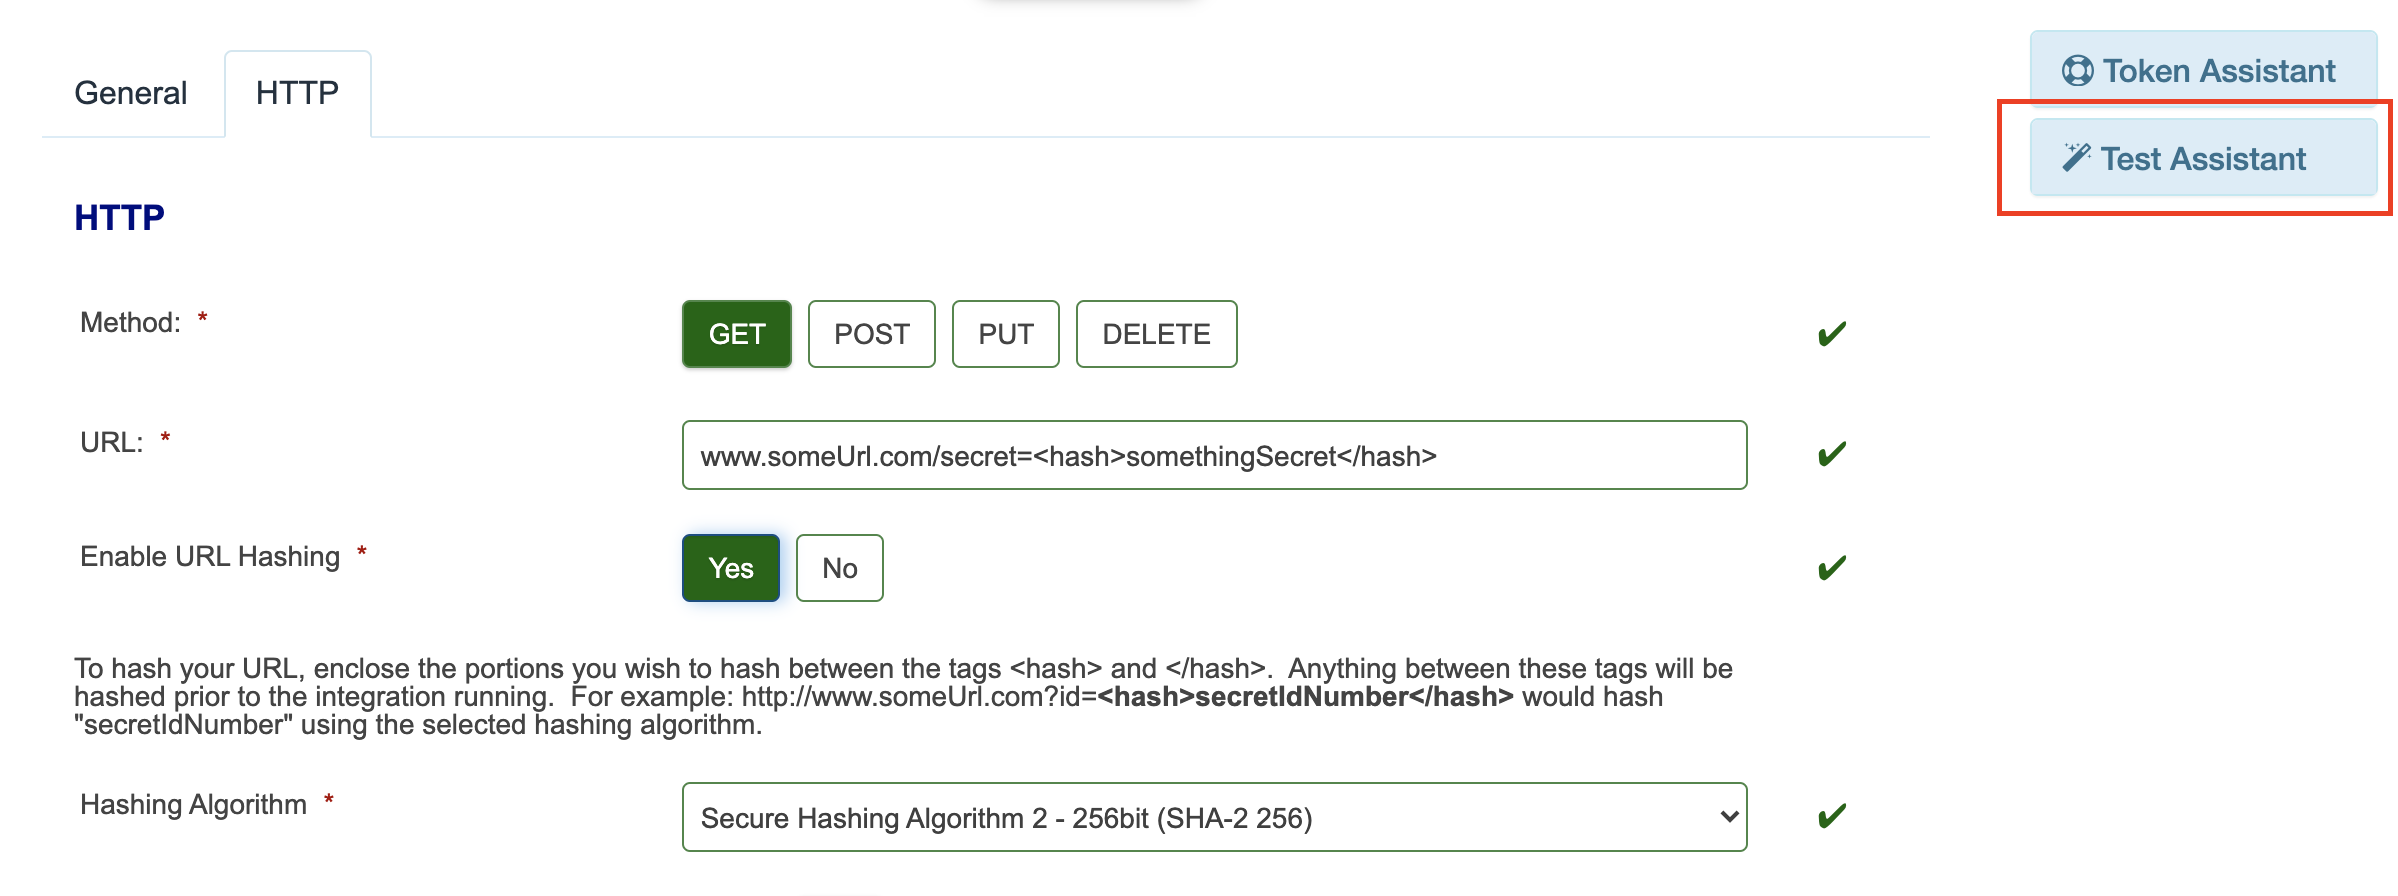
- In the HTTP tab, set 'Enable URL Hashing' to Yes.
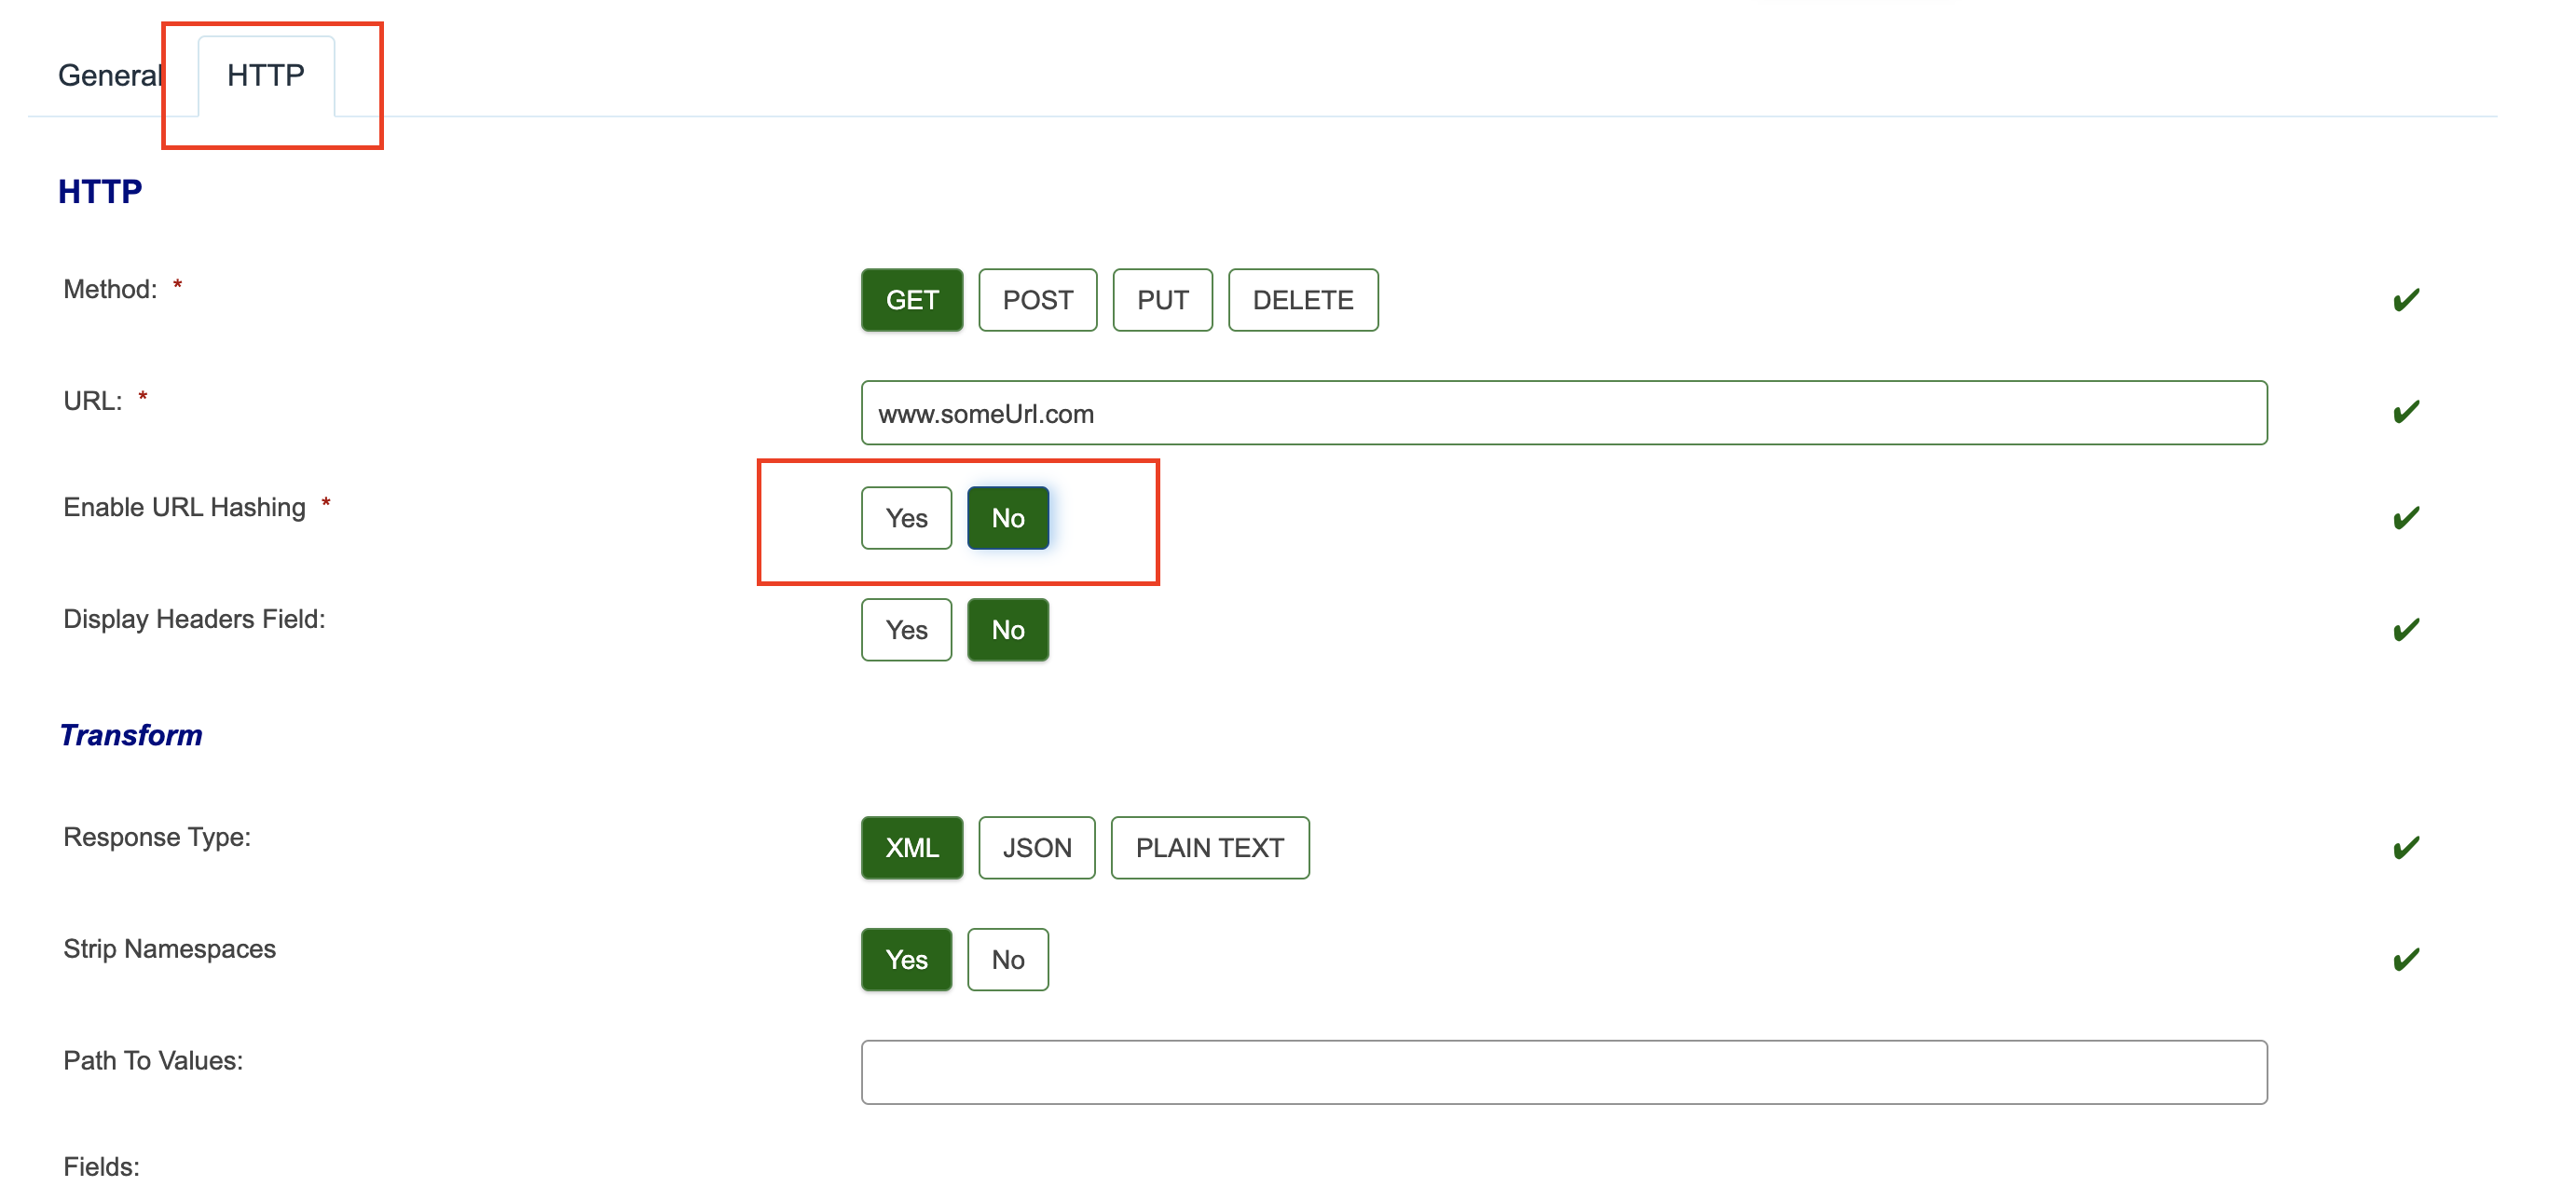
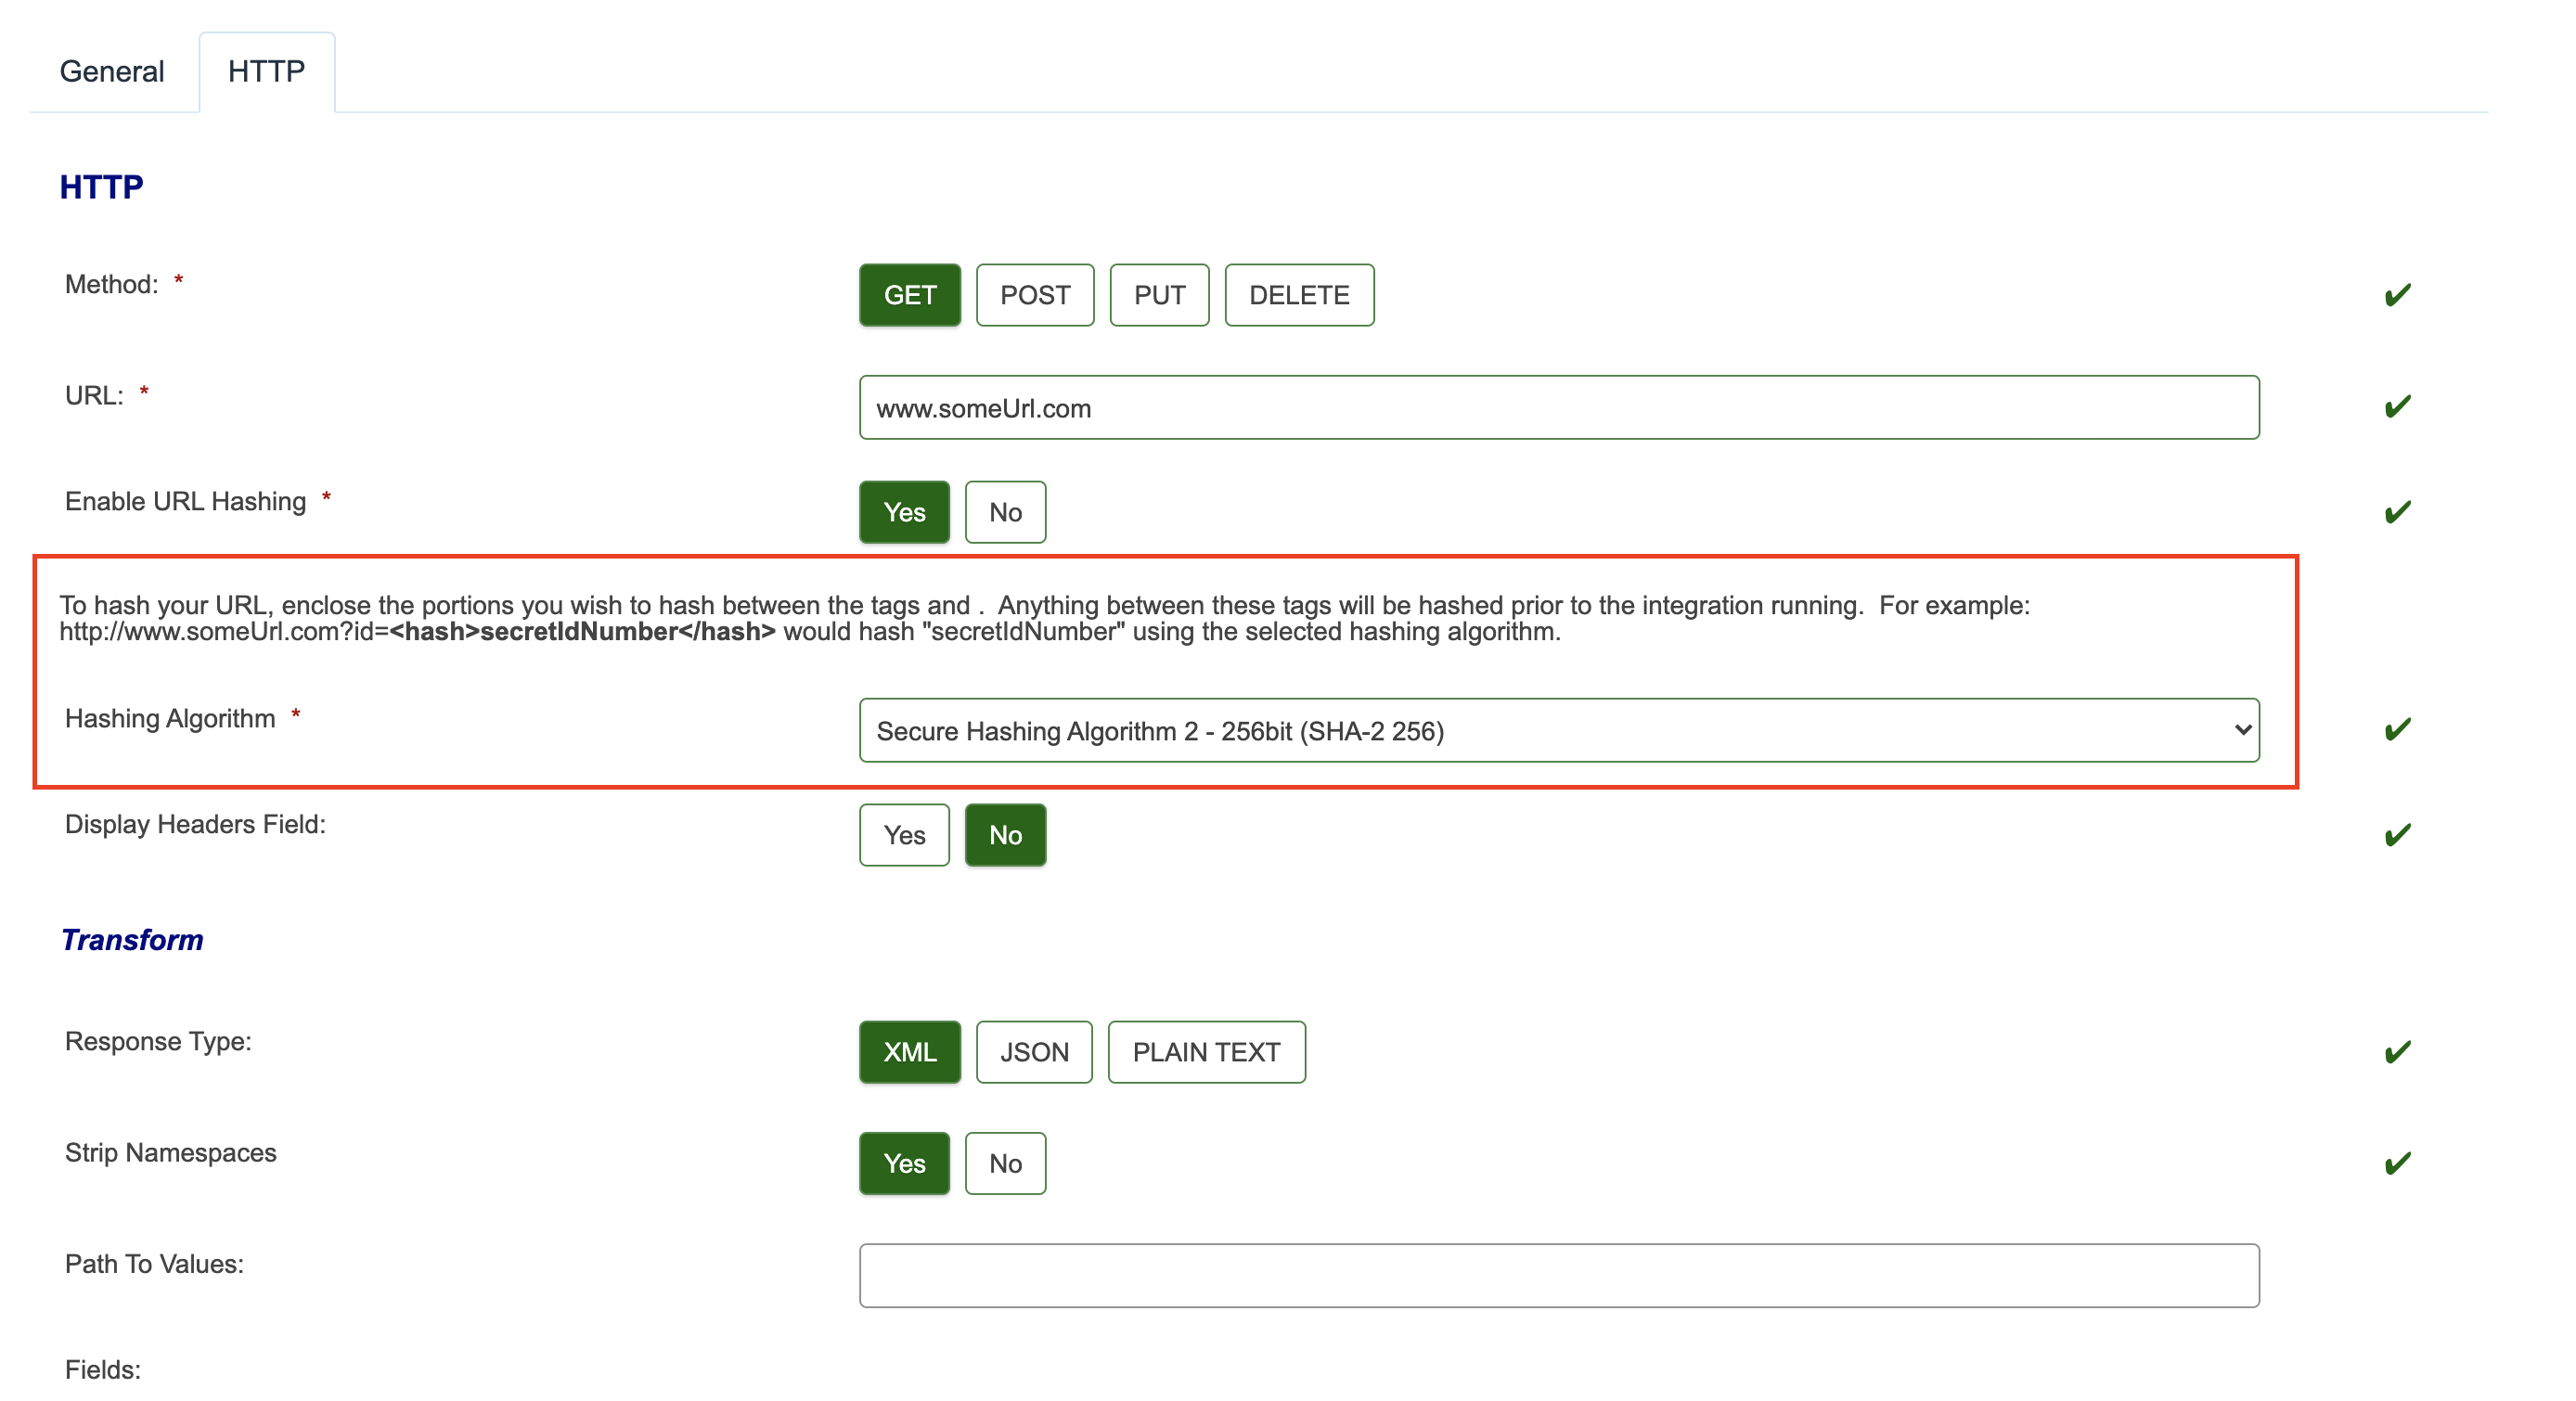
- This will display some help text explaining how to hash portions of your URL, as well as additional options to choose the type of hashing algorithm. It defaults to using the SHA256, or Secure Hashing Algorithm 2 256 bit, algorithm.
Hashing your URL
Once URL hashing has been enabled, enclose the portions of the address you entered into the URL field between the tags <hash> and </hash>.

Anything placed between these tags will be hashed with the chosen algorithm prior to the HTTP integration running, ensuring that your integration hits the correct endpoint. This secret parameter will not be exposed when the integration is run.
In the above example, the HTTP integration will hash the keyword "somethingSecret" using the sha256 algorithm and the final target endpoint will be similar to "www.someUrl.com/accounts?secret=5d25ec20555768253c130e7307637fd6e50935f81ae130d746745b5e85c65c7b". The "secret" parameter, which may be sensitive data such as a password or salt, is hidden by the algorithm hashing.
Testing your Integration
Testing the HTTP integration remains relatively unchanged, but URL hashing does not work with test assistant version 1 and you must instead use version 2. See the steps below:
- To test that your URL has been correctly hashed, Use the Test Assistant. Click the Test Assistant button to open the test assistant window.
- You must use version 2 of the test assistant to accurately test your HTTP integration
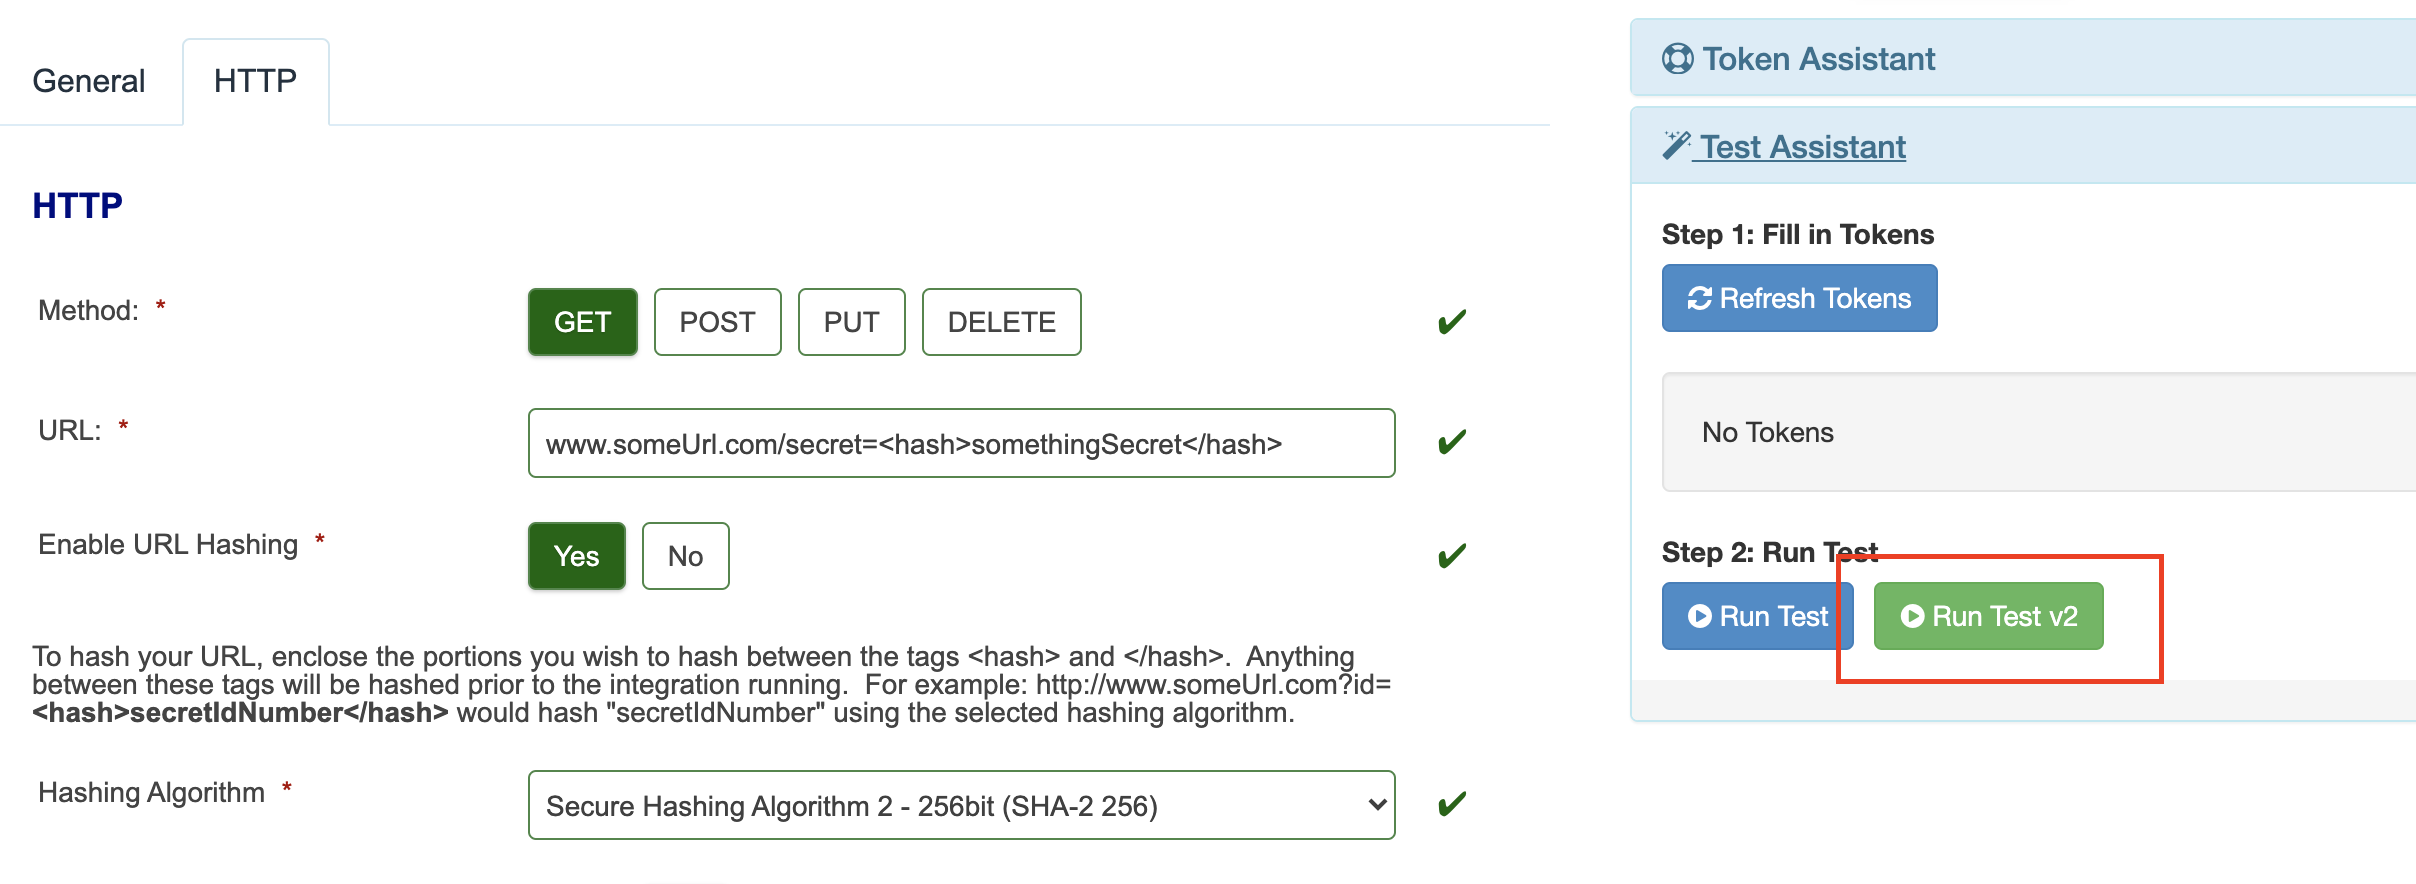
- Once the integration test has run, you will see the box below the assistant populate with the results, including the response gained from the target endpoint.
Additional Notes
Any other behavior is unchanged by URL hashing tags – you will still be able to use values such as tokens within the URL or within the hashed section. If the parameter being hashed is dependent on information contained in a token from a citizen filling out a form, you can enter it such as "<hash>{citizenInformationToken}</hash>" – the "citizenInformationToken" token value will be resolved, and then its value will be hashed using the selected algorithm.
Different levels/Creating tables (V1 only)
It is now possible to return data from a JSON response from different levels within the JSON, eg for HTTP integrations you can extract both the first_name and the pet_name from the JSON below. This only works with V1 integrations.
data: { first_name: test, pets: { pet_name: dog } }
To extract this information: In the Path to Values box put
data/
In the Fields box put:
{ "first_name": "First Name", "pets/pet_name": "Pet Name" }
This also works for JSONs with several children and can be used to generate a table. If the response was:
data:{ { first_name: test, pets: { pet_name: dog } }, { first_name: test_two, pets: { pet_name: cat } }, { first_name: test_three, pets: { pet_name: fish } } }
Then the required configuration of paths to generate a table will be
data/ArrayNode
in the Path To Values box and in the Fields box
{ "first_name": "First Name", "pets/pet_name": "Pet Name" }
ArrayNode is required if you wish to generate several rows
Testing
It is possible in the Test Assistant section to run the test for the HTTP integration. Note: if you are using URL hashing, you must use version 2 of the Test assistant. See above for instructions on running a test using version 2.
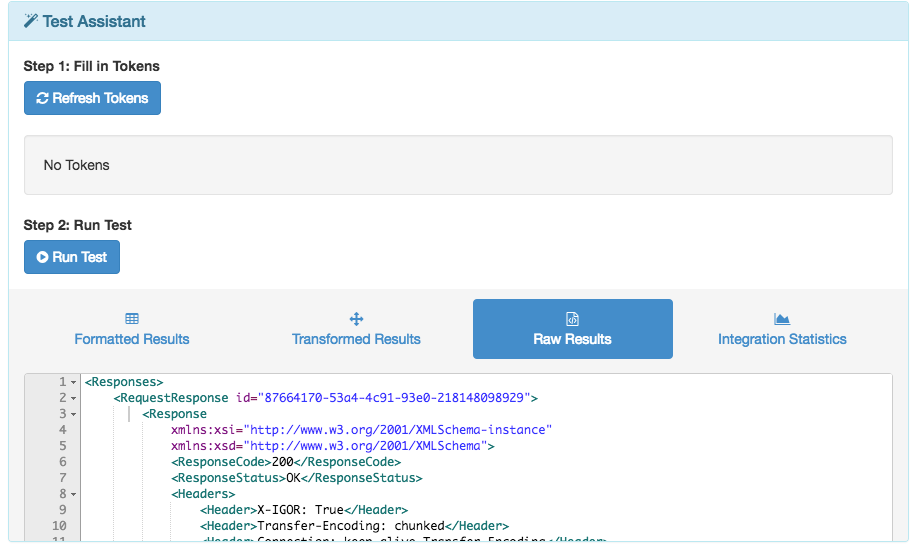
The Raw Results Tab will display the results obtained from the http request. For the previous case, the raw result will be as follows
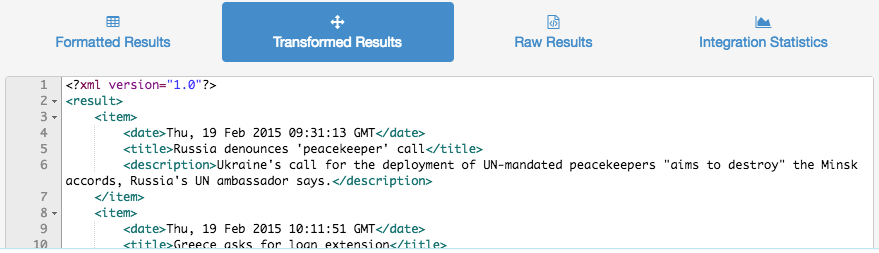
The “Transformed Results” tab depicts the results after applying the previous Xslt Stylesheet. For the previous example the result is the following:
Finally, the Formatted Results will show the results for the fields that have been selected and after applying the Xslt Stylesheet.
LIM Version
The PUT/DELETE options were only added in 2017 and therefore require a LIM version post 2017
Further useful reading:
top of page
- When V2 Integrations finds an array in the <body> of a Webservice/HTTP integration response it will introduce a <RepeatableNode> element. This was introduced to make it easier for customers who were previously having to write extensive XSLT to handle array returns. The <RepeatableNode> is expected behaviour for V2 integrations. You can tell if an integration returns an array or not by looking at the Raw Response. An item will return like this: <Body>{"itemName... whereas an array will return <Body>[{"postNumber... - ie. a square bracket indicates your integration is returning an array. Even if your array returns one item it will introduce the repeatable node element.
- Regardless of whether the integration receives JSON or XML, it gets converted to XML, because a conversion to JSON would leave some attribute names which are not standard XML and this would cause an error when converting back. We recommend making sure that your JSON will convert to XML with correct tag names or just sending the XML directly instead of JSON.
- PUT/DELETE integrations only work with LIMs post 2017
- If the API JSON response has field names that contain spaces, when targeting these fields in the 'Fields' box, you should replace the space(s) with an underscore.

