Introduction
File integrations are used to write a file to a disk. The upload itself can be any file type, and enables the form data to be used by other system eg Electronic Data Records management systems (EDRM).
A file integration can be used to PUT a printable integration output on a server. However it can't be used to GENERATE the printable during the file integration.
File integrations can only generate plain text files
Creating a File Integration
On the general tab for the integration you need to ensure you are using your local LIM and not the platform one. Also we advise checking that you are using an up to date LIM (certainly post LIM version 376)
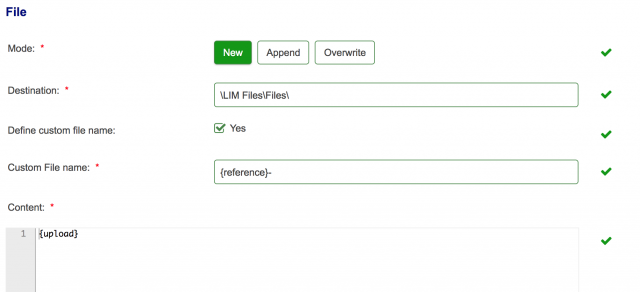
NB that the content field can be a list of form field tokens--{upload} is itself a form token
Mode- If there is already a file at C:\Files\Submissions\AF102353.txt, you can set the Mode to control the following behaviour
New - Create a new file, named C:\Files\Submissions\AF102353.txt-1
Append - Append the data to the existing file, so C:\Files\Submissions\AF102353.txt
Overwrite - Overwrite the existing file, i.e. delete the file that was there before and replace it with the new file
Destination - specify where you want the file to be written. Eg: if you configure your LIM so that the base path is "C:\Files", then setting /Submissions/{reference}.txt will write the file to C:\Files\Submissions\AF102353.txt. Notice that you can use tokens in the filename. You can also set your file extension here.
Note that the destination path uses / to define the directory structure.
If you want to change your base path, you can do this by changing the following key in the lim config file on your LIM
<add key="storage/Files/Specialfiles" value="\\servername\special_files"/>
Multiple storage keys
The LIM can have multiple storage keys allowing different groups of files to be stored in different locations. If adding additional storage keys, please ensure the default key is listed last as they are evaluated in order and the default used if no rules are matched.
For Example:
<add key="storage/Files/Specialfiles" value="t:\special_files"/>
<add key="storage" value="c:\normal"/>
Where the path part of key matches the first part of the path for the file to be written, that key and value will be used to determine the destination of the file. The matching part of the path is removed from the path. Otherwise the "storage" key will be used, and the full path is appended to the storage value.
In the above example:
mytextfile.txt gets written to c:\normal\Files\mytextfile.txt
Specialfiles/specialfile.txt gets written to t:\special_files\specialfile.txt
Note that Forms automatically appends Files to the start of Write File and User Upload integrations.
Define custom file name - If this is ticked (Yes) - then Custom file name can be used to rename the upload
Custom File name - V2 only - If you select a custom file name, the file integration will assign the name you put in that box. If that name does not contain a file extension, it will add the original file name at the end of it (ie. The original file name from the upload or printable assigned to the content via {prev_data} or {uploadfieldName}) - you do not need to specify the path as this is defined in the config
When using {prev_data}, the printable file name is passed. Users should instead create a custom file name as the 'PDF Name' when creating a printable.
Content - what the content you would like to include.
You can also use upload field tokens within the Content area to save uploads to a local folder in the same way
Using a file integration
The file integration can be used in 3 ways to place files on the LIM.
- It can write tokens from the form to a text file on the server.
- It can also be used to place uploads on to the LIM as follows:
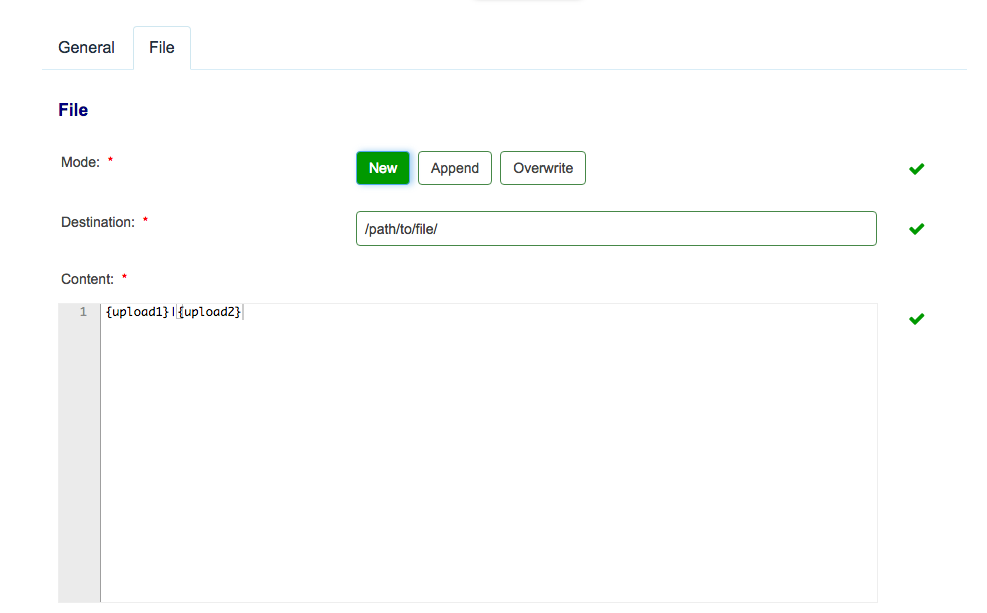 By setting the path to end with a /, we are telling the integration in which folder to place the files. The content is then set to contain the fields within which the uploads have been attached. In the case of the above screenshot, I've elected to place 2 files on to the lim in one integration. This is done by including both upload field tokens separated by the pipe character.
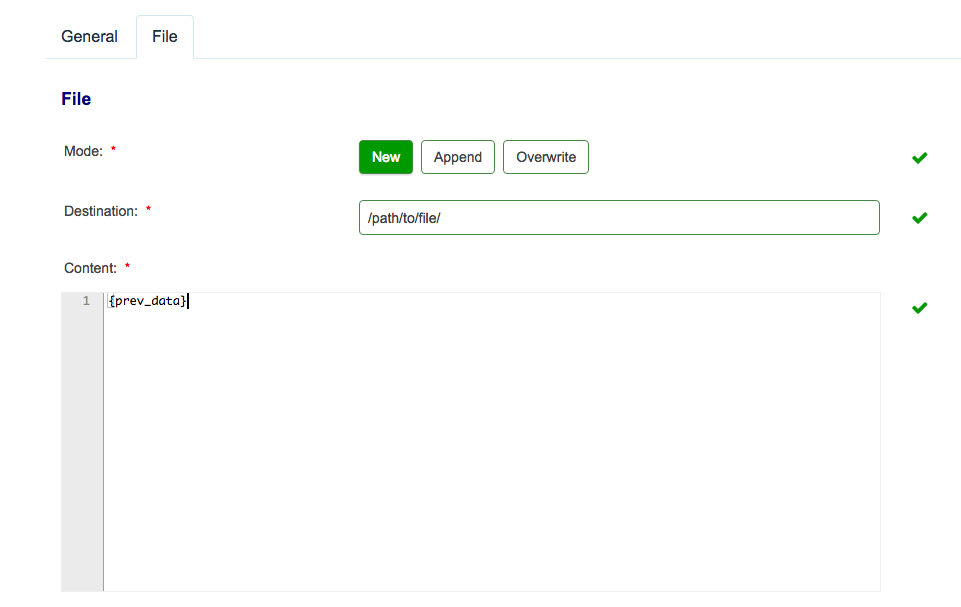
 - The third way a file integration can be used is to place the pdf generated by the printable integration on to the LIM. This is done in much the same way as we did the file upload above, except we use a special token {prev_data}. This token will take the output of the preceding integration and include it in the current integration. The integration would look something like the following:Note: With this third method, the integrations must be run one directly after the other. The printable must be run first followed immediately by the file integration.
Please note:
Only tokens of mandatory upload fields should be put in the 'Content' field. If an empty upload field is put first, it may be triggered which can cause issues with subsequent files being uploaded to the same location. Also, the more uploads that are linked into a single integration, the longer it can take and the more prone to timeout it can become.
Repeatable upload fields work fine. Any upload field files that are added will be saved with their original name. There is no method for altering the file name however you can place these into a folder with a different name using a token in the destination box.
For consistent results this should be used for single file file upload fields
Further useful reading:
top of page

