Table of Contents:
Introduction
CaseViewer is an enhanced case management tool that improves on the functionality of the existing dashboards. Predefined Filters or Custom Filters can be used to organize and display cases to internal teams in a way that best suits their workflow. It is fully tablet responsive, to facilitate remote working.
Using CaseViewer
Users will only be able to view cases in CaseViewer where they:
- have CaseViewer permission defined in the Self section of Permission Manager, and
- are assigned a case directly or via group membership as part of the process design.
The CaseViewer menu item will display to all Dash users once installed, similar to the Dashboard menu item, and it can be configured to display at:
/admin/self/Navigation/AppManagement
Views/Filters
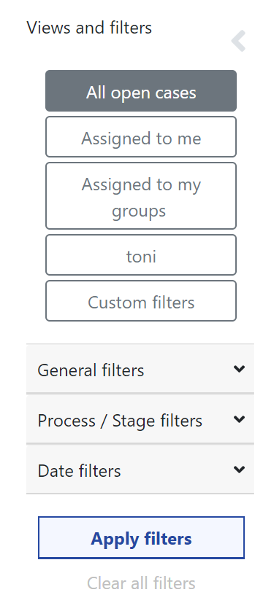
By default, CaseViewer includes three standard filters:
- All open cases: Cases that are either assigned to individual Back Office User/CSA or to groups the Back Office User/CSA is a member of.
- Assigned to me: Open cases directly assigned to the Back office User/CSA
- Assigned to my groups: Open cases directly assigned to the groups the Back Office User/CSA is a member of.
Additional views can be created and made available either “globally” or ”Restricted” based on permissions through CaseViewer admin. Users can also create and save their own filters and define their preferred default view.
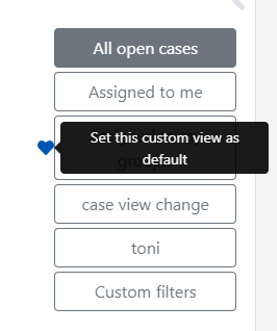
Defining Default View or Filter
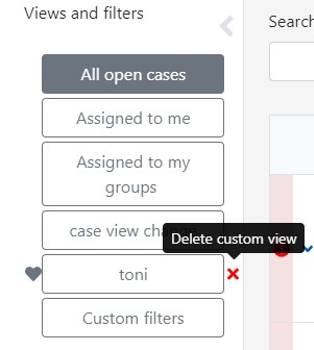
The default filter is “Assigned to me”, but users can set their own filters from the default Filters and Custom Filters created by Admin or filters they have created.
When viewing the available filters, a grey heart will display. It can be used to set the default filter, which is shown by a blue heart.
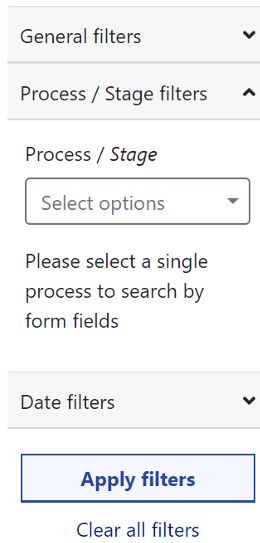
General, Process and Date filters
The default views show open cases, however additional views can be created for open and closed, or closed only. Note: If you deselect both open and closed cases, then no cases will be displayed.
The 'General Filters' option allows additional filters to be applied to those already selected from a default filter and can also be applied when using Search. General Filters allow filtering at task level and for closed cases/tasks/saves at group and user levels. Groups are displayed as a searchable list. To select an assigned user, either type the username or email in the Assigned User field and the field will display matches for selection (multiple users can be selected). Click outside the modal once you have made your selection.
Typically, there is no need to filter by user/group because users can only see cases that they are assigned to by default. However, if you are a member of multiple groups and and one of the user group assignments is for urgent cases, then you may want to filter these specifically.
To filter for a specific process first select the process, if you require a specific stage within the process then select the relevant stage from the stage option, otherwise all stages will be shown. When selecting Processes/stages, please note that processes will be listed ifr they have previously been published even if subsequently deleted or no cases are reported.
Note: If a process is not listed, first refresh the page, then check that you have permissions to view stages of the process or closed cases as applicable.
When applying additional layers of filters using General and Date options, it is important to note they will be applied as a layer to any custom filters already selected. For example, if “Assigned to me” is selected and then you apply a process filter that is not assigned to you directly but through a group, then you will not see any search items returned. Therefore, we advise switching to 'All Open Cases' before applying General and Date filters.
Date filters can also be applied as required to limit the number of cases returned.
Note: If you are unable to scroll to bottom of date filters, close the general filters option.
Once you have defined the filters you wish to use then you must select the
Apply Filters button for the change to be applied.
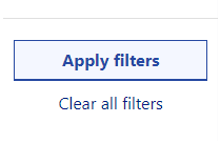
Once filters have been applied, they will remain active until the “clear all filters” option is selected or a different filter is selected (even after continuing or viewing a case/task). To clear filters you need to select
Clear Filters then apply filters or click on the required filter.
Save My View
When creating a custom view and applying the filter, an additional button will appear at the bottom of the Views/filters list named
+Save current view.
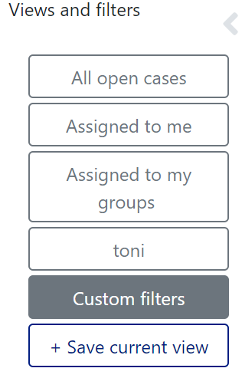
This will allow the user to save the view as selected for reuse. Unlike the custom views created by Admin users, this saved view will only be visible to the logged in user. (The saved view can also incorporate the search term and sort order).
Note: if on saving a custom view you receive the error "Oh No! A valid user ucrn is required to perform this action - please contact your administrator." this means the UCRN for the logged in user does not match the UCRN in the permission manager - please
contact our support team and
provide the is authenticated details for the logged in account.
To remove a locally saved view, click on the red
X to the right of the view button.
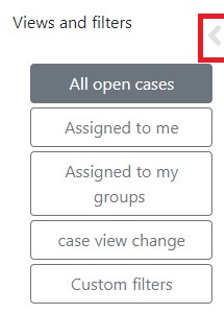
Hiding Views and Filter menu
To increase the visible content of case information on the screen, you can hide/unhide the Views and Filters menus on the left using the grey chevron.
Search Options
Simple Search

The CaseViewer simple search will search case id: Case Reference number (the most commonly used search term)
Advanced Search
The advanced search allows a search of any combination of
- case id: Case Reference number
- citizen name
- citizen email
- originator: Email address of the originator
- case summary: Case Summary fields as defined in CaseViewer Admin. Note: Search will not function across all fields within a summary, only one distinct string from a defined field. This will be enhanced in later phases.
If you need to search for a list of cases by Process, then use the General Filters option.
Once a Search term has been applied it will remain active until removed, even after continuing or viewing a case/task.
Note: It is also possible to include a search term in a locally saved filter/view, as created above.
Process Specific Search
CaseViewer allows specific fields to be selected for detailed searching and filtering on a process by process basis, which provides a powerful filtering functionality within CaseViewer. The fields that users will be able to search are defined within CaseViewer Admin.
When selecting a
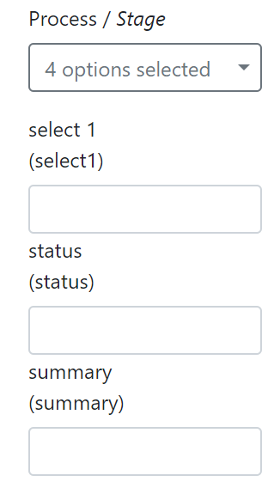
Single process in the Process/Stage filter option, the user will be presented with the configured search fields.
Note: This only works when CaseViewer Admin have configured Process Specific search functionality.
Users will be able to search any combination of the field as required.
Note: For select fields the user will need to know the select options expected.
As an example – above the fields:
- {select1}
- {status}
- {Summary}
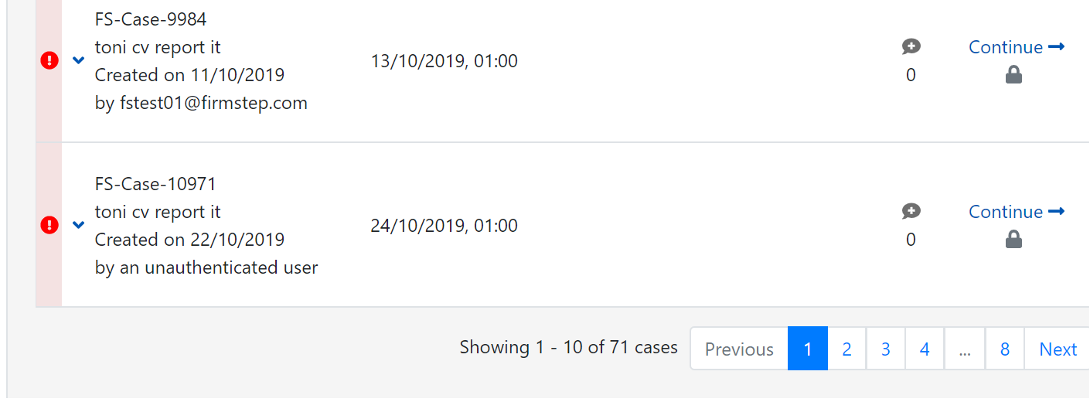
Have all been provided as search terms for our “toni cv report it” process. Leaving all three fields blank return all open cases for the process:
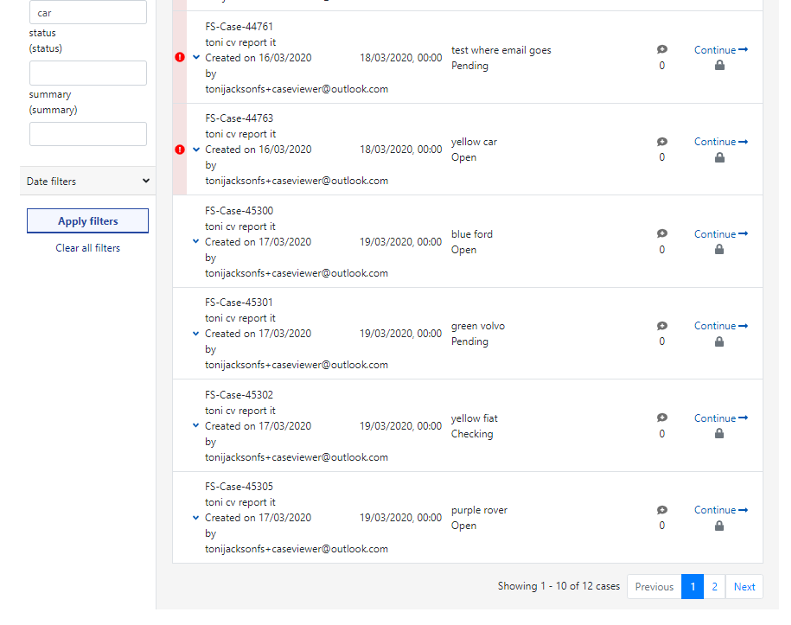
Adding a search term of “car” to the {select1} option filters the search to show only those reports relating to abandoned cars, which reduces the number displayed to 12 cases.
Further filtering to show the cases where status is open shows a reduction to 5 cases.

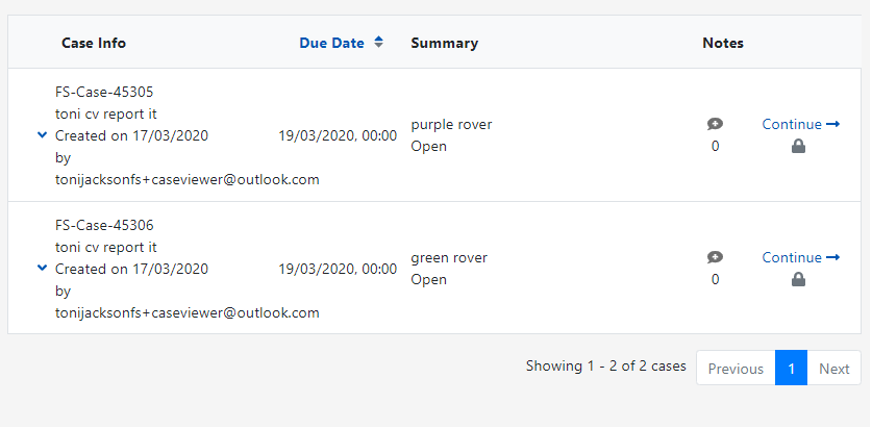
Applying the additional search term of "rover" to pick up a specific model from the summary shows only two cases.
A combination of creating summary text and applying process specific fields provides a powerful filtering option that can show key cases and expose case data to the user.
Sort
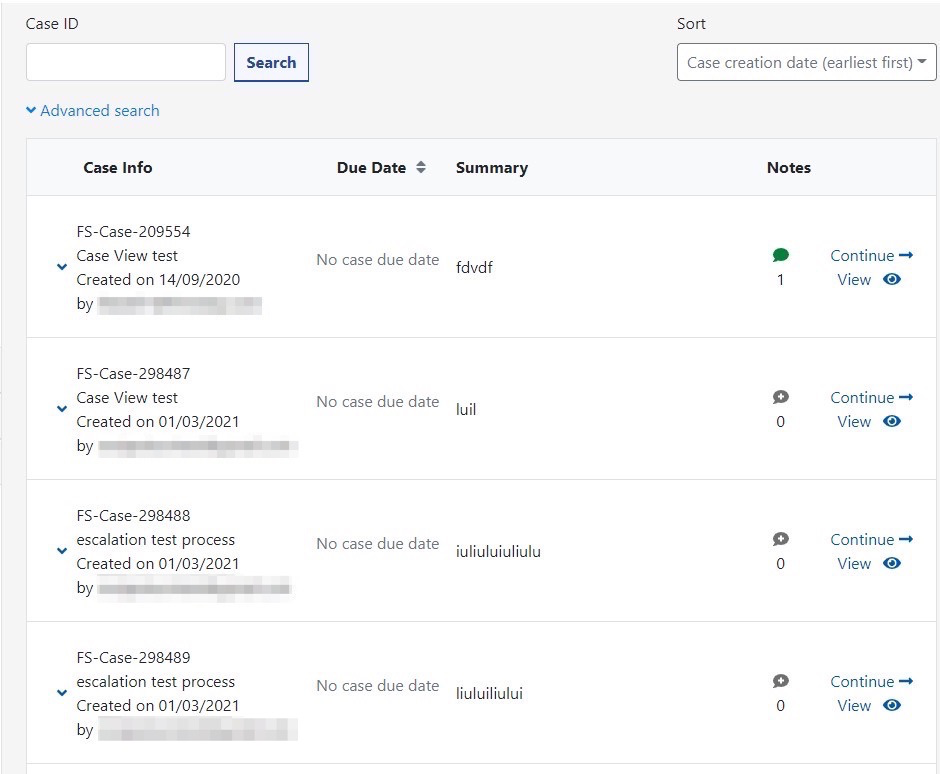
By default, CaseViewer will list cases in “Case creation date (earliest first)” order to ensure that cases that are the oldest will be seen first; However, the sort order can be changed as required to:
- Case creation date: Earliest first, this is the default setting
- Case creation date: Latest first
- Case due date: Earliest first - where Case due dates are used for a process to manage SLAs it is recommended to change to sort by Case due dates
- Case due date: Latest first
- Task due date: Earliest first
- Task due date: Latest first
- Task creation date: Earliest first
- Task creation date: Latest first
Once a sort option has been applied it will remain active until removed, even after continuing or viewing a case/task. It is also possible to include the sort order in a locally saved filter/view as created above.
Viewing Cases/Tasks
Users with permission to continue the case will have two options:
Continue and
View.
- Continue allows the user to continue the case - progressing the next task as required.
- View provides identical functionality to that available in Dashboard, where the previous completed task displays (subject to the necessary permissions). Using the View option will prevent the task being marked as started/locked by another user.
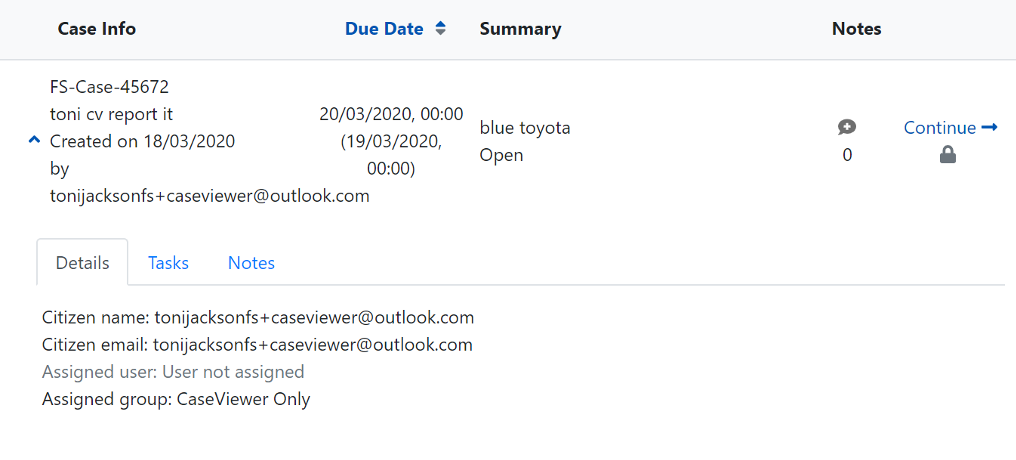
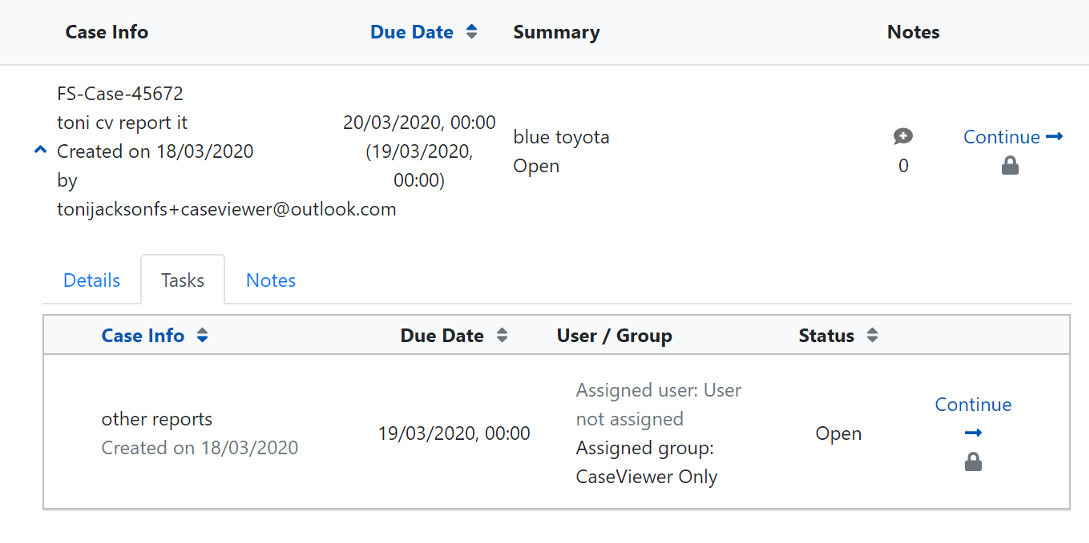
When cases have a task due date they will be shown under the Case due date in brackets. Due dates are indicated by color/icon:
- Case or Task Due soon: Orange when case or task warn date is passed.
- Case or Task Overdue: Red when case or task due date is passed.
Where a case has more than one task open there will be no 'Continue' option on the case itself, but if the user opens the case to view all open tasks they can choose which task to continue. (See Parallel Processes for more information about this).
The permissions defined in a process define the visibility of tasks within a case. CaseViewer permissions are:
a. Users in the View data group/static view data group will have read-only access to view ANY/ALL tasks in a case regardless of whether the case is open or closed. This provides additional visibility on open cases. Previously, View Data groups only had visibility on closed cases. Users will NOT have permission to continue any tasks.
b. Any assigned user/group should be able to see any task that they had permission to action when open, even when the case is closed. (They do not gain visibility of any of the other tasks in the case, only the one(s) they were able to action via assignment.).
Locked cases: When a case has already been opened by another user the case will be marked as locked with a small grey padlock. Hover over the padlock to view additional information about the lock, e.g. the user who has locked the case and the date/time it was locked. This provides valuable information on whether the case is currently being worked on (therefore can be ignored and move on to the next case) or if it was opened for information a few days ago, and not worked on. Locked cases can be opened and continued by users, reverting any work started as applicable by the other user.
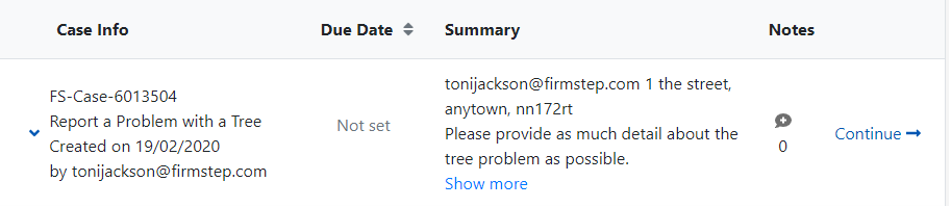
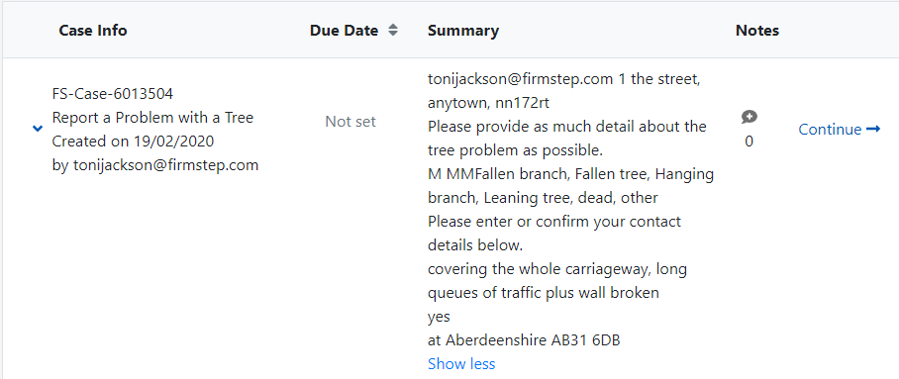
Summary Fields: When a summary has been defined this will be displayed in the Summary column and can be used to search records. If the summary is extensive and would span more than 5 rows the summary is truncated and has a “Show more” option. This allows for the summary text to be expanded and reduced as required.
Details
The Case can be expanded to view the
Details tab.
Tasks
To view the specific tasks for a case, click in the case near the downward arrow to the left of the case reference number. This will display all tasks (that the user has permission to view) for that case and will allow tasks to be continued.
Note: Default view only shows open tasks, so as first stage tasks are by default closed on submission, these will not show, unless you adjust the filter option to show closed/open tasks. When CaseView is being used the previous stages will be displayed when the case is continued/viewed as applicable.
Notes
To view Case Notes – you can either expand the case and select the notes tab or click on the red/green speech bubble on a case.
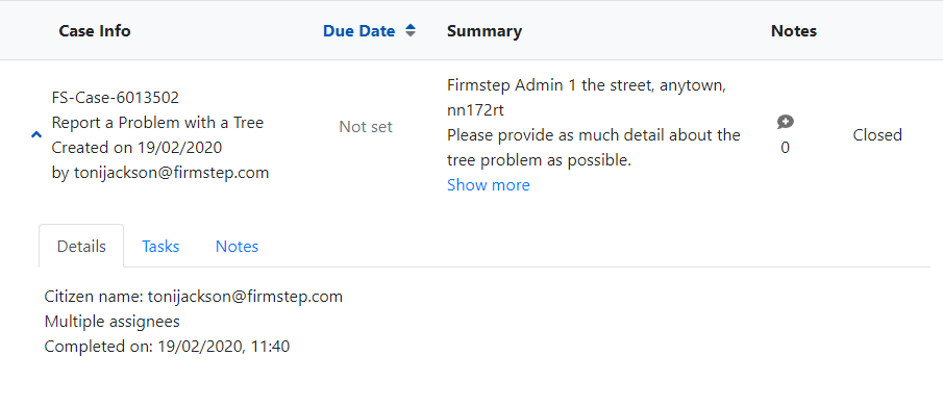
Closed Cases/Tasks
When a case/task is closed, it is greyed out to remove focus so open tasks can be easily identified, and the Continue option is replaced with a blue view icon (indicated with a blue eye). When the case is expanded, additional case details, including Citizen name/email, plus completed dates are shown.
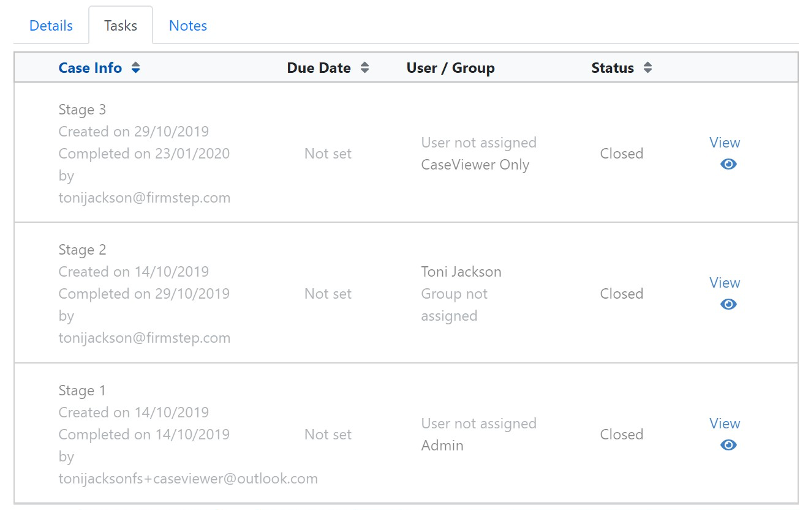
The
Tasks tab will show the task status and the details of who completed each task and on which date.
 Note:
Note: The Case shows who started the case (e.g., citizen or CSA) and each subsequent task shows who completed the task, and who started the next task. The user who completes the final task is the user who completed the case.
If you view a closed case and want to return to your search, use the browser back button (using the
CaseViewer option on the menu will refresh the CaseViewer search).
Saves
When using Saves with the New Queue Processor, the save is considered to be a task so it can be completed where required in Service by CSAs. The Saves are not visible in CaseViewer by default, as these are not actionable, but they can be made visible using the relevant filter option in the general filters.
Print Case Functionality
Where a user has the relevant Print Case Permission, when expanding a case to view the details tab a
Print Case button will be displayed.
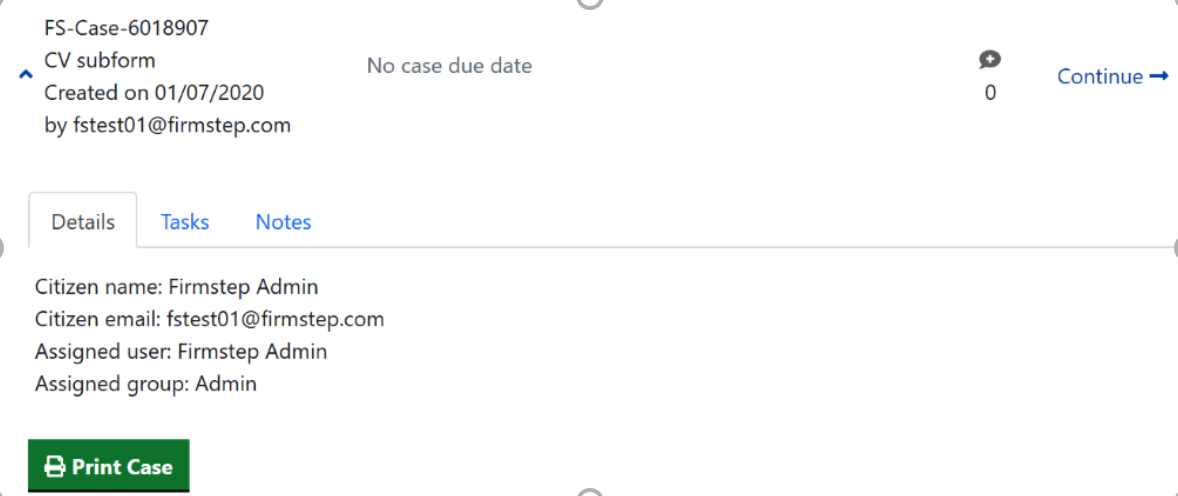
Clicking
Print Case will allow all the relevant Case details including task information to be downloaded locally to a docx file.
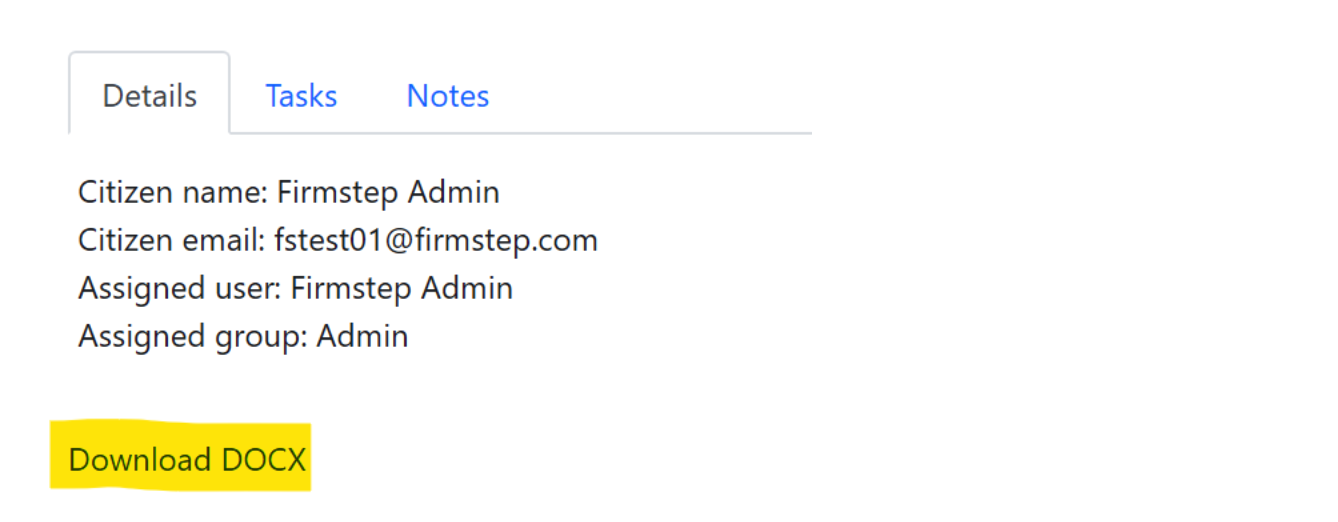
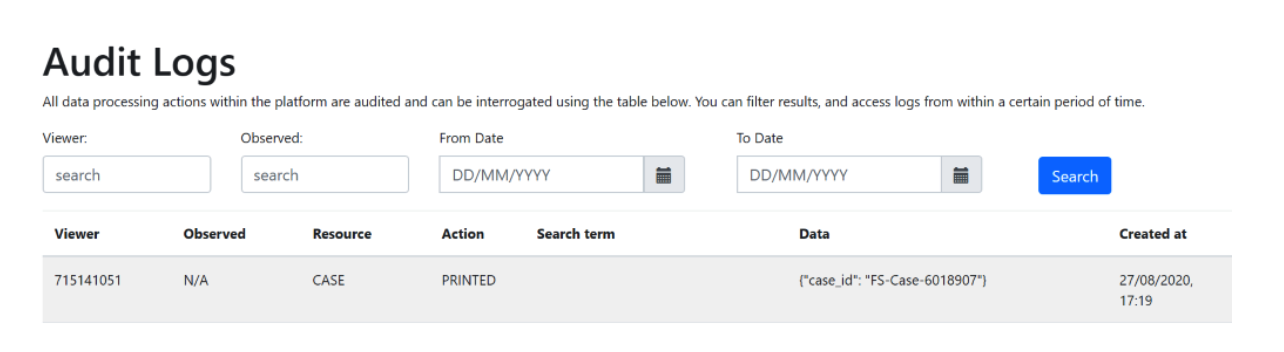
This can then be opened in word and redacted/edited as required. The Print Case activity is logged in the Audit logs within the Compliance Console.
Migrated Cases
As part of the migration to CaseViewer, only open cases will initially be migrated; Therefore, CaseViewer will only show cases completed after the CaseViewer migration. Older closed cases can be viewed in Dashboard. For established customers, this is to allow customers to adjust
Case Retention ahead of full migration of closed cases, so that cases that are no longer required (e.g., for GDPR) can be deleted as part of the archiving process. Once Case Retention has removed the old cases, then even older closed cases will be migrated so both open and closed can be viewed through CaseViewer, as we move towards decommissioning Dashboard. Initially CaseViewer is only available in Staff Portal, but it will be implemented at a later phase in Service, thus allowing Dashboard to be decommissioned. Cases can be updated in either CaseViewer or Dashboard.
Case Notes
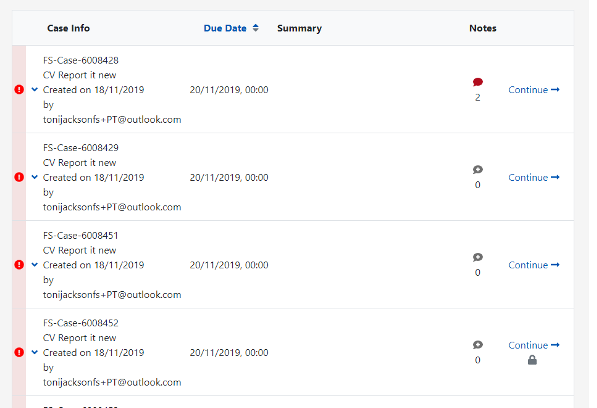
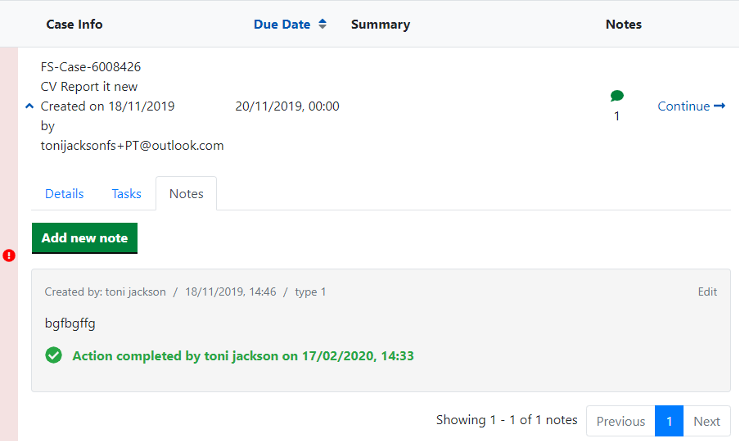
Case notes allow messages to be added to a case and serve as internal notes. When viewing a list of cases, the Notes column will clearly identify if a case has case notes associated:
- Grey speech bubble: No case notes
- Green speech bubble: Case notes are present but no action is required (number will indicate how many notes)
- Red speech bubble: Case notes are present and one or more of the notes requires action (number will indicate how many notes)
Adding/Viewing Case Notes
Clicking directly on the relevant speech bubble will open the Case Notes function. If there are no existing case notes present, the user is taken to the Add Case Note modal where they can add previously configured case notes. If case notes already exist the user can view the list of case notes already assigned to the case. They can also view and update as applicable.
Adding a Note
There are two ways to add a note:
- Click on a note bubble
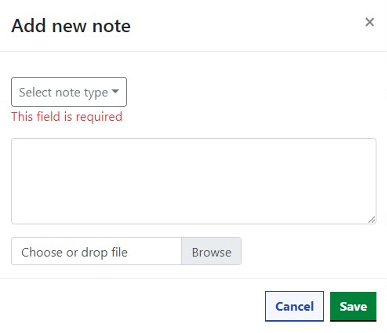
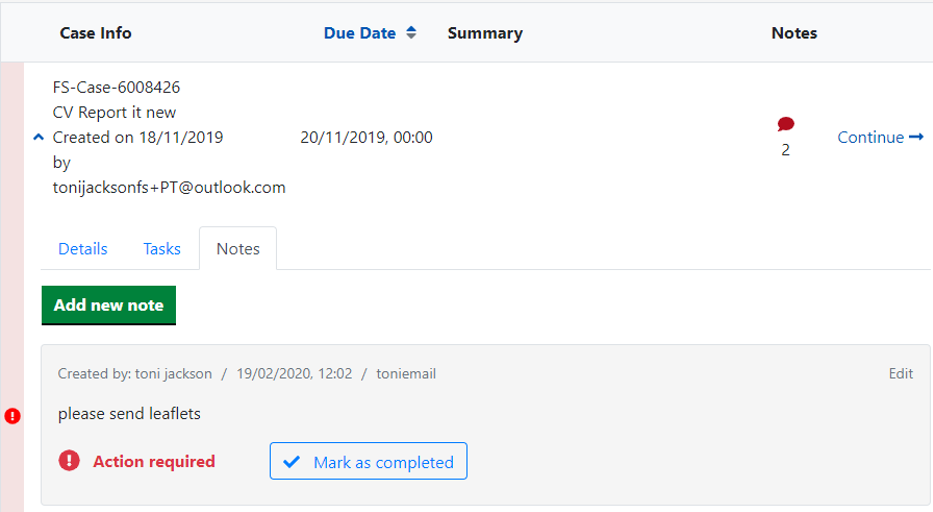
- Expand the case to view the task and switch to the notes tab, then click on Add new note button
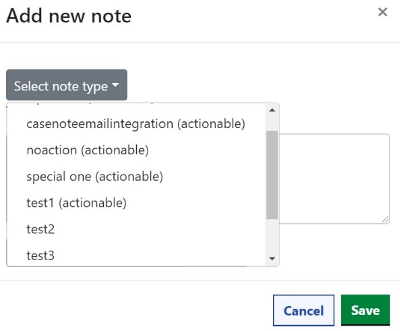
Select the note type (drop down list will indicate which are actionable note types and which are not), add relevant note text and where applicable add supporting files (supported file types: gdoc, docx, odt, pdf, rtf, txt, 7z, zip, rar, csv, bmp, jpg, jpeg, png, svg, tif, tiff, key, pps, ppt, pptx, ods, xls, xlsx).
Note
: There is a file size limit of 10MB per attachment. This limit cannot be increased.
When selecting a note type, those that have been defined as actionable will be annotated accordingly.
 Note:
Note: It is possible to add a Case Note to a completed/closed case. While these will be annotated on the case in the usual way, there is no system prompt to advise that a note has been added to a closed case. This may mean actionable notes are not spotted.
Viewing a Note
There are two ways to view a note:
- Click on a note bubble
- Expand the case to view the task and switch to the note tab. Existing notes will be displayed where document/image has previously been uploaded to a note. This will be downloaded from a double click.
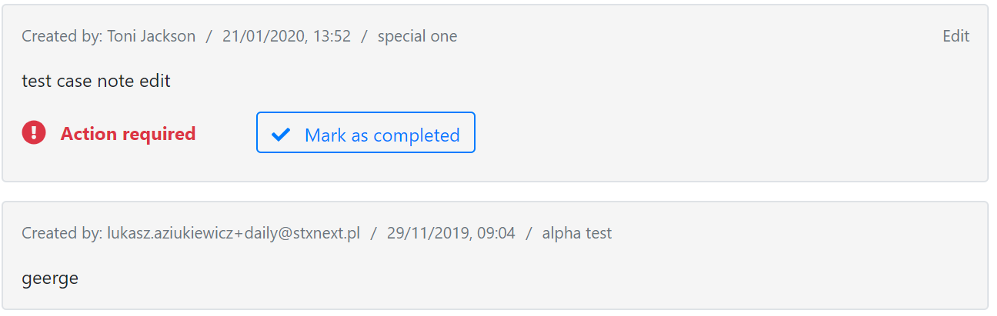
Updating a Note
If a note has an outstanding action required, this will be highlighted in red on the note, along with the option
Mark as completed.
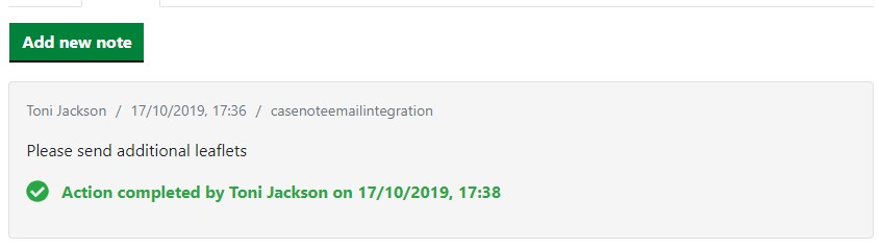
Once the action has been marked as completed then the display will change.
Editing a Case Note
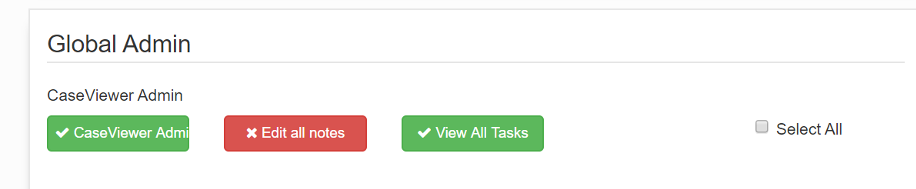
Case Notes can be edited by either the original author or by a user with
Edit all notes permission (defined in Global Admin).
Where the CaseViewer user has permission to edit a Case Note, the edit option will be display against the note.
Selecting
Edit will open the original note modal, allowing the text and the attachments to be changed.
Note: It is not possible to change the Note type (this preserves the history in case the original note was associated with an integration), nor is it possible to delete the case note. If a note was made in error, the edit function can be used to indicate the reason for the error and the remedial action taken.
The changes to case notes are recorded in the audit logs and can be checked at /admin/v1/compliance/audit/logs, subject to relevant permissions.
Known Issues
- Tasks assigned back to citizens show as no “assigned user” when viewed with “View All Task” permissions
- New Saves (limited use) do not show correct user assigned ie citizen
- View/Filter labels are not translated
- Case Note Attachments are not translated
- In some situations eg mobile offline closed cases are not accessible to view in CaseViewer – and an error is displayed on viewing as “Task null not found” the case can be seen in CaseViewer but not viewed – but can be viewed in DashBoard
Out of Scope
Whilst CV is tablet responsive to facilitate remote working it is not fully mobile responsive, but will work on mobile devices.
Frequently asked Questions
- Can we continue to use Dashboard?* - The plan is to remove Dashboard from the Product. It has not received any enhancements for a number of years as we were working on its replacement, CaseViewer. CaseViewer will be replacing Dashboard in all environments. First, it will be replaced in Staff Portal, then in Service. All Customers should now have received information on having CaseViewer added to their sites - if you have not, please contact your Account Manager. There are no additional costs associated with CaseViewer.
- Dashboard will not be fully sunset until performance improvements to Caseviewer are completed, resolving intermittent issues for our largest customers. However, in this quarter we will begin removing Dashboard for customers unaffected by performance issues. More detail will be provided by the end of 2023.
- Does CaseViewer affect Mobile/Offline app? - No - the mobile/offline app is unchanged by CaseViewer. CaseViewer is simply a replacement for Dashboard
- Is there a view Case option for open cases? - No, the users can continue the case to view and then cancel, they will be returned to the same search filters previously applied - which renders opening a View as in Dashboard in new tab pointless
- Will there be any impact on MyRequests used by Citizens in Self? - No this product is not affected
- Will there be any impact on Shared Digital Workspace or other portals?. Where Dashboard is installed this will be replaced over time with CaseViewer.
- Do you have to migrate case repeatedly? No Case migration of open cases runs once this copies all cases that are open from Dashboard and duplicates in CaseViewer, and new cases are automatically visible in both ongoing. Once Case Retention has been running for a while and cases that are old and no longer required have been removed by Retention Processor then we run a similar script to migrate closed cases, so these are also visible in both Dashboard and CaseViewer, until Dashboard is removed.

