Landing pages are a new type of page that you can associate with a bulletin. Use a landing page when you want to:
- Direct bulletin readers to a customizable govDelivery webpage.
- Simplify your bulletin while engaging subscribers with more information.
- Track clicks and engagement from your bulletin to your landing pages.
Creating a New Landing Page
To create a new Landing Page, select Templates in the lefthand navigation bar, and then Landing Pages on the righthand navigation bar. If you have already created one or more landing pages, they will appear as a list on this page. To create a new landing page, click the Create Landing Page button at the top of the page (Figure 1).
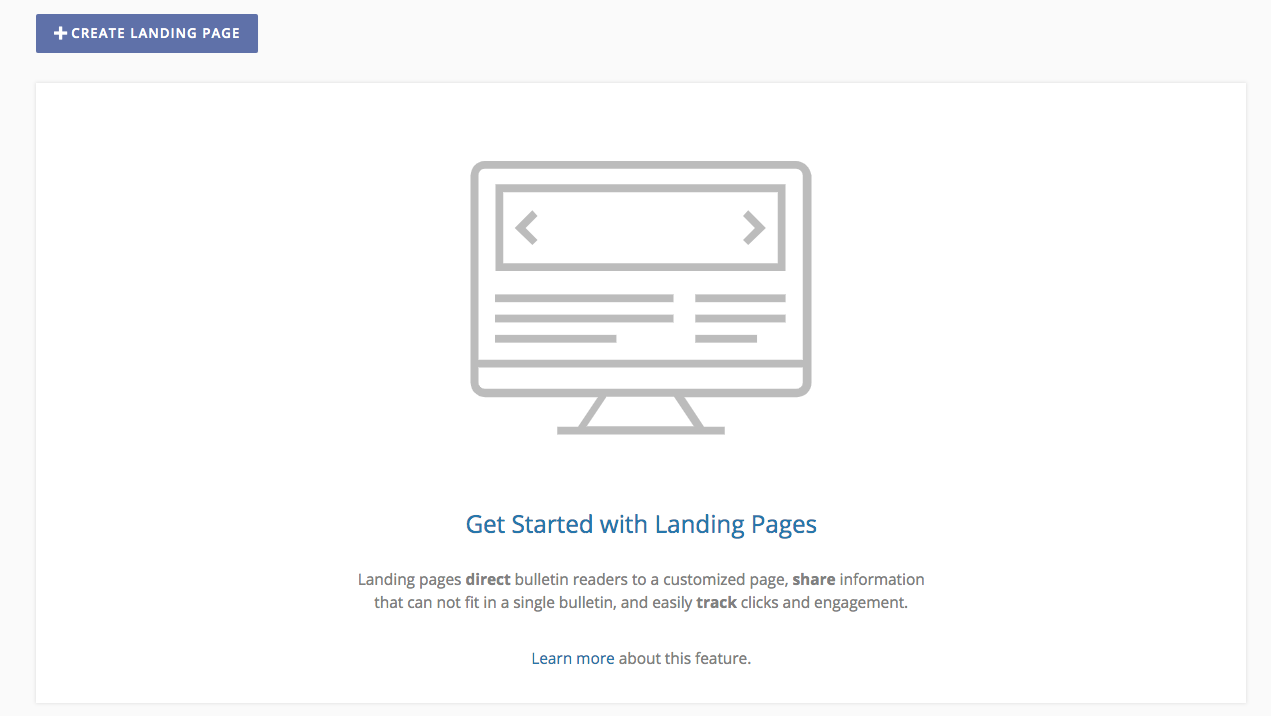
Figure 1
A blank editor will appear on the next page (Figure 2), with required fields for Name (The internal name of the landing page you will see in the list on the previous page. This will not be seen by your audience.) and Web Page Title (The title which displays in a browser tab when someone visits your landing page).
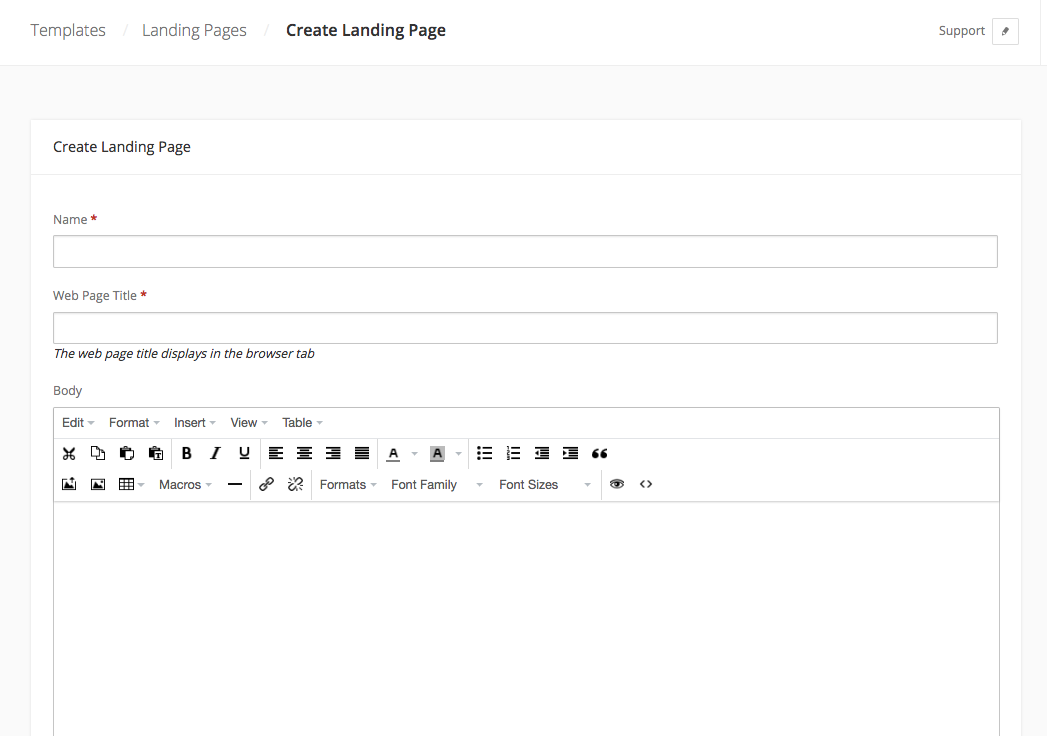
Figure 2
From this editor you can create and style your landing page similar to how you would create bulletin content. The landing page editor is the same as the bulletin text editor, with one exception: the Macros drop-down menu in the landing page editor contains only the Account Name macro (Figure 3).

Figure 3
Publish and Unpublish a Landing Page
Publishing a landing page allows anyone with the link to view your landing page. If you try and link to an unpublished landing page from within a bulletin, there will be a warning on the bulletin's "Review and Send" page, but you will still be able to send the bulletin. At any time, you can choose to unpublish a landing page, even if a bulletin has previously been sent with a link to that page. If the landing page is marked as unpublished, all existing links to that page will be broken, and bulletin recipients will not be able to view the page.
At the bottom of the landing page editor, there is a small checkbox marked 'Published', which is checked by default. To unpublish the landing page, uncheck this box and click Save (Figure 4).

Figure 4
On your list of landing pages, you can see which of your pages have been published (denoted by a checkmark in the 'Published' column, Figure 5), and choose to unpublish select pages by clicking the "Unpublish" button for the landing page. If the page has not been published yet, the button will read "Publish", and clicking it will publish the landing page.
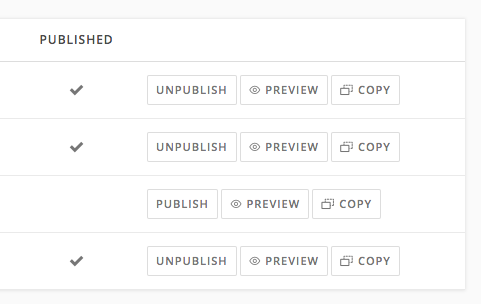
Figure 5
Editing a Landing Page
You can edit a landing page prior to publishing and sending your bulletin, and you can also edit the landing page after the bulletin has been sent. This is useful if you need to update information on the landing page. This way, anyone clicking the link to the landing page within your bulletin will be directed to the latest version of the landing page, without you having to send an updated or corrected bulletin.
To edit a landing page, go to Templates > Landing Pages and click on the name of the landing page you wish to edit. This brings you to the same editor in which you initially created your landing page.
Copying a Landing Page
To copy a landing page, navigate to your list of landing pages and click the Copy button to the far right of your selected landing page (see figure 5). This will open a new version of your existing landing page that copies all of the fields, including whether the page is published or not. Make any changes to the copy that you wish, and then hit the Save button. You must click Save in order to finish creating the new copy of your landing page.
Linking to a Landing Page
Once you have completed and published your landing page, you must create a bulletin to go along with your page before the page can be viewed by others. Within the bulletin text editor, select the text or image to which you would like to link your landing page. This might be a "Read more" button at the end of a section of shortened content, or specific text within a paragraph. Click the link icon  .
.
A pop-up box appears, allowing you to insert a link to a webpage, account file, or landing page. Select the Landing Pages tab. This tab lists all the landing pages available for your account, their creator, the last day they were edited, and whether or not the page is published (Figure 6).
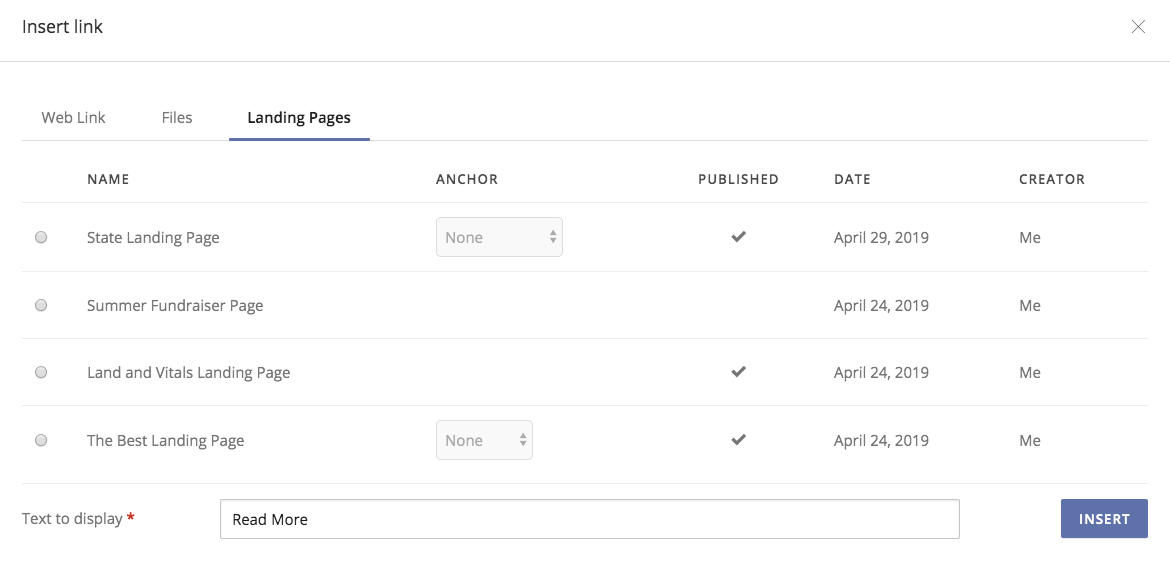
Figure 6
If there are any anchors in your landing page, there will be a drop-down menu next to the name of the landing page allowing you to select which anchor to link to. If you do not select any anchor, the bulletin link will be directed to the top of the landing page.
Preview a Landing Page
While editing your landing page, at any time you can preview the page by clicking the Preview button at the bottom of the editor (Figure 7). This will open a new window and display what users will see when visiting your landing page. From here, you can test any links added to your landing page.

Figure 7
You can also preview your landing page from within your bulletin preview. This is helpful for testing any anchor links to the landing page. From within the bulletin editor, click the Preview button at the top of the editor (Figure 8). This will open a new window and display a preview of your bulletin. From here, any links to your landing page will work, and you will be able to preview your landing page as well as the bulletin.

Figure 8
Reporting
After sending your bulletin, the Bulletin Detail Report will be available for review. In addition to providing an overview of delivery metrics, opens, and clicks for the bulletin itself, this report now contains a section dedicated to the click rates for landing pages and anchor links. This section of the report shows you the name of the landing page(s) to which the bulletin linked, the specific anchor link used (if applicable), the number of unique clicks, and the total clicks for each landing page link in the bulletin (Figure 9).

Figure 9
Note: The click metrics listed in this report are only a measure of clicks directly from the bulletin, not anonymous visits (for instance, if you or a recipient sent the direct landing page URL to another person, their click(s) would not be reflected on the bulletin detail report.
You can access the Bulletin Detail Report in one of three ways:
Direct Email:
When sending your bulletin, toggle "Send Bulletin Detail Report" to "Yes" at the bottom of the bulletin editor page. This will send a copy of the Bulletin Detail report directly to your govDelivery Administrator email address after deployment.
Via Sent Bulletins:
- Click Bulletins on the lefthand navigation bar
- Select the Sent tab at the top of the page
- Click on View Report to the right of the bulletin you wish to examine
Via the Bulletin Analytics Report:
- Click Reports on the lefthand navigation bar
- Select Bulletin Analytics Report
- Select the timeframe for which you would like to see bulletin data, and click Search(?)
- A list of bulletins sent in the selected timeframe will appear. Click on the name of the bulletin you wish to examine.
Example: State-Specific Information using Anchors
A national agency may want to use a bulletin landing page to share different information with their subscribers based on the subscriber's state. Instead of including information for every state within their bulletin, they can instead link the name of each state directly to detailed information on the landing page.
Landing Page:
- Create your landing page content, and include relevant sections. In this example, that would include a section or paragraph for each US state.
- Add an anchor to each location you want to link to by selecting Insert > Anchor (Figure 10).
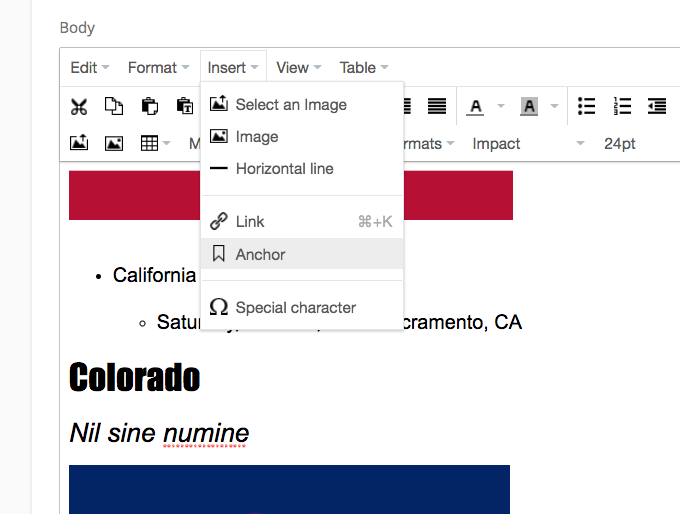 Figure 10
- A pop-up box appears asking you to name your anchor (Figure 11). Choose a unique and descriptive name for each anchor on your landing page, and click OK.
 Figure 11
4. Repeat this process for each anchor you want to create in your landing page.
Bulletin:
- Select the text you wish to link to your landing page's anchor, and click the Link icon (Figure 12).
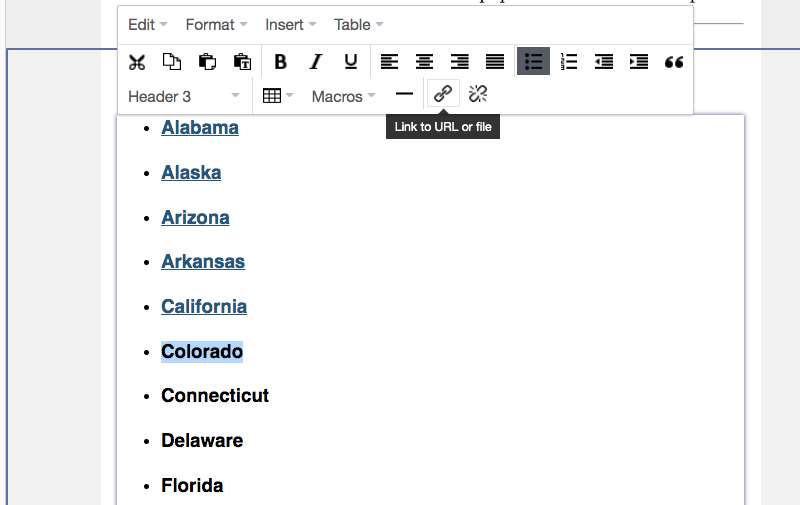 Figure 12
- A pop-up box appears, allowing you to insert a link to a webpage, account file, or landing page. Select the Landing Pages tab (Figure 13).
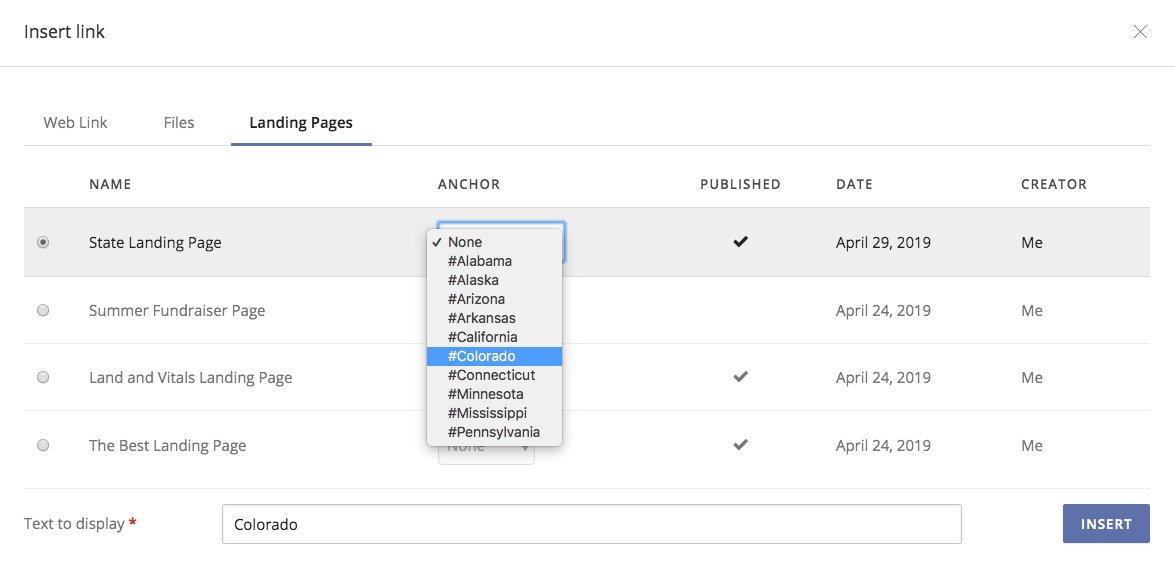 Figure 13
- This tab lists all the landing pages available for your account, their creator, the last day they were edited, and whether or not the page is published. Select the landing page you would like to use, and under the Anchor drop-down menu, select which anchor you would like to link to the text in your bulletin.
- Repeat this process for each anchor you created.
- Click Preview to review your bulletin and test your landing page links.
- Test, and Send your bulletin.
Frequently Asked Questions
What is the difference between Landing Pages and Shared Bulletin Pages?Shared Bulletin Pages (previously known as landing pages) are unique govDelivery webpages representing a bulletin that you can choose to share with non-subscribers. Landing pages are separate pages that can only be linked to within a bulletin.
Can I share a landing page with someone who is not a bulletin subscriber?No.
Landing pages cannot be linked independently of bulletins. If you want someone to see the content of your landing page, you must
associate the page with a bulletin and send the bulletin to that subscriber.


