Introduction to Flexible Templates
Flexible Templates are a type of bulletin template that allows you to drag and drop blocks of content directly into the template to quickly preview and edit your communications. This is different from Advanced Bulletin templates that use stock or custom layouts where you must switch between layout code and the template editor to add or remove containers.
Benefits of Flexible Templates over Layout-Based Templates:
- More responsive emails for mobile users
- No coding knowledge required
- Default styling options allow you to style your templates quickly and completely
There are five different sections you can add to a Flexible Template: one, two, and three column, as well as two sections that create a sidebar effect (Figure 1). You can add as many sections as you like, building the rows and columns as you go, directly in the template. Once you've added at least one section, you're ready to start creating your content with content blocks.
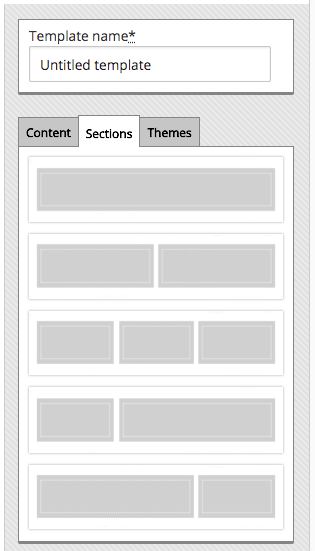
Figure 1
Getting Started
To get started building a Flexible Template, log into your govDelivery account, then:
- Click Templates in the left navigation bar
- Click Advanced Bulletin in the right navigation bar
- Click Create Custom Template
- Select Create Flexible Template
This will open a new, untitled template (Figure 2). The Sections tab will automatically be selected in the content menu.
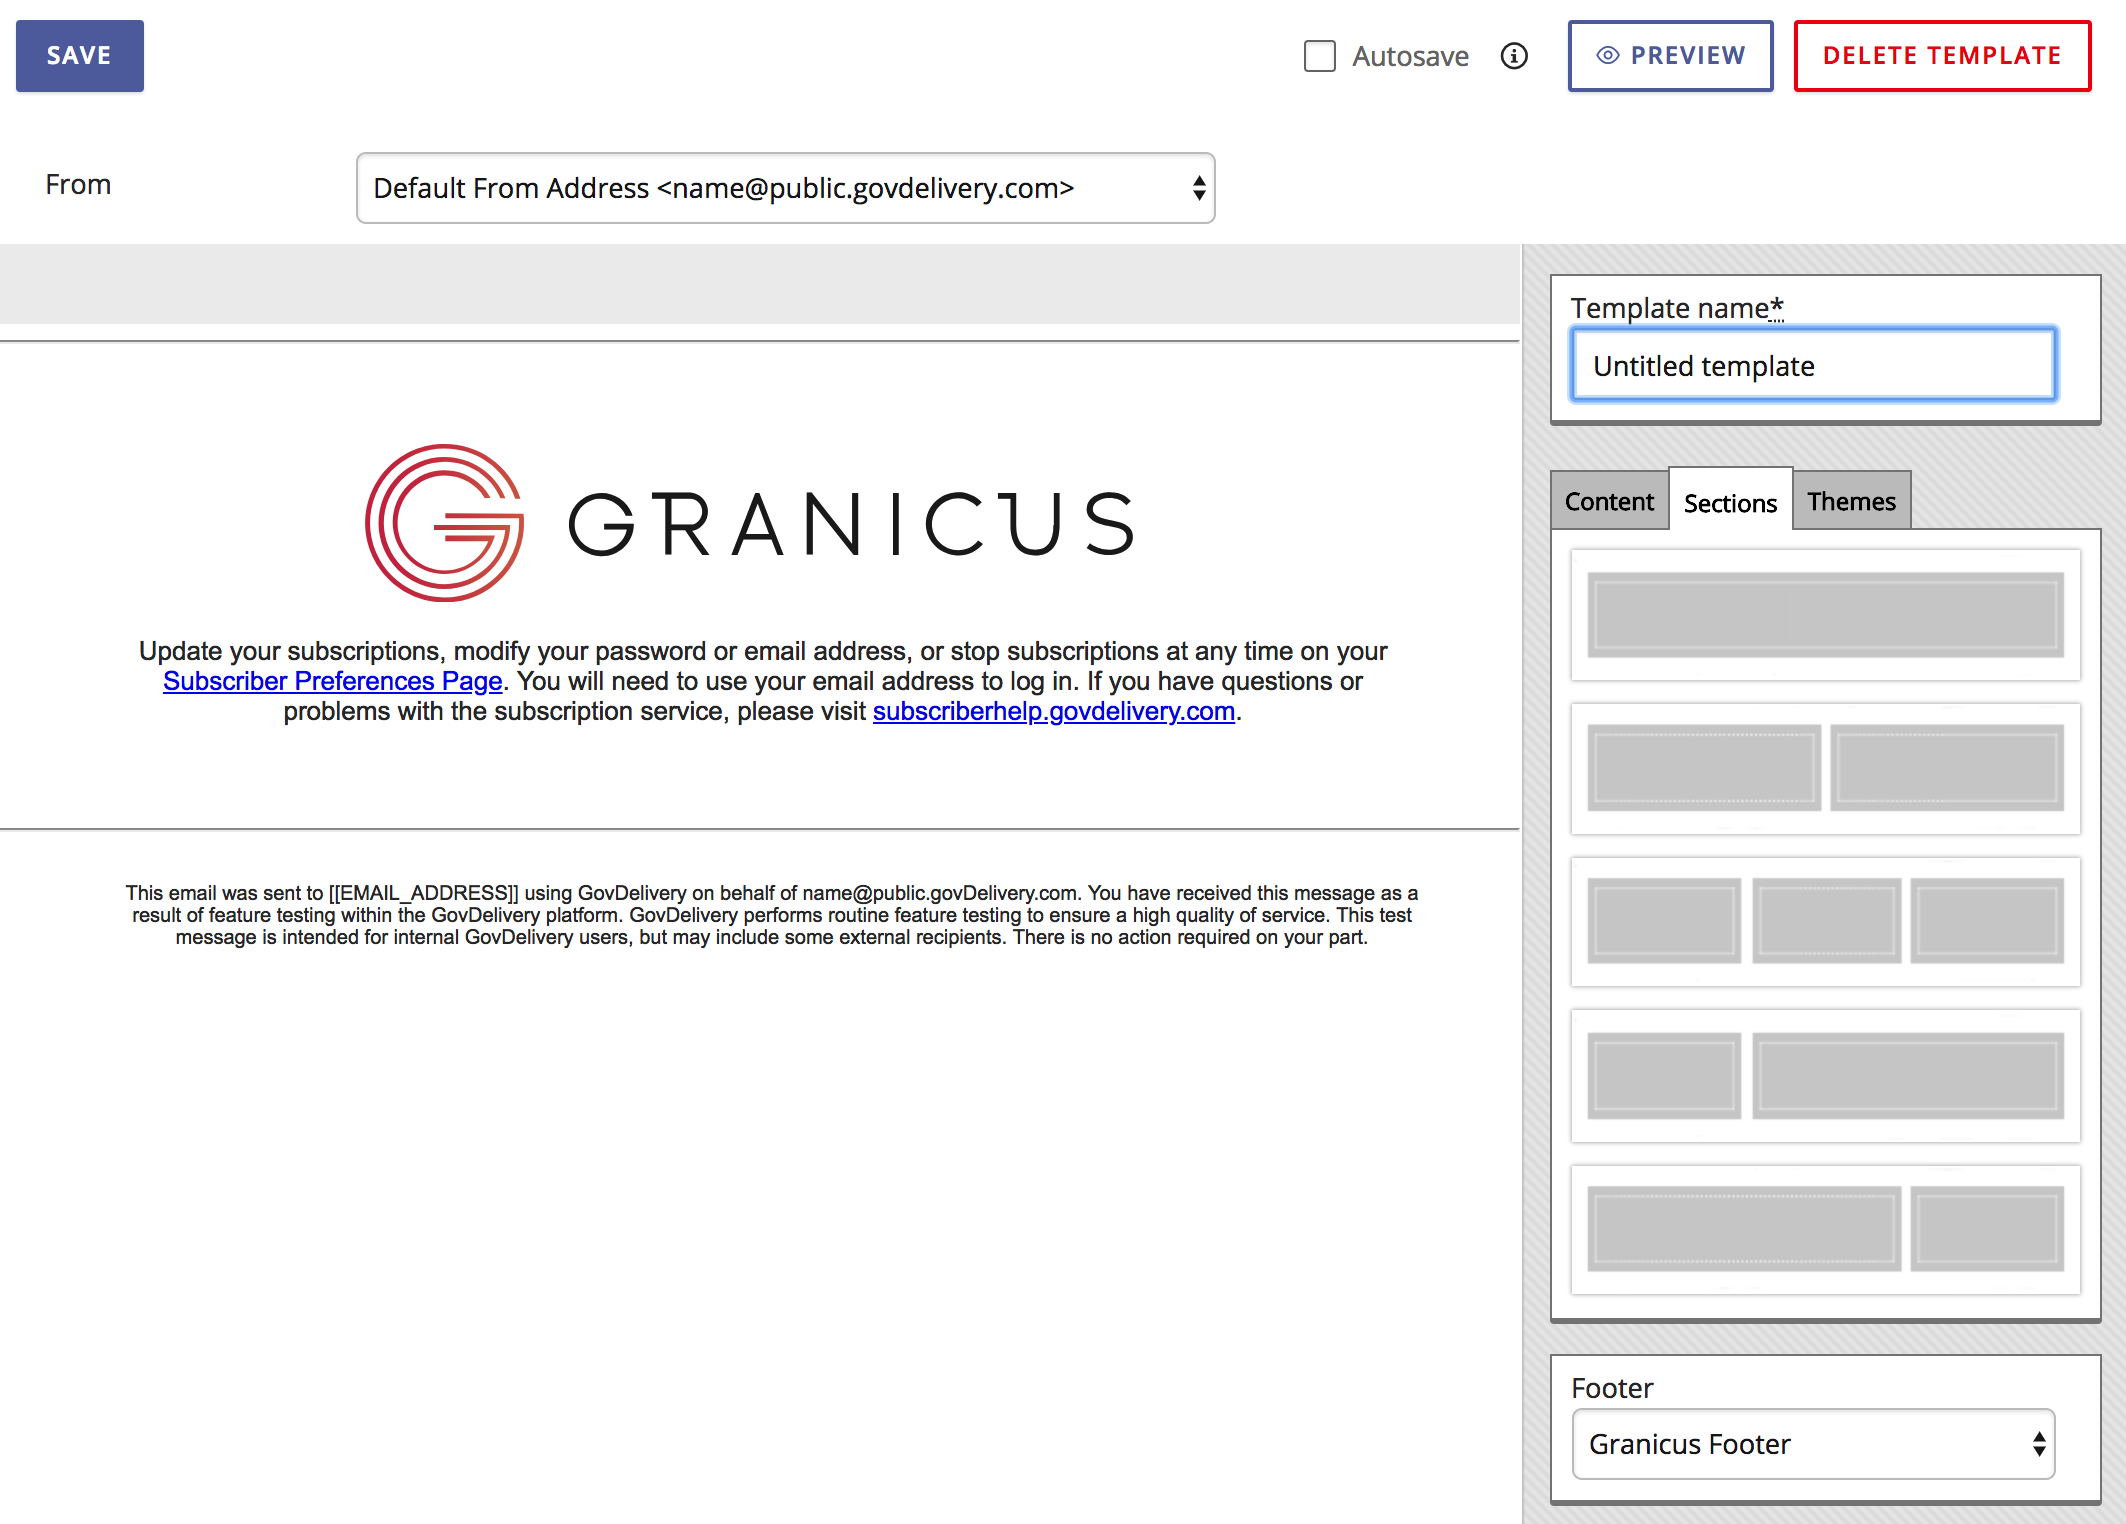
Figure 2
Building Your Template
Once you have opened a new template, you will start by working from the content menu. There are three content menu tabs: Content, Sections, and Themes. Each of these areas will be explained in more detail later in this article, but briefly you:
- Create rows and columns by adding sections from the Sections tab
- Add content blocks to the columns from the Content tab
- Style each section row and/or column using the Themes tab
Adding sections
To add a section, drag it from the Sections content menu tab into the template body. As you drag the section, you will see a dotted outline appear (Figure 3). Drop the section when the line turns solid to add it to your template (Figure 4). If you drop the section while the line is dotted, it will not be added to your template.

Figure 3

Figure 4
Editing sections
Hover your mouse over a section to view the editing options: move, lock/unlock, and delete (Figure 5).

Figure 5
Section editing icons explained:
 To move a section, click the move icon and drag the section to a new location.
 By default your section displays the locked icon, meaning the section cannot be moved or deleted in bulletins created from this template.
 Click the lock icon to unlock it, meaning the section can be moved or deleted in bulletins created from this template.
 Click the trash can icon to delete the section. A pop-up window will appear to confirm you actually do want to delete the section before it is deleted.
Adding content blocks
Once you’ve added your sections, click the Content tab on the content menu. Drag a content block into the editor and drop it into a section column. Similar to adding sections, you will know where the content block will land by the solid container outline (Figure 6).
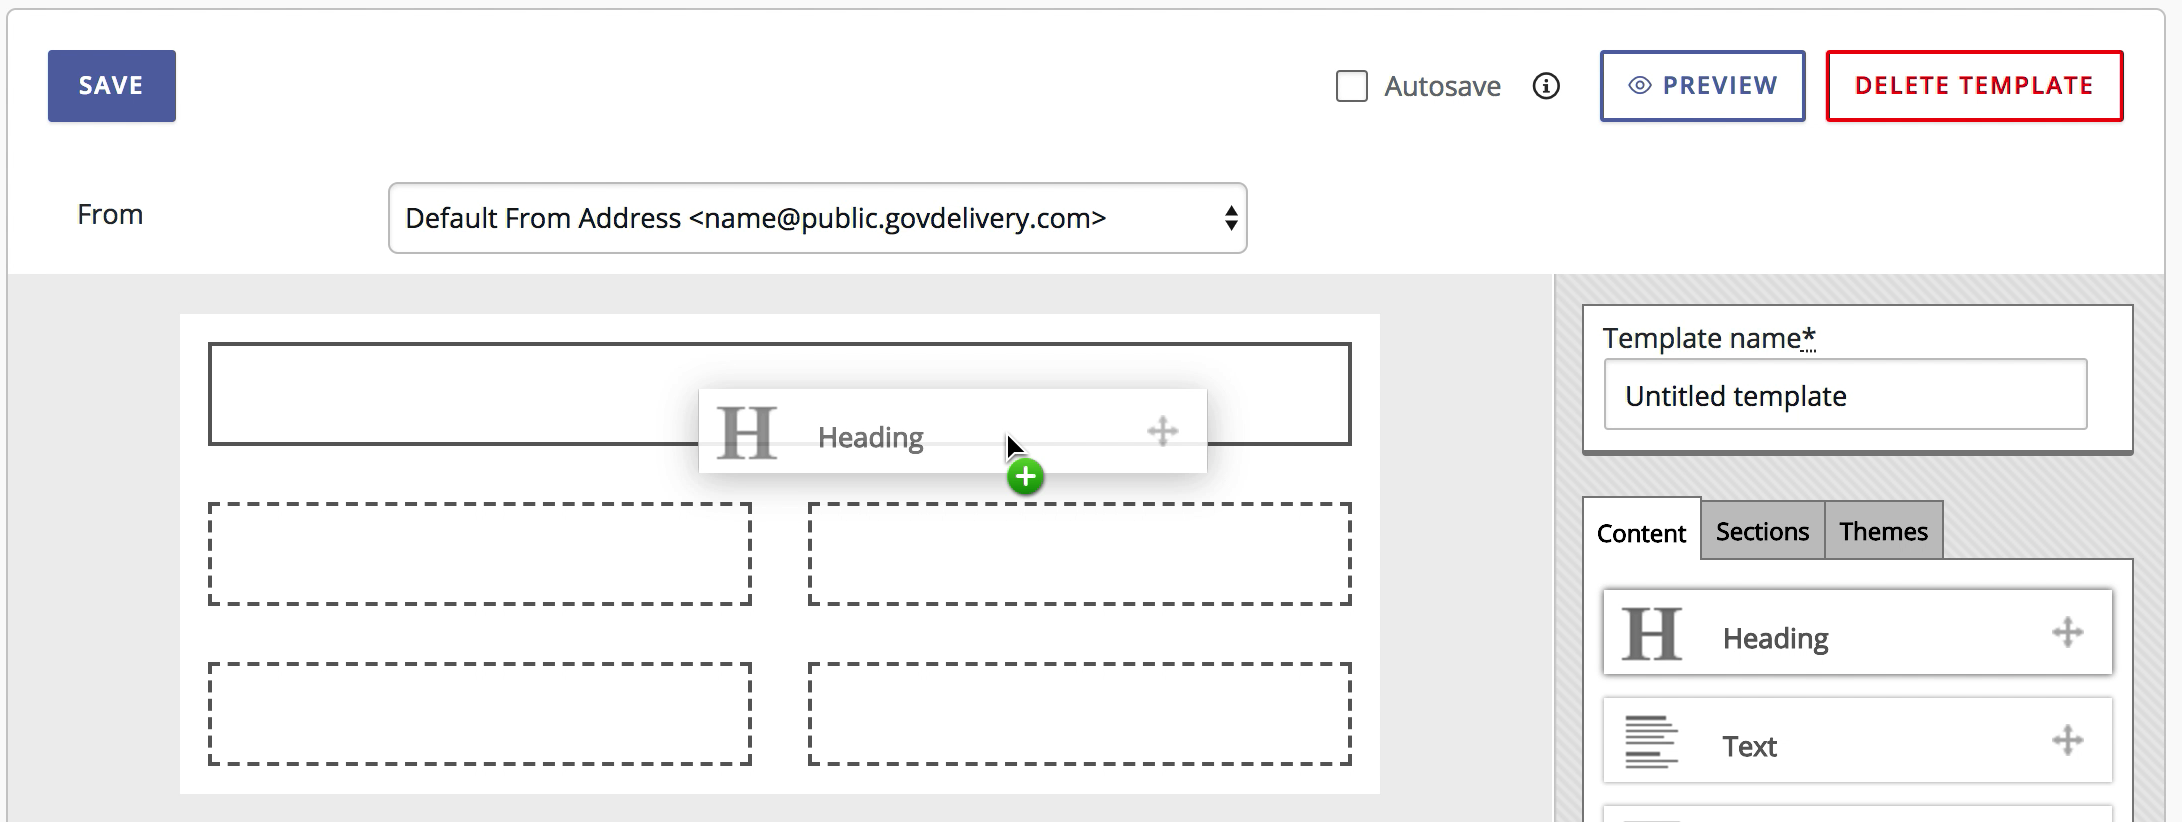
Figure 6
Content blocks are edited the same way in section-based templates as they are in layout-based templates. Learn more about editing content blocks.
Themes
To style your template, click the Themes tab and select Custom from the drop-down menu. You will see expandable areas for styling your template body, setting column defaults, and individually editing rows and columns (Figure 7).
- Rows are numbered automatically according to their order in the template, from top to bottom. For example, Row 1 is in the first section, Row 2 is in the second section, etc.
- Columns are also numbered automatically according to their order in each row, from left to right. For example, in a three-column section, the leftmost column is column 1, the middle column is column 2, and the rightmost column is column 3.
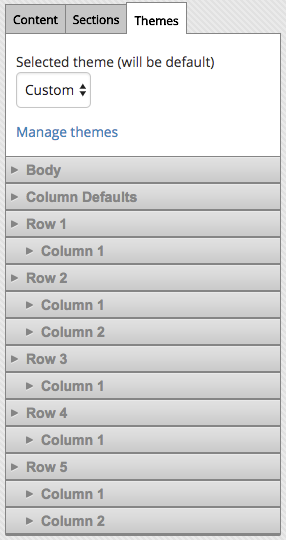 Figure 7
Body
To style the body background color or background image, expand the area by clicking the arrow next to Body, and select the color or image.
Column Defaults
The Column Defaults feature (Figure 8) allows you to set the style for all the columns in the template at once. This is an improvement from layout-based templates where you must style each container individually to fully style your template. To style the column defaults, expand the area by clicking the arrow next to Column Defaults, and style the various elements using the options as you normally would.
Note: You can still modify individual columns without affecting the default styling that is applied to all other columns.
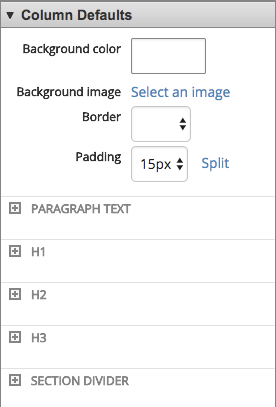
Figure 8
Row
To style the background color of a particular row, expand it by clicking the arrow of the row you want to style, and select a background color.
Column
To style a particular column (and overwrite any Column Defaults styling), expand it by clicking the arrow next to the column you want to style, and edit the various styles (Figure 9).
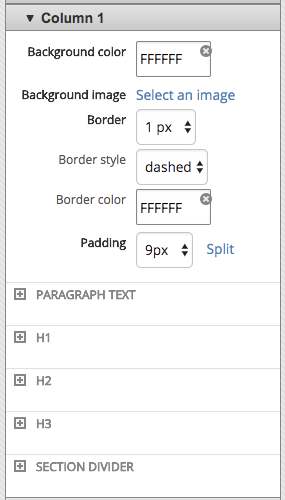
Figure 9
If you need help with Flexible Templates, contact Support at support@granicus.com and we will answer your questions.


