In the standard subscriber flow, constituents could sign up for updates from your organization using signup forms designed by Granicus. With the new Signup Builder feature, your agency can create its own signup processes, including forms overlaid or embedded on your website, and separate forms for each topic your govDelivery administrators manage. The benefits of the Signup Builder include:
- Subscriber growth: entice visitors on your website to subscribe to updates from your organization.
- A shorter implementation time from idea to your first topic subscriber- create a new signup form in minutes!
- Meet subscribers where they are: make page-specific signups to allow visitors to sign up for department emails right on that department's page.
- View reports on the number of subscriptions based on your signups, enabling you to make quick changes to the process, and engaging more subscribers.
Note: Only users with Account Admin permissions or higher can use the Signup Builder.
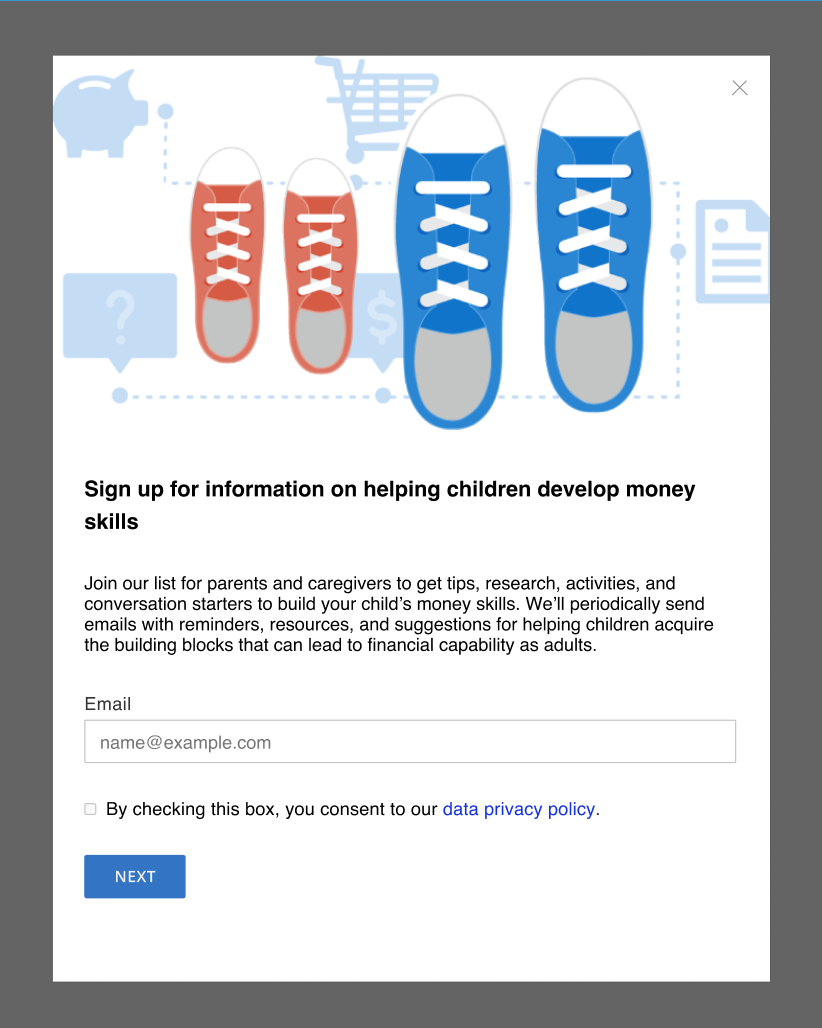
There are 5 steps to creating a custom signup:
- Create a Signup Theme.
- Build your signup.
- Associate your signup with an audience.
- Publish, and select how your signup will display to your subscribers.
- Place the code for your signup on your website.
Step 1: Create a Signup Theme (Optional)
If you want to use a particular banner image, color scheme, or font in your signup, you'll need to create a signup theme first. Once at least one theme has been created and set as the default for your account, you can skip this step for subsequent signups.
See this article for how to create a theme for use in your signup.
Step 2: Build your Signup
Click on Subscriber Capture on the left navigation bar, then click the Signup Builder button.
Existing signups will be listed here alphabetically. Click Create Signup to make a new signup, and give it a name. This is an internal-only name, and will not be visible to your subscribers. Make the name meaningful to differentiate from other signups in your account.
The styling and banner image that appears in the Signup Builder is your account's default signup theme, which was selected while creating your signup theme (see step 1 above). You can change this by selecting a different theme in the Themes tab on the right of the Signup Builder, or by editing the signup theme itself.
When creating your signup, you can edit two required steps:
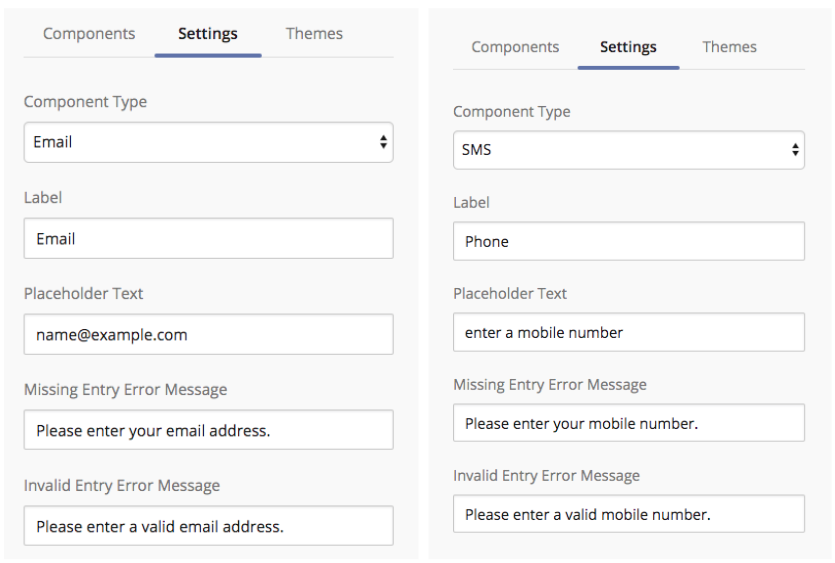
Destination: The first signup page that visitors to your site will see. By default, this will include a space for subscribers to enter their email address. You have the option of changing the placeholder text and error messages that appear if a subscriber does not complete the form. You can also change this component to accept phone numbers for SMS updates, or either email or SMS.
Success: This is the final step that new subscribers will see, where they can (optionally) subscribe to updates from network partners. By default, this step includes a Finish button to end the signup process. To create a better experience for your subscribers, this button behaves differently depending on whether the signup form is embedded into a website, overlaid on a website, or displayed on its own govDelivery hosted page. The button will close overlay signups, and not display at all in embedded signups. For signups on hosted govDelivery pages (link signups), the button will redirect subscribers to another webpage to finish the signup. By default, this will send subscribers to your agency homepage, but there is the option to link to a different page by clicking on the Button component, selecting the Settings tab, and editing the Redirect URL.
Optionally, you can add extra steps by clicking the
+ (plus) button between the Destination and Success steps. Each step can be customized by editing and adding
Components.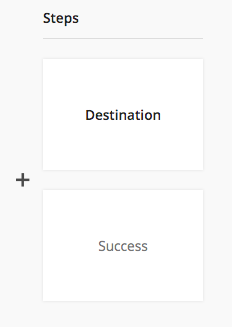
Components
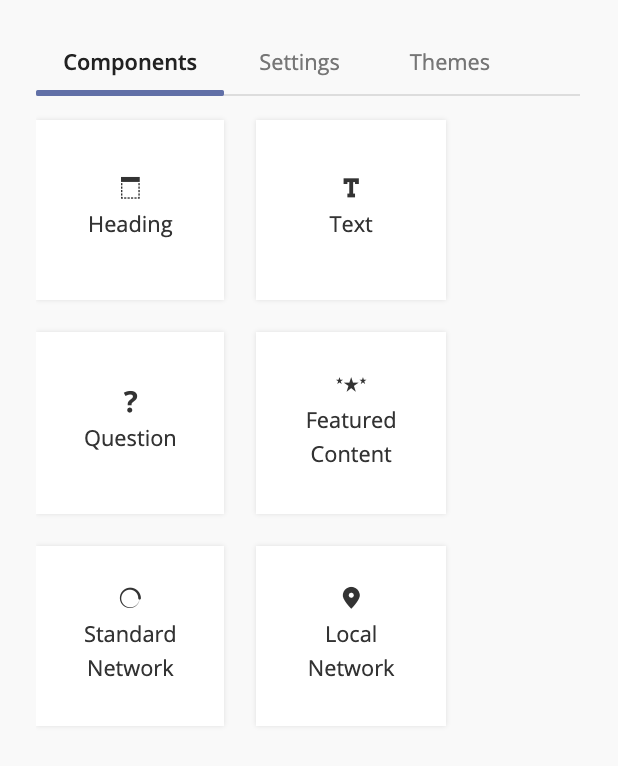
You also have a choice of adding the following additional Components by clicking and dragging a component into your signup. When you select a component, the Settings tab will open and you can edit the content of the components.
- Heading
- Text
- Questions: Questions can be added to signups to collect more information from subscribers, such as data on their locations, demographics, and interests. An Account Admin must first create the questions before they can be included in a signup. Signup forms can contain up to 5 questions per screen. Questions can be set to optional or required. Before creating or adding questions to your signup, and for more information on how to implement them, we recommend reviewing the Questions Overview and the Best Practices for using Questions section.
- Featured Content: Featured Content represents lists of topics which have been curated by an Account. Featured Content that has been added to a signup can not be deleted. If you wish to remove Featured Content associated with a signup, you must first update the signup to no longer reference the Featured Content.
- Administrator. If you already have Featured Content lists created for your account, you can select and add them to your signup here. This will display a list of topics on your signup which new subscribers can opt-in to subscribe to. To create or edit a Featured Content list, read our Featured Content article.
- Standard Network: Clients who are part of The govDelivery Network will have the option to display a section of recommended govDelivery Network partners.
- Local Network: Clients who are part of The govDelivery Network will also have the option to display a section of recommended govDelivery Network partners tailored to individual subscribers based on their location.
Note: Only Heading and Text components can be added to the final "Success" step of a signup.
Themes
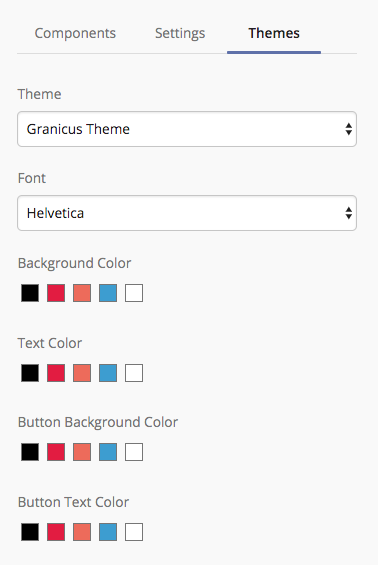
Select a Theme from the dropdown menu of available themes. If there are no themes listed, you can create one in Templates > Signup Themes.
The font and color options chosen when creating the theme will be available in the Signup Builder. Use the theme's color options to select your signup's Background Color, Text Color, Button Background Color, and Button Text Color.
Step 3: Topics and Interests
Save your signup and click Finish. You will be prompted to choose designated topics for your signup. You can select more than one topic as a designated topic. When a visitor to your website goes through this signup process, they will be added as a subscriber to those designated topics selected. In order for a topic to appear in this list of designated topics to choose from, the Visibility setting for the topic must either be Listed or Unlisted (not Restricted). For accounts that are set up for SMS use, Wireless Alerts Enabled must also be set to Yes for the individual topic (these settings can be managed by admins within the Topics area of govDelivery).
Note: The Signup Builder is not suited for topics set up with Subscription Restrictions, Subscription Approval, or Subscriber restore settings enabled.
Admins creating a signup must also add at least one Interest. Interests are tags and can be common to multiple topics. Interests help you understand what topics are similar to each other. See our article Managing Interests to learn more.
Step 4: Review your published signup
When you finish adding Topics and Interests to your signup, Save, and click the Publish button at the top right corner of the signup window. After publishing, click the X at the top right corner to close the Signup Builder. You will be taken to a new page, which displays the performance of your signup, provides options for sharing your signup, and allows you to edit its appearance and topics/interests.
Tracks the following performance metrics about the signup:
- Total Impressions: The number of times the signup was displayed to a user.
- Total Conversions: The number of people who used the signup form to subscribe to your agency's updates.
- Conversion Rate: The percentage of people who used the signup form to subscribe to your agency's updates.
Click View Details in the top right corner of the Performance panel to display a table of recent impressions, including the URLs for pages that have shown the signup within the past six months, type of signup (Link, overlay, or embedded), and the impressions/conversion rate for each page.

Share Signup
Choose from the following three options to copy the code for your signup:
- Link: A govDelivery hosted page where subscribers can sign up to receive emails from your organization.
- Embed: Provides a snippet of code representing your subscriber capture form, that you can embed within an existing webpage.
- Overlay: Provides a snippet of code representing a box overlaid onto one or more of your webpages. Prior to copying this code, you can optionally change the width of the display box, and amount of time the signup waits before displaying on the page.
You can use more than one signup process on your site at once.
Update Signup
Click the Edit button to return to the Signup Builder to edit your signup. If at any point you no longer want your signup to be active, you can unpublish it by clicking the Unpublish button at the top left corner of the signup editor. If you had previously added the signup as an embedded form, overlay, or URL hyperlink to your website, the signup will no longer work once unpublished. Once a signup has been published once, it cannot be deleted, only unpublished. If you have set up a Signup promotion within a bulletin template, the promotion will be removed from the template (but not sent bulletins) once the signup is unpublished. At any time, you can re-publish a signup that has been unpublished by editing the signup and clicking the Publish button at the upper right corner.
Note: Unpublishing and republishing a signup does NOT alter or reset the impressions/conversion rate. Admins previewing the signup during the creation process will not count towards the number of signup impressions.
Manage Signup Topics
This section shows you the topics and interests associated with your signup. Click the Edit button to open the topics and interests dialog box to make changes.
Step 5: Place the code for your signup on your website or share the link to the signup
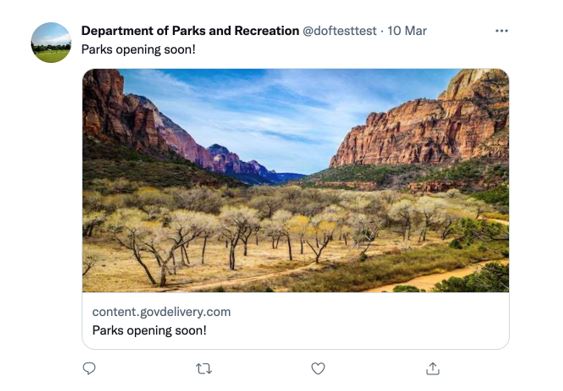
In the Share Signup section above, select how you would like to share your signup with subscribers. The Link option will open a dialog box with a URL to your signup and the Embed and Overlay option will open a dialog box with a snippet of code that can be incorporated into various pages on your website. If you share the URL to social media, the banner image chosen for your signup will display as the preview image on Twitter or Facebook alongside your account name and the first heading of your signup. An example can be seen below:
Once a published signup is available on your site, the Performance section on this page will update with the number of impressions and conversions, so you can get real-time information about how many people are viewing and interacting with your signup.
Note: The govDelivery interface will NOT tell you which pages on your website you have incorporated code to embed or overlay your signup(s), nor which pages or communications possess the link to your signup(s). We strongly recommend you or your IT department keep track of every location where your signup code or URL has been used. This is important if you ever decide to take down your signup. Signups that have been unpublished but remain live on a page will result in a broken link.
Step 6 (optional): Promote your Signup Within Bulletins
Use the Promoted Signups feature to attach promotional images within bulletins that link to your custom signup, to promote new and additional account topics to existing subscribers.
Managing Your Signups
Once you have created at least one signup, they will be visible on the Signups index page, available by going to Subscriber Capture > Signup Builder
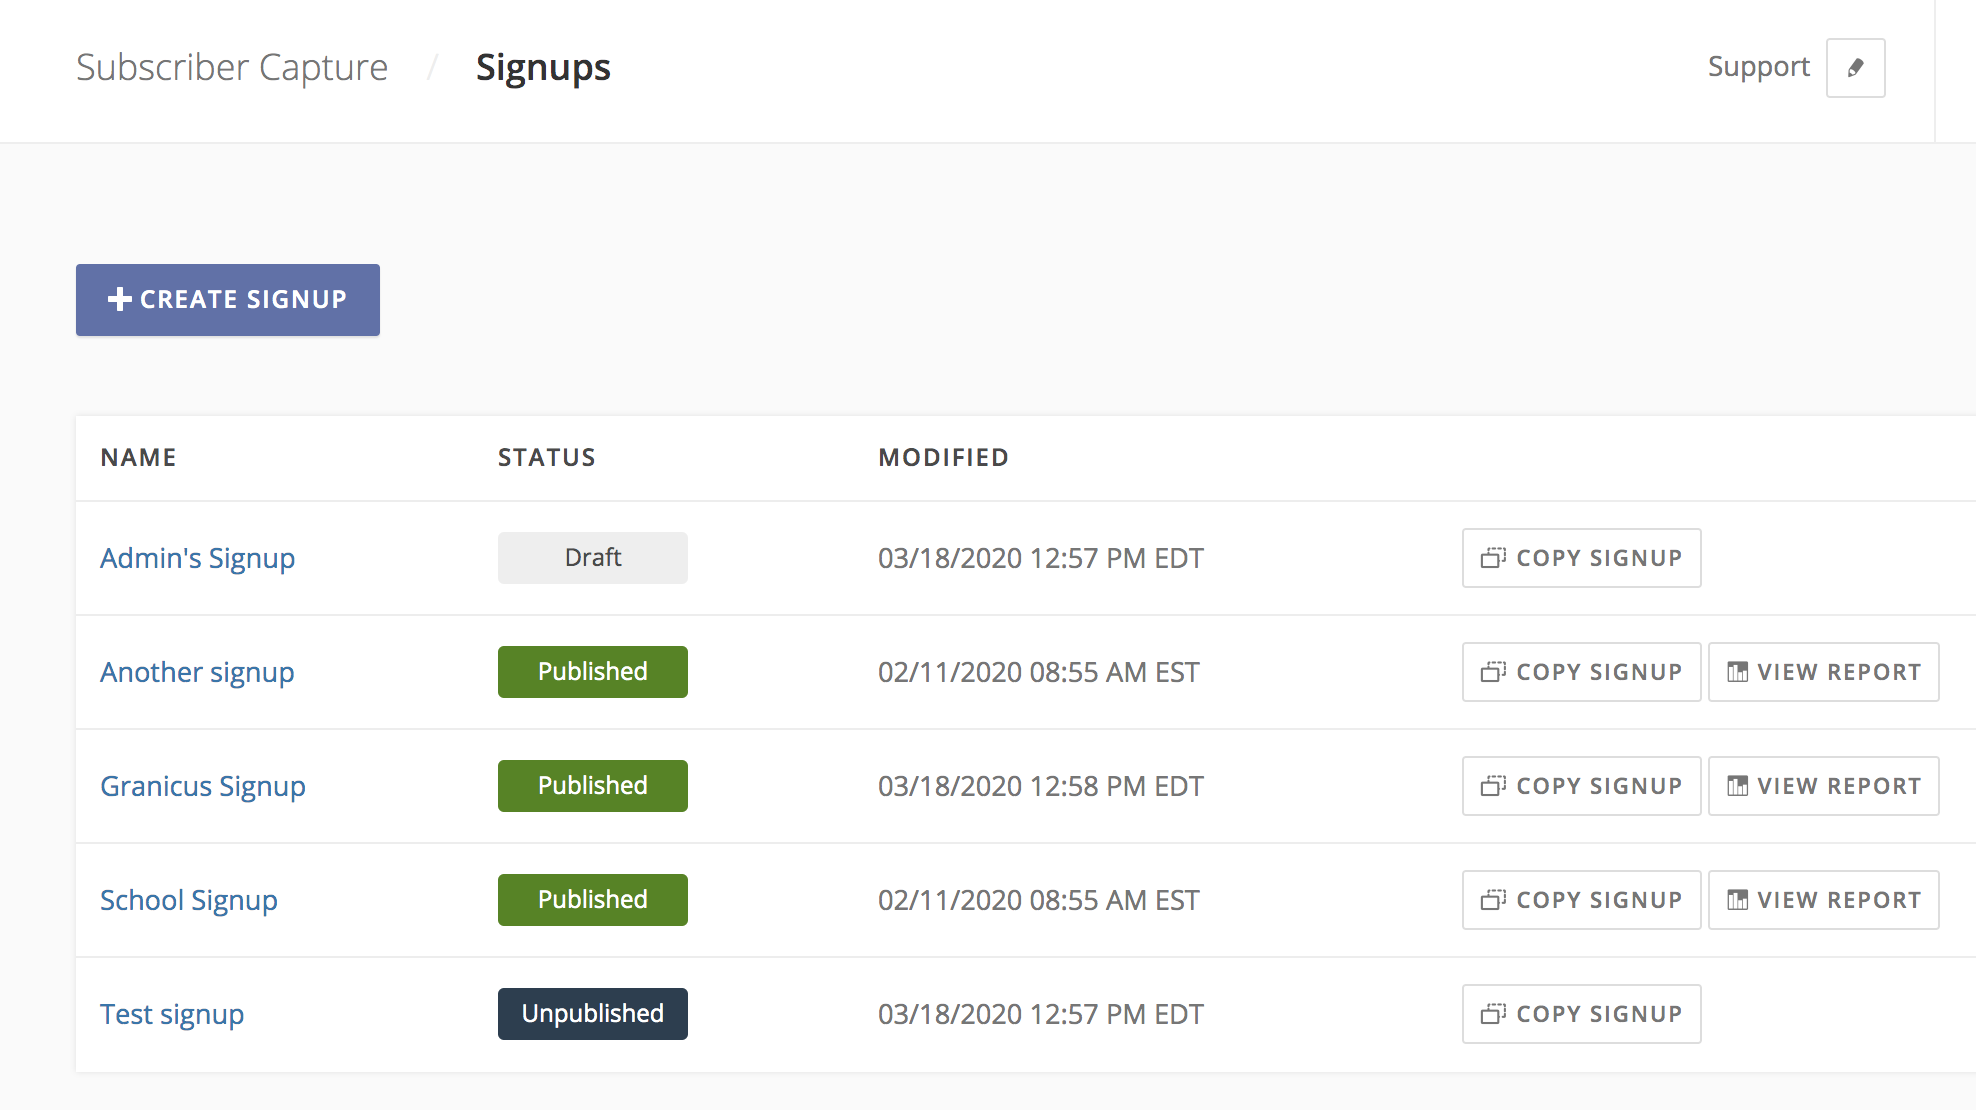
This page shows each of your signups, their status (either 'Draft', 'Published', or 'Unpublished'), the date they were last modified, and links to copy the signup or view its report. Any Draft signups (a signup that has never been published) can be deleted by editing the signup and clicking the delete button at the upper left corner of the signup editor. Once a signup has been published once, it can only be unpublished, not deleted.
If you would like to see exactly how many new subscribers your signups have brought in, review your Subscriber Activity Report. In addition to the Direct and Overlay line items, there is now a Signup Builder line item that displays how many new people have subscribed to your topic updates via a signup created with the Signup Builder.


