Adding images to your Advanced Bulletins will increase the visual appeal of your bulletins and help draw your reader's interest into your stories. The Advanced Bulletin Editor offers enhanced image capabilities, including an image library and the ability to crop and zoom into images.
Images are added to your advanced bulletin or template using an image content block. For more information about content blocks, see
Working with Content Blocks in Advanced Bulletins.

Using Images from your Image Library
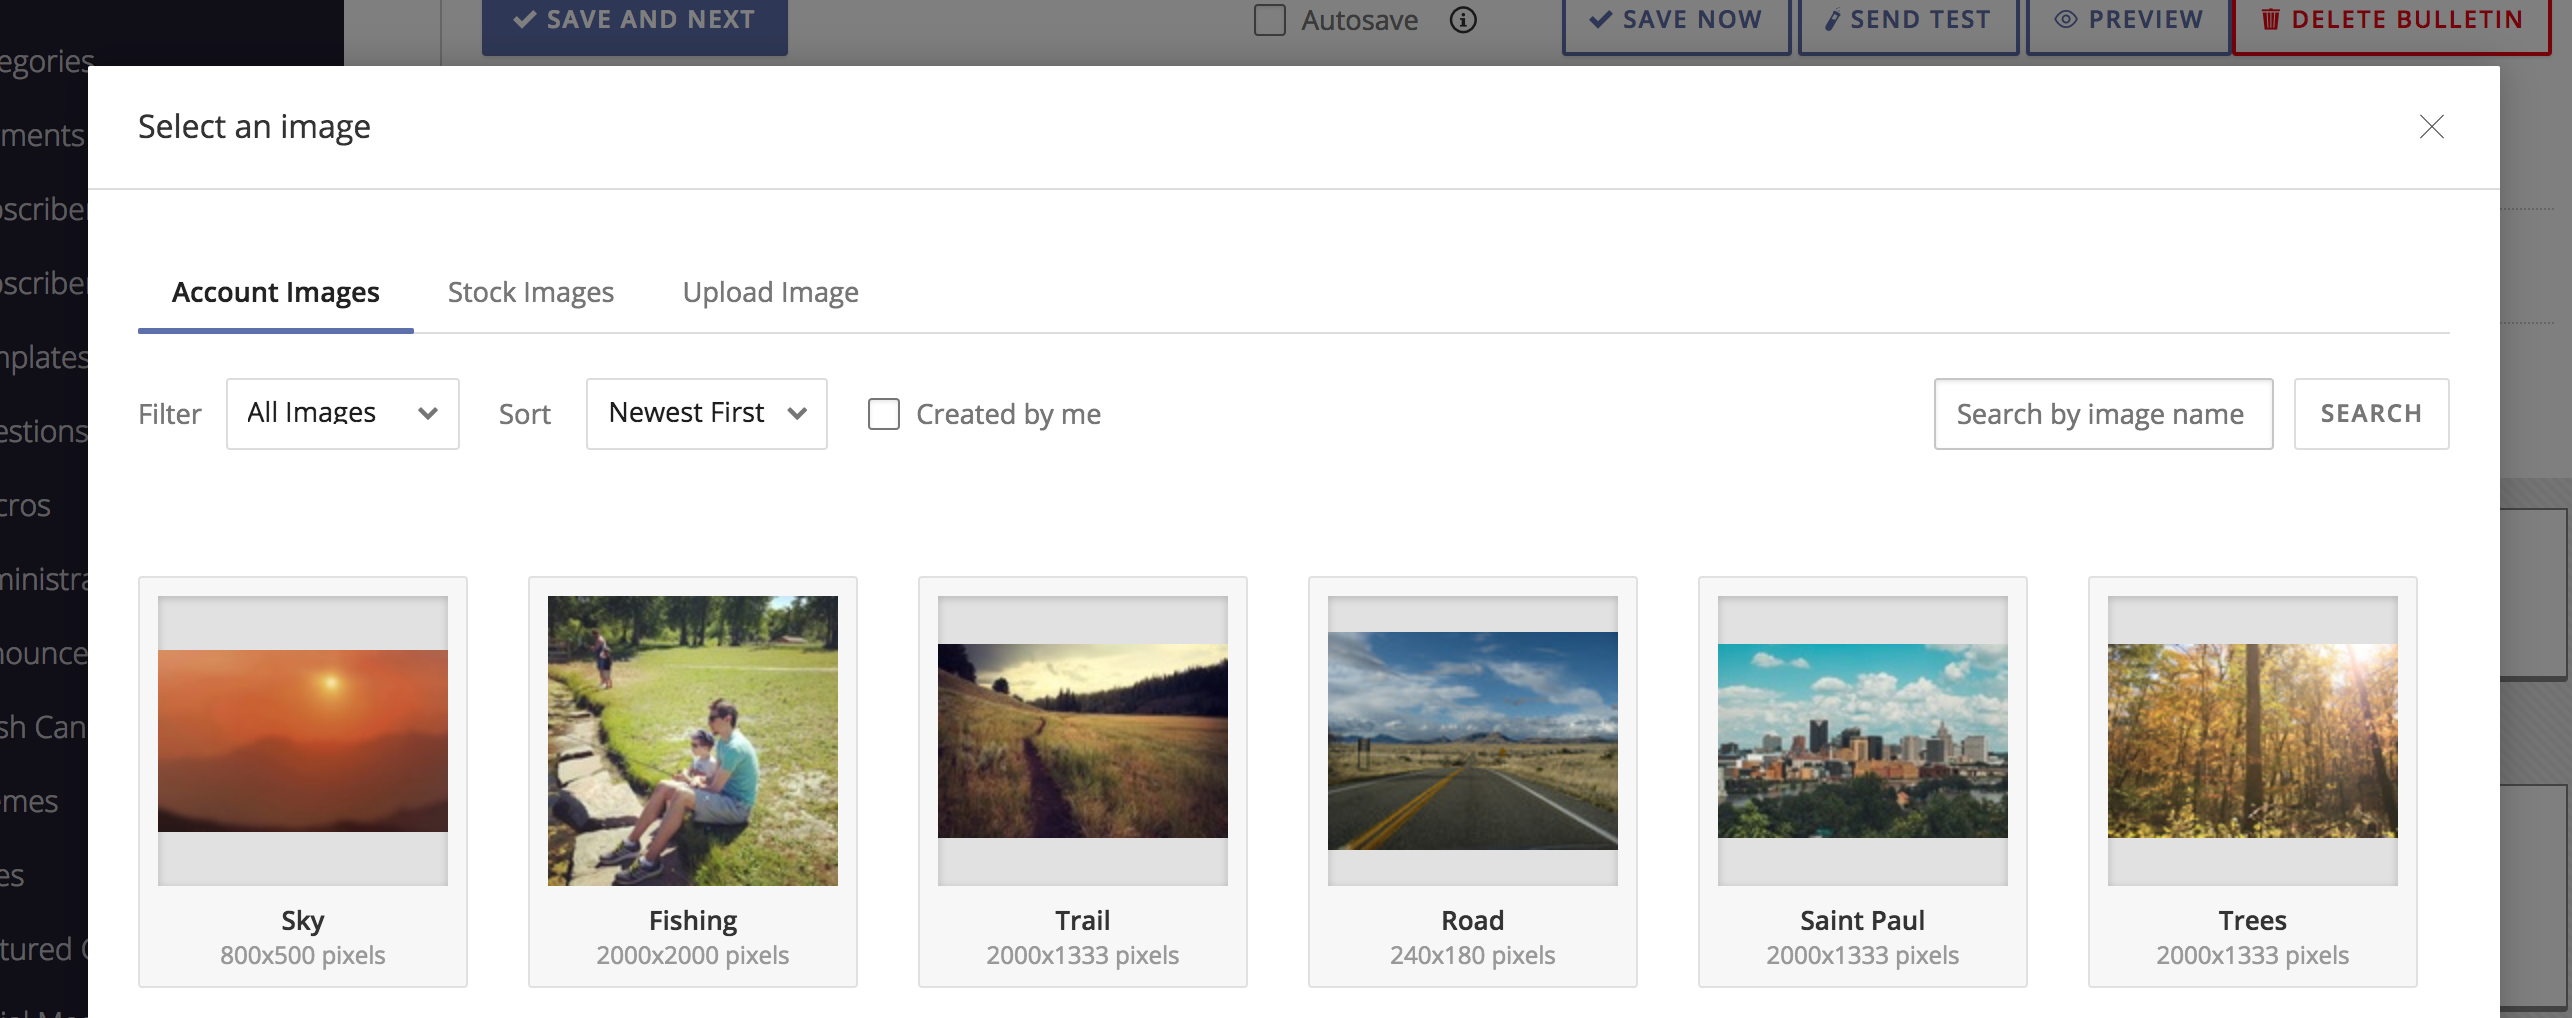
The image library allows you to access existing images and upload new images for use in your bulletins and templates. The image library features three tabs:
- Account Images: Images uploaded by users in your account
- Stock Images: Images provided by Granicus
- Upload Image: Where you can upload a new image
Under Account Images, you can filter by:
- All Images
- Everywhere: Images available for anyone in your account to use, excluding "Specific" and "Styling" images
- Specific: Images only available to a specific template or bulletin
- Styling: Images used in developing the template, including background images, etc.
- Images "Created by me"
You can search by image name within those filters.
Your library might already contain images. Images can be added to the library during bulletin creation, or from within the library itself. To learn more about uploading and managing images in the library, see Managing Images.
To upload an image from your image library to your bulletin or template:
- Click into an Image content block or Image+Text content block.
- Click the Choose/Upload button.
- Find an image by searching by file name and/or by using the available filters.
- Click the image you want to use.
Instructions for modifying an image once you have added it can be found below.
Uploading Images
To upload an image from your local or network drive to your bulletin or template:
- Click into an image content block.
- Click the Choose/Upload button.
- Click Upload Image.
- Browse for your image to select an image from your local or network drive.
- Enter an Image Name. This text is also used for the alt text (alt text appears if an image doesn’t load and is necessary for 508-compliance).
- Select Image Visibility. This controls where the image can be accessed. Your options include:
- For any bulletins with this template
- Only for this bulletin: Images will not be available for reuse in another bulletin.
- Styling images: Images used in developing templates, including background images, etc.
- Everywhere: Images available for anyone in your account to use.
- Click Upload Image.
Modifying an Image
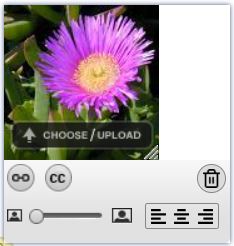
The Advanced Bulletin Image Editor allows you to crop, zoom, delete, and link images within your bulletins.

Use the following icons to modify your image:
- Click the Link icon (
 ) to open the link dialogue box. For more information about links, see our article Using Links in a Bulletin.
 - Click the Closed Captions icon (
 ) to add a caption to the image. Note: captions are available for the Image content block only. They cannot be added to the Image+text content block. For more information about the differences, see Working with Content Blocks in Advanced Bulletins.
 - Use the slider on the Zoom icon (
 ) to increase or decrease the size of your image.
 - Use the Align Text icon (
 ) to left-align, center, or right-align your image.
 - Click the Trash Can icon (
 ) to delete the image.


