This article covers how to set up approval workflows in Peak. You can either follow the video or written instructions below.
Once you've created an agenda item, you have the option to set up an approval workflow for it. There are two ways to set up approvals for a particular item: 1) when creating a new agenda item, and 2) when editing a previously created item. In either case, before you click the Create button, select the Set up Approvals checkbox. Note: A site setting can be enabled so that this box is always checked on creating items in Peak. The approval workflow setup process will then initiate as soon as you click Create, and you'll go to this page. You can also arrive here by clicking directly on Approval Status just above the item details:
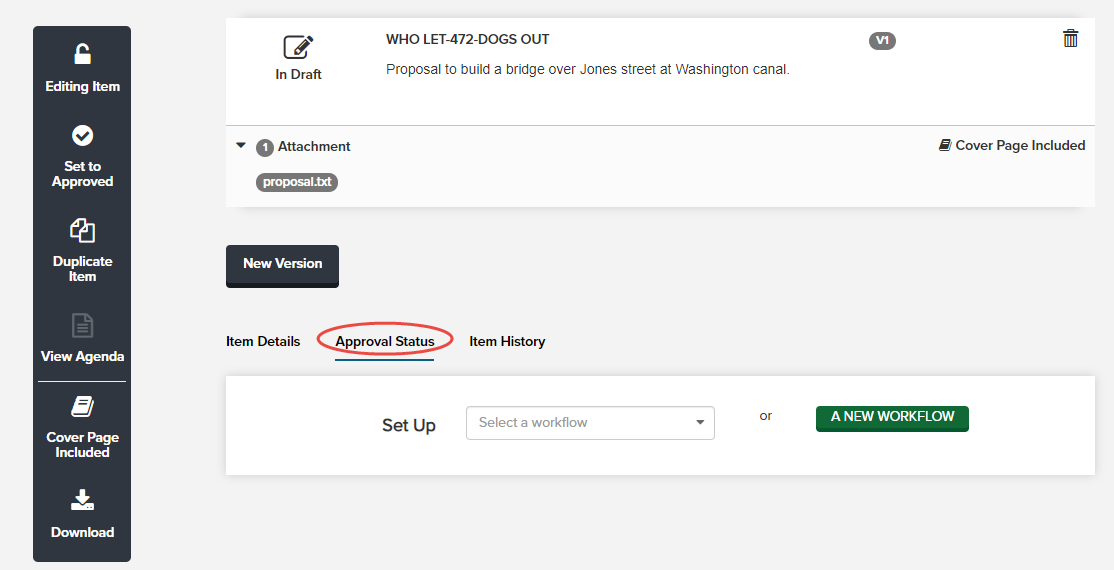
1. Decide whether you want to use a saved workflow or set up a new one.
- To select an existing workflow, click the Set Up drop-down menu and choose the workflow you want to reuse. You can edit an existing template, but you must then save it as a new workflow (Save as Template) if you want your updated version to be available for future use. Workflow templates can be deleted only by a Peak Admin via Admin > Agenda Items > Item Approvals.
- To add a new workflow from scratch, click the green A New Workflow button.
2. The workflow is broken up into phases. Click the Phase Name field, then type a name for the first phase. Then click the Add Approver button.
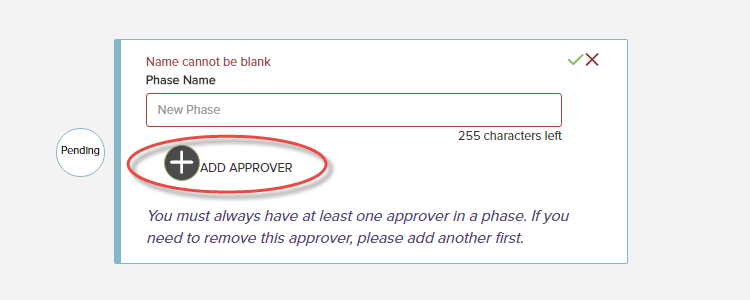
3. Select the name of your first approver from the drop-down menu. Then choose whether you want this person to be an Approver or FYI Only by clicking the corresponding button. FYI Only are people who are a part of the workflow but are not required to approve the file; they'll be able to view details of the agenda item, including attachments, for informational purposes. Click the green Add button.

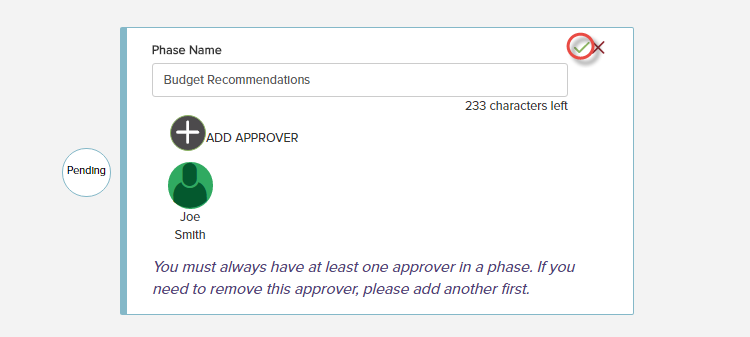
4. The approver's name and avatar now display on the phase. You can add multiple approvers to a single phase, or just use one approver on each phase to create a specific sequence for the workflow to follow. Repeat step 3 to add more approvers to this phase. When you’re done with the first phase, click the green checkmark in the upper right-hand corner of the phase box.
5. To add another phase, click the plus sign (+) underneath an existing phase.
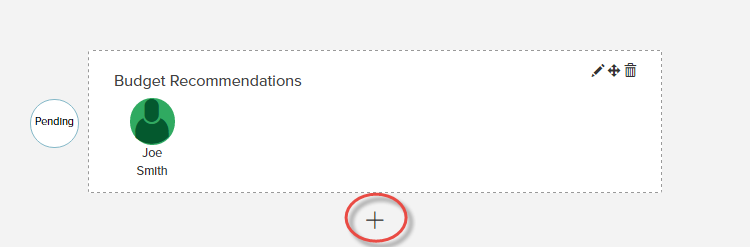
6. Once a phase is added, you can use the pencil to edit it, the arrows to drag and drop into a new order, and the trash can to delete.
7. When you’ve added all the phases you need, you can choose to save this workflow as a template for future use. To save the workflow for future use, click the Save as Template button. If you want to scrap your work and start again, click the gray Remove Template button. No changes will be saved if you choose to start over.
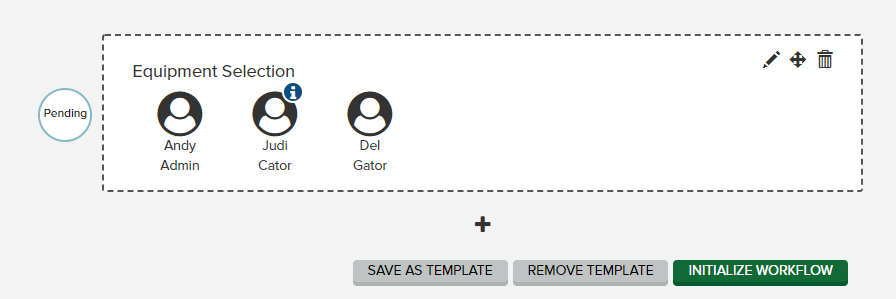
7a. You will be then be able to click the Template Name field and give your workflow a name. Click Save Template.
8. To initialize the workflow, click the green Initialize Workflow button.
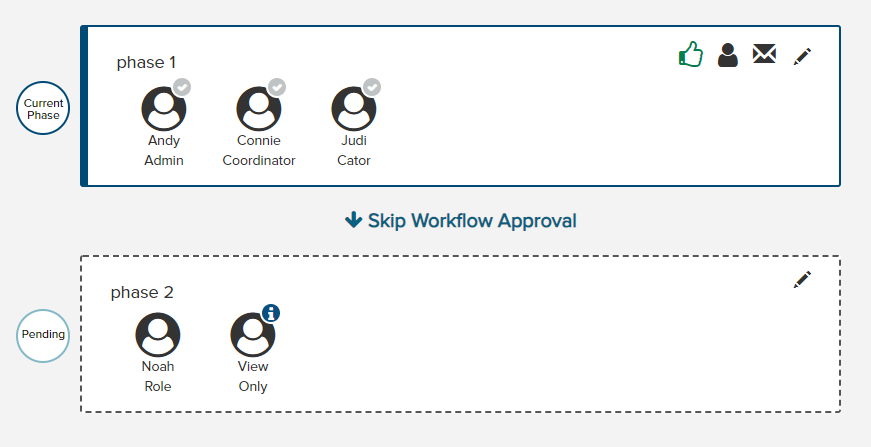
The approval workflow is now in review. Emails will be automatically sent to the approvers informing them that an agenda item requires their approval. Peak uses automated emails to alert the item's drafter and participants to various other workflow actions as well. See specifics about Peak's automated workflow notification emails.
Note: Workflows can be deleted only by Peak Admins via the Admin > Agenda Items > Item Approvals. Admins can also assign workflows to an individual or departmental owner, which will limit who has access to them. If you create a workflow here, for example, that you do not want anyone else to be able to use, contact your Peak Admin to assign you as the owner of the workflow; it will then display in the menu only for you.

