This feature is part of the govDelivery Advanced Package. If your organization is interested in accessing this advanced feature, submit a request or contact your Customer Success Consultant.
Test and Send campaigns provide a quick and easy entry into A/B testing. They take the guesswork out of design decisions. Test out subject lines, preheaders, graphics, and even message layout for on-the-spot optimization.
In a Test and Send campaign, two bulletins are each sent to a sample of your recipient list. The campaign tracks and compares subscriber engagement for each, and determines the more effective bulletin based on this engagement data. At the end of the campaign, the final bulletin is sent to all remaining subscribers.
How It Works
When you create your Test and Send campaign, you decide whether you want the campaign to automatically determine the winning bulletin and send it to the remaining recipients, or if you want to manually pick and send the final bulletin. This choice has the following effects on your campaign:
| | Manual | Automatic |
|---|
| Test Length | You choose the length of the test when you create the campaign. | The testing phase runs for 4 hours, but you can select and send the final bulletin at any time during or after the test. |
| Winner Criteria | You select the criteria for determining a winner when you create the campaign. | The campaign selects the highest scoring bulletin across all engagement data as the winner. However, you can choose which bulletin to send to the remaining subscribers. You do not have to send the winning bulletin. |
When you first start the Test and Send campaign, your campaign's status changes to Sending Tests. During this time, the campaign sends Bulletin A to a sample of your recipient list. When Bulletin A is sent, it sends Bulletin B to another sample of your recipient list.
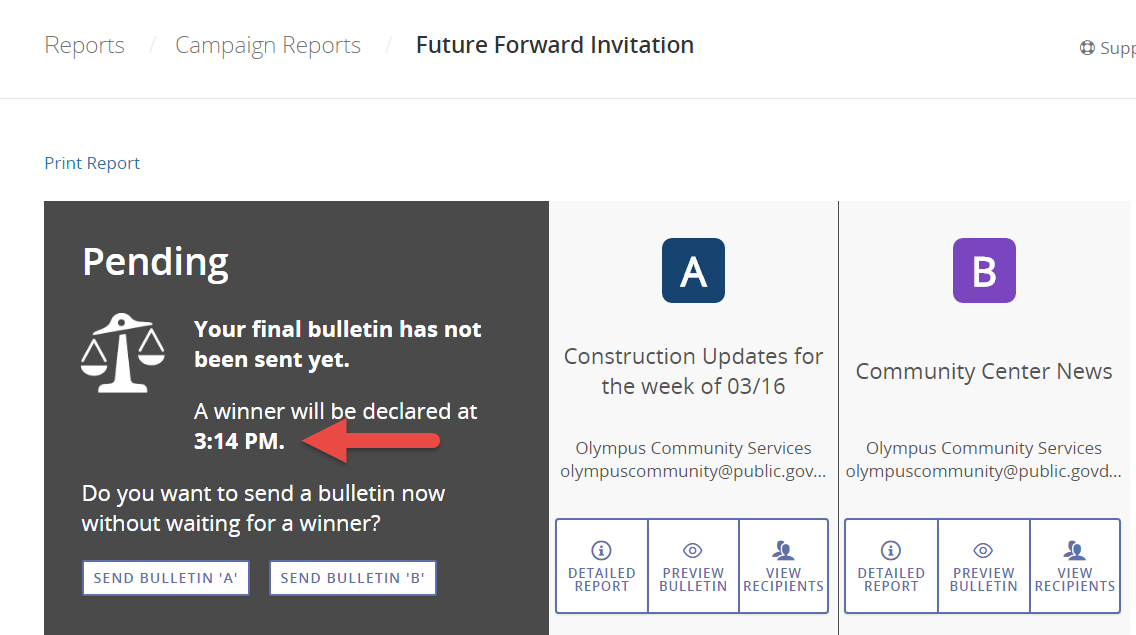
Once your test emails are sent, the campaign status changes to Tests Sent. The campaign tracks your subscriber's engagement for each bulletin. During this time, you can see when your test will end by clicking the report link in the Campaigns list.

At the end of the testing period, the campaign declares one email a "winner," using engagement data to decide which bulletin was more effective. If you chose to select and send the winner automatically, the final bulletin will be sent when the testing period is over and a winner has been declared.
After the final bulletin is sent, the campaign's status changes to Sent.
For more information about how Campaigns track and compare email engagement in an A/B testing campaign, see Analyzing A/B Testing Campaigns.
Before You Begin
Make sure you have already created the bulletins you want to use as your campaign messages. You can only select bulletins that are currently in draft form as your testing campaign messages. See the Analyzing A/B Testing Campaigns article for tips on creating bulletins for testing campaigns.
To create a Test & Send campaign:
- In the left navigation menu, click Campaigns.
- Click Create Campaign.
- Click Create Test & Send.
- Give your campaign a Name.
- Build your Recipients list by selecting topics or segments. You do this the same way that you would for any bulletin. For more information, see Selecting Your Bulletin Audience and Channels.
Note: govDelivery uses the recipients you define in the Campaign editor tool, even if you defined recipient lists in the bulletin editor when you created the bulletin
- Under Recipient Distribution, specify the size of the sample used for the testing phase using the slider bar. As you move the slider bar, the tool displays the number of recipients that will receive each bulletin.

By default, the campaign will use 20% of your recipients for testing (10% sent Bulletin A, 10% sent Bulletin B), sending the final bulletin to the remaining 80%.
- Choose to send the winning bulletin either automatically or manually (see how sending the winning bulletin works). If you opt to send it manually, the other fields in the section will be hidden and you can skip to step 10 in these directions.
- Set the Test run length.
Note: You can set the length anywhere from 1 to 72 hours. By default, the testing phase lasts four hours. Any subscriber activity within that time frame is used in determining the more successful bulletin.
- Under Win determination criteria, indicate which criteria is most important to you in identifying the winning bulletin by choosing from the following options:
- Highest Scoring Bulletin: The bulletin that scored the best across all engagement criteria, including opens, clicks, and opt-outs, is selected as the winner. For more information about the engagement criteria tracked by the campaign, see Analyzing A/B Testing Campaigns.
- Open Rate: The bulletin with the highest percentage of recipients who opened the message is selected as the winner.
- Unique Clicks: The bulletin with the highest percentage of recipients who clicked at least one link in the message is selected as the winner.
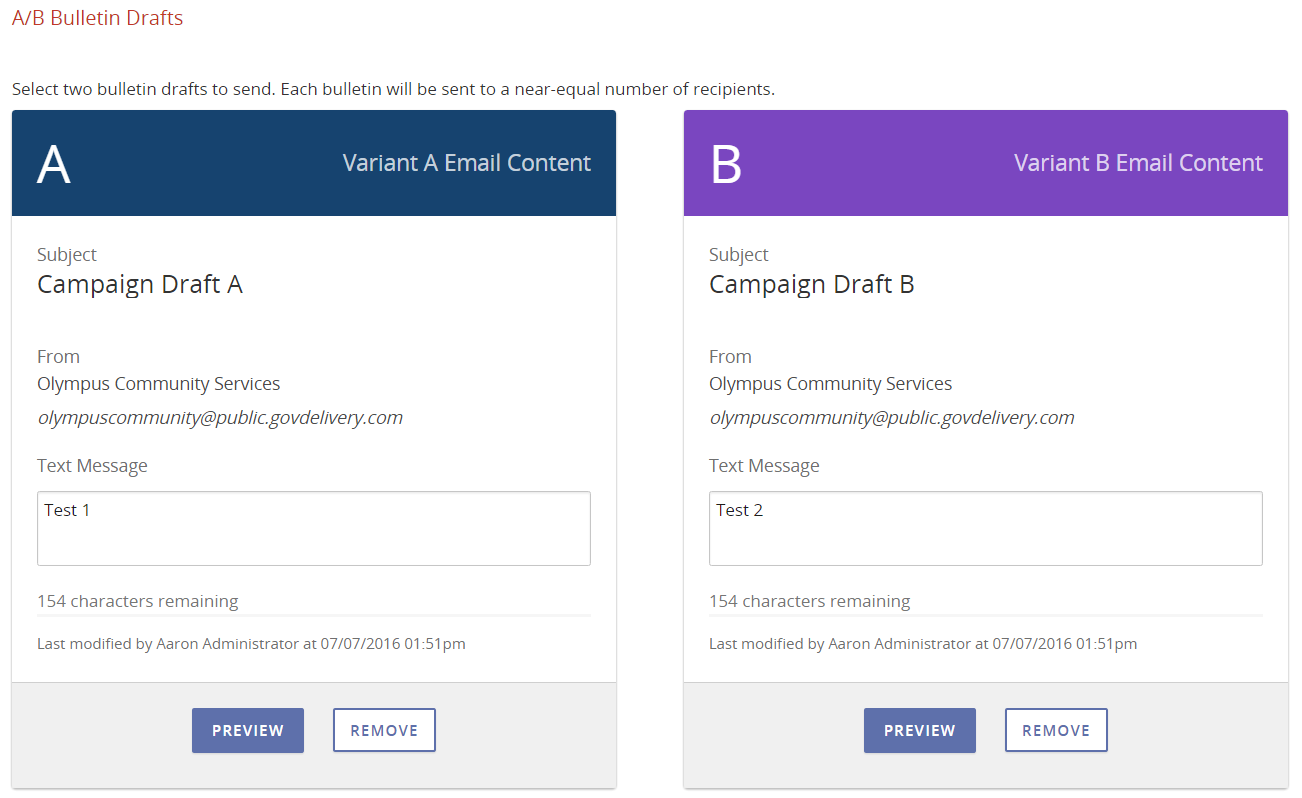
- Under A/B Bulletin Drafts, choose the bulletins for your campaign by clicking Select Content in each pane (A and B) and clicking Select next to the bulletin you want to use.
Tips:
- Use the filters at the top of the window to search for your bulletin. For example, if you can't see your bulletin, try changing the drop-down menu from Last Week to Last Month. Click Search to refresh the list.
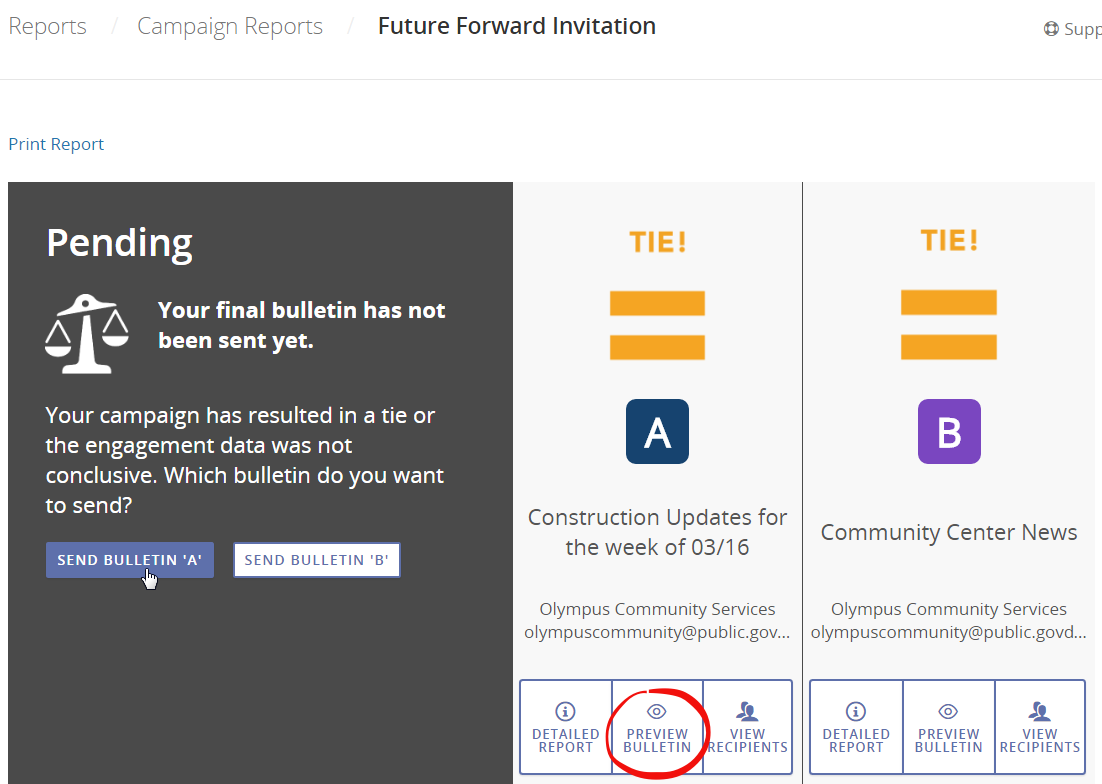
- In the event of a tie, Bulletin A is sent to the remaining recipients.
- If you want to change the bulletin you've selected for a variant, click Remove in the pane.
- You can preview a selected bulletin by clicking Preview in the pane.
- If you selected a topic that is enabled for wireless messages, enter a Text Message for each version in the fields that appeared under the bulletins you selected.

Tip: Use the SUBJECT and SHORT_URL
Macros to pull the bulletin's subject into the message, accompanied by a shortened URL link to the shared bulletin page (the webpage version of your bulletin).
- Under Send report, select Yes if you want your test report emailed to you after the test is completed.
- Decide whether you want to start the campaign now or schedule it for a particular date and time. To schedule your bulletin, enter the date and time under Schedule Automatic Send.
- Under Send Report, indicate whether you want your A/B test report emailed to you after the test is completed. The report will be available from the Campaigns list, regardless of what you select here.
- After you've reviewed your bulletins, finish by either:
- Click Send Now or Schedule to kick off the A/B test campaign.
- Clicking Save Draft to save your progress. You can edit the campaign to send or schedule it later.
To Manually Send the Final Bulletin
If you chose to manually send the final bulletin, you can do so at any time during or after the testing phase.
- In the left navigation menu, click Campaigns.
- In the Campaigns list, click the View Report and Send Final link for your Test and Send campaign.
- Use the engagement data collected by the campaign to inform your decision.
- Click the button for either bulletin to send it to the remaining recipients.
Tip: If you can't remember what each bulletin version looked like, click Preview Bulletin under each.


