govDelivery hosts a library of your uploaded images to use in bulletins and shared bulletin pages. In addition to images that are currently stored in the library, you can also upload additional images in a variety of formats.
Image Library
The image library allows you to maintain a collection of images available for use within the Standard Bulletin Editor and Advanced Bulletin Editor.
To manage banners for your subscriber-facing pages, including subscription, quick subscribe, and shared bulletin pages, please see Banner Images.
Tip:
When you're turning the visuals in your bulletins into links, make sure you are putting alt tags in place for people who have images turned off. Also, make sure the alt tags make sense to people viewing your message. Instead of subscribers seeing an outline of your button image with the file name “mobile_button_2.png” in place of the image, why not try an alt tag that displays something like, “Click here to go to the full article. Please allow images from Central City to improve your reading experience.”
Access the bulletin images library:
- In the left navigation menu, click Templates.
- In the right menu, click Bulletin Images.
Upload an image to the image library:

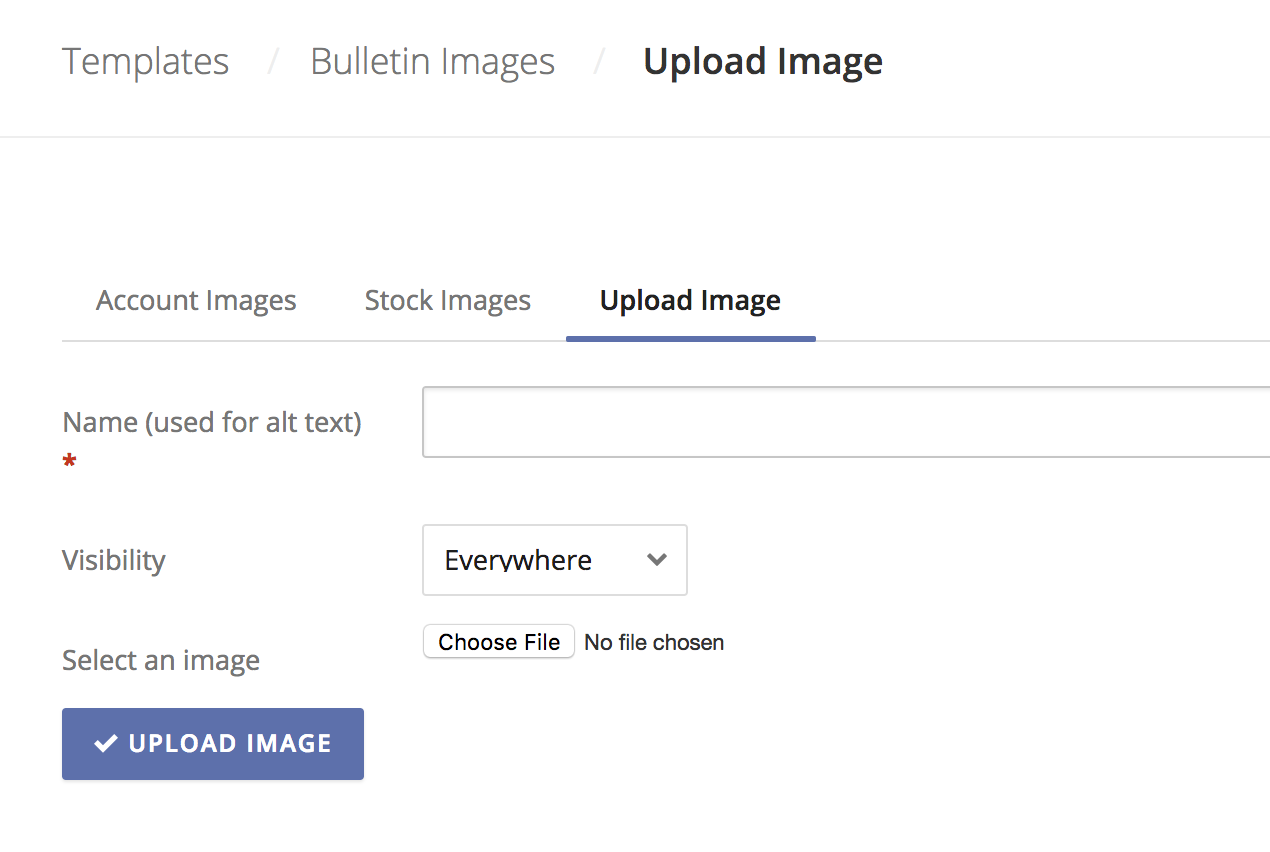
- Click Upload Image.
- Enter an Image Name. This text is also used for the alt text (alt text appears if an image doesn’t load and is necessary for 508-compliance).
- Select Image Visibility. This controls where the image can be accessed. Your options include:
- Everywhere: Images available for anyone in your account to use.
- Styling images: Images used in developing templates, including background images, etc. Note: alt text isn’t associated to images in this folder.
Browse to and image on your local or network drive. - Click Upload Image.
Update an existing image:
- Click the image you want to update.
- Update the Name or Visibility fields as desired.
- If you want to replace the image, click Browse and select a replacement image from your local or network drive.
- Click Save.
Delete an existing image:
- Select the image you want to delete.
- Click Delete.
Search, filter and sort on uploaded images:

- You can search images by name, which searches within the filter you have selected.
- You can filter by:
- All Images
- Everywhere: Images available for anyone in your account to use, excluding "Specific" and "Styling" images
- Specific: Images only available to a specific template or bulletin
- Styling: Images used in developing the template, including background images, etc. Note: alt text isn’t associated to images in this folder.
- You can also filter by images "Created by me" to limit to files uploaded by you.
- You can sort your image results by:
- "Newest First"
- "Oldest First"
- Name "A-Z"
- Name "Z-A"
Inserting GIF files
Graphic Interchange Format (GIF) is an image format that can be used for short and simple animations. You can upload and use GIFs in your bulletins just like other image files, however there are some aspects to keep in mind:
- Some email clients, such as Microsoft Outlook, will only display the first frame of an animated GIF. Make sure the first frame of your GIF is the one you want to be displayed in these emails.
- We suggest you do not reduce the image by more than 50% of its original size within the bulletin itself. Doing so may make the animation appear choppy.
- In order to be compliant with 508 standards, a GIF must have a frame rate slower than two per-second.
Linking to Videos in Bulletins
Most email clients have trouble with embedding or displaying videos in a bulletin. Videos can affect a bulletin’s deliverability, so we recommend linking to the video instead. Create a clear call-to-action that drives your subscribers to the hosted video by linking a screenshot of the video.
- Insert an image:
- Refer to the Using Images in Standard Bulletins article if you are creating a Standard Bulletin.
- Refer to the Using Images in Advanced Bulletins article if you are creating an Advanced Bulletin.
- Link a video to your image:
- Click the Insert/edit link button in the bulletin editor.
- Enter your URL and other fields.
- Click Ok.
- Click the image link button in the lower left corner of the Image block.
- Enter your desired video URL in the text-box.
- Click Ok.
- Preview, save, and send your bulletin.


