The workflow functionality in Peak enables agenda item drafters to create and submit their items through a sequential or concurrent workflow. Workflows can be set up while drafting agenda items via the Agenda Item Details page. Workflows can be deleted by Peak Admins only. Admins can also set up and edit workflows.
To manage workflows, click Admin in the upper right-hand corner. Choose Agenda Items from the menu on the left, then select Item Approvals. Note: Only users with the Peak Admin role (or a platform administrator) will have access to the Admin portion of the application.
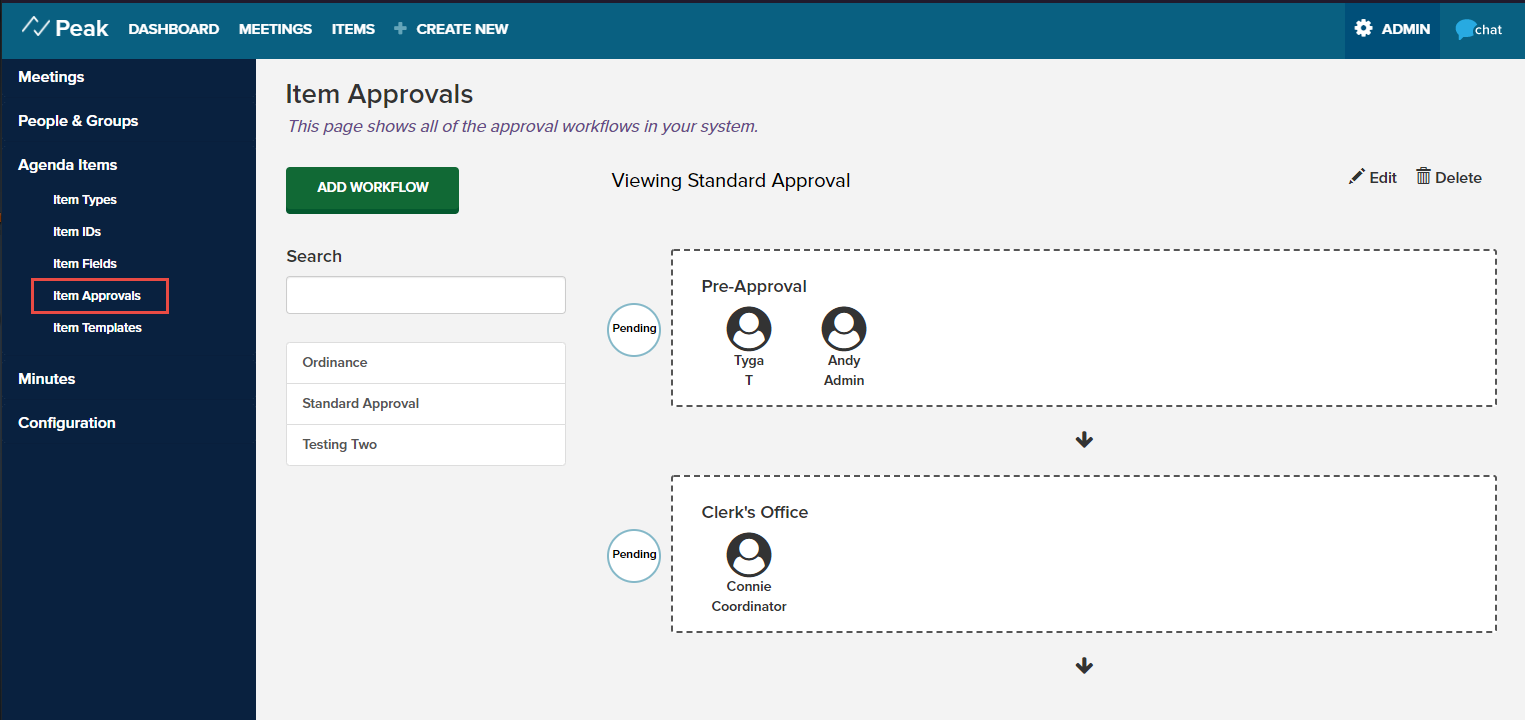
1. To add a workflow, click the green Add Workflow button. The following fields display:
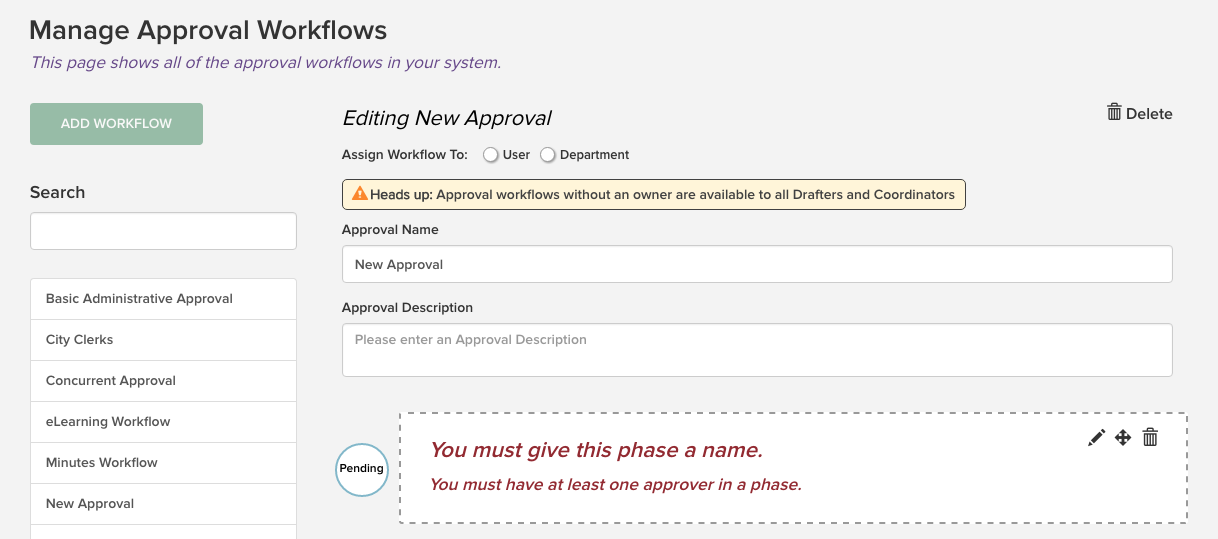
2. Decide whether this workflow should be assigned to an individual or departmental owner by selecting the User or Department radio button. Leave these deselected if you want the workflow available to all. Click Clear if you've selected a button and want to deselect it.
If a workflow is assigned to a department, the workflow will be available only to users who are part of the department (users can be associated to a Person record and that person record can be associated with a department). Note: It does NOT use the submitting department field set on the agenda item when drafted.
If a workflow is assigned to an individual, the workflow will be available only to that user. If a workflow is assigned to a department, the workflow will be available only to users who are part of the department (users can be associated to a department via People records).

If you do not assign the workflow an owner, it will be available to all Drafters and Agenda Coordinators.
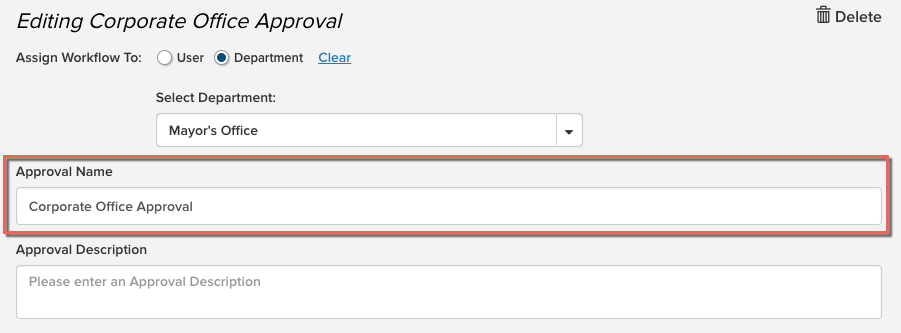
3. Add a name for your workflow in the Approval Name field. The workflow is named "New Approval" by default. You can also enter a description of the workflow in the Approval Description field.
4. To create your first phase, click the pencil icon in the corner of the unnamed phase.

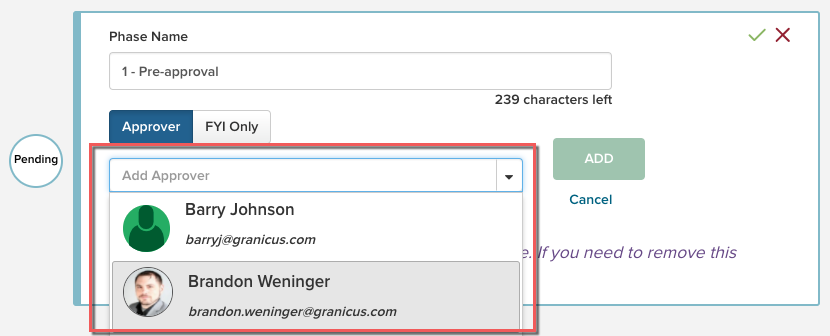
5. Click the Phase Name field and type a name for the first phase. Then click the Add Approver button.

6. Select the name of your first approver from the drop-down menu. You can also type directly in the field to narrow the choices. Choose whether you want this person to be an Approver or FYI Only by clicking the corresponding button. FYI Only are people who are a part of the workflow but are not required to approve the file; they'll be able to view details of the agenda item, including attachments, for informational purposes. Click the green Add button to add the selected approver.
Note: Workflows use USERS of the system (people with logins). Although not required, the Peak Admin can create/edit a person record and associate it to a user in the system and populate an avatar in the person record, which shows here in the workflow.
7. The approver's name and avatar now display on the phase. You can add multiple approvers to a single phase, or use one approver on each phase to create a specific sequence for the workflow to follow. Repeat step 5 to add more approvers to this phase. You can delete approvers using the red x on the associated avatar. When you’re done with the first phase, click the green checkmark in the upper right-hand corner of the phase box.

8. To add another phase, click the plus sign (+) underneath an existing phase.

9. Once a phase is added, you can use the pencil to edit it, the arrows to drag and drop into a new order, and the trash can to delete.
10. When you’ve added all the phases you need, click the green Save button at the bottom right of the page.
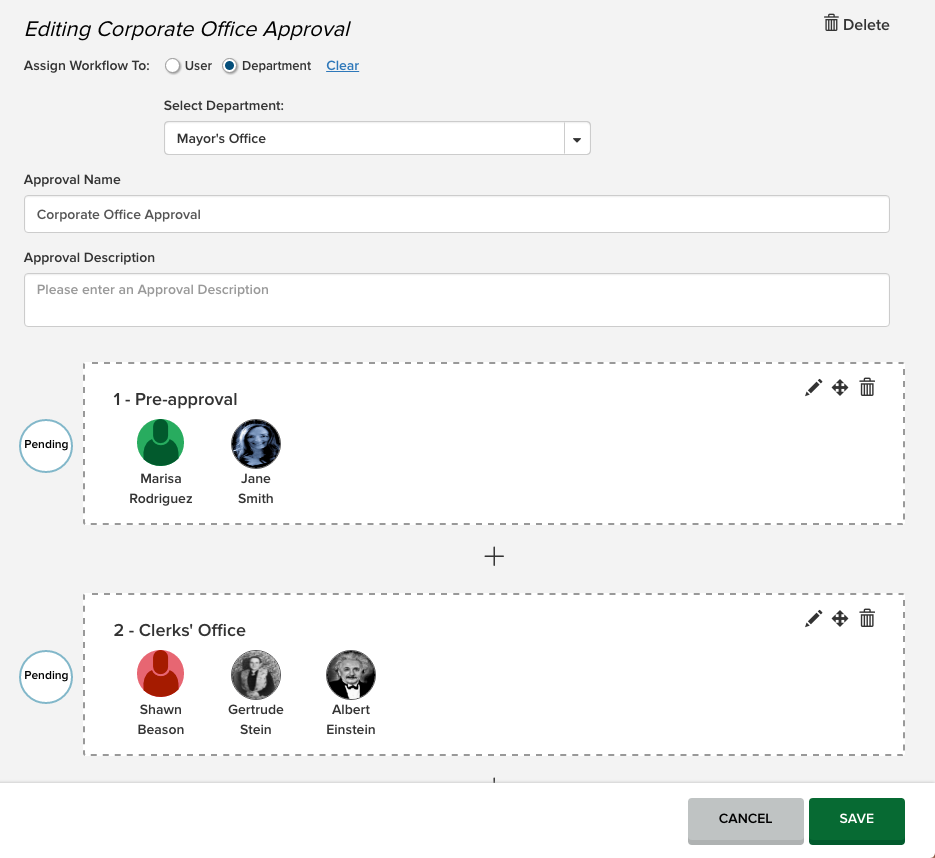
The new approval workflow displays in the list of workflows on the left. It will also be available in the Select a workflow drop-down menu under the approval status of an agenda item. If it is not assigned an owner, it will be available to everyone; if it has an owner, it will display to the person assigned or to the members of the department assigned.
You can also edit and delete workflows from this page. Click the name of the workflow in the list, then click Edit or Delete in the upper right-hand corner to take the desired action.
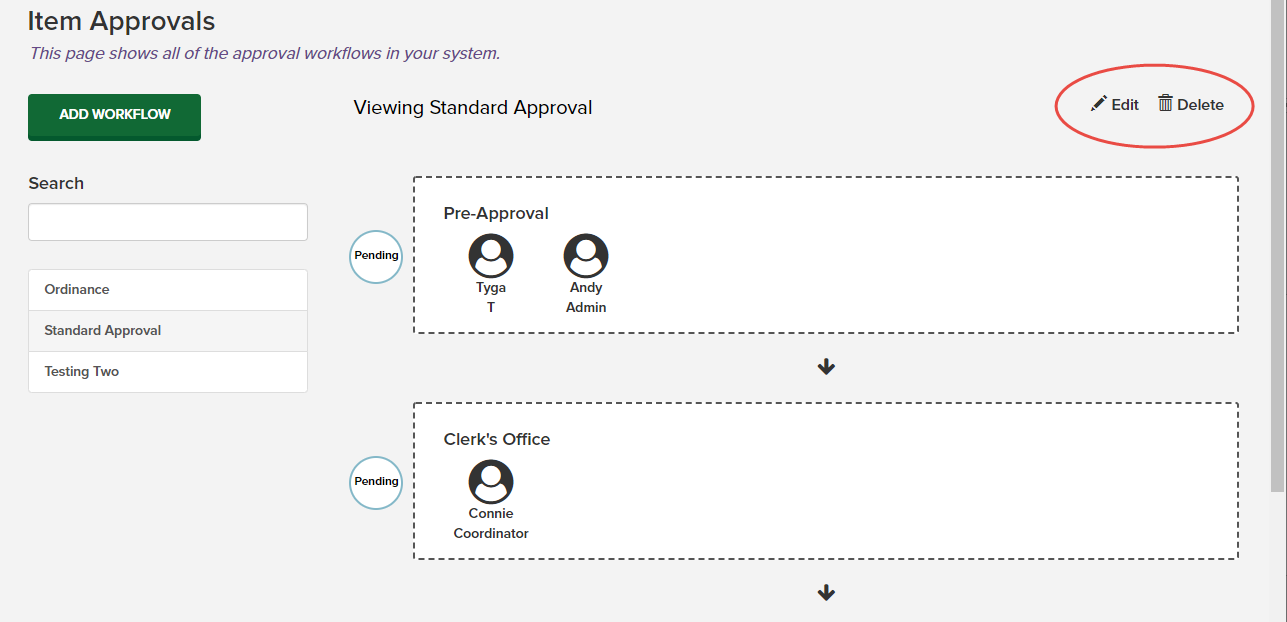
If you choose to delete a workflow, you'll get a confirmation message that allows you to cancel if you clicked Delete in error.

Note: Neither deleting nor editing a template will affect any historical data, i.e., it will not affect the workflow for current or past agenda items using a workflow that has since changed or been eliminated. The changes are available for use on subsequent approval workflows, but in-process workflows will remain the same unless stopped and assigned a new workflow.
Automatic emails are sent to participants in an approval workflow. Read details about notification emails.


