The Agenda Details button, which is found on each meeting card on the meetings page, provides you with a shortcut to view or edit agenda details. You can also assign a Peak meeting body and type to any meetings created at the platform level. This functionality is available to users with Agenda Coordinator or Peak Admin roles, and to Drafters for items in Final status. Drafters may also access draft agendas if a Site-Wide Setting is enabled.
To work with meetings and their associated agendas, click Meetings on the left-hand side of the navigation bar at the top of any page in Peak.
From the list of meetings on the left, select the meeting card associated with the agenda you wish to view or edit.

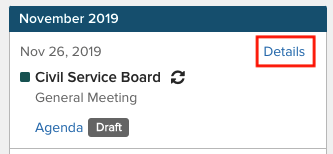
Click the Details link to access meeting details. To access agenda details, click the Agenda link.
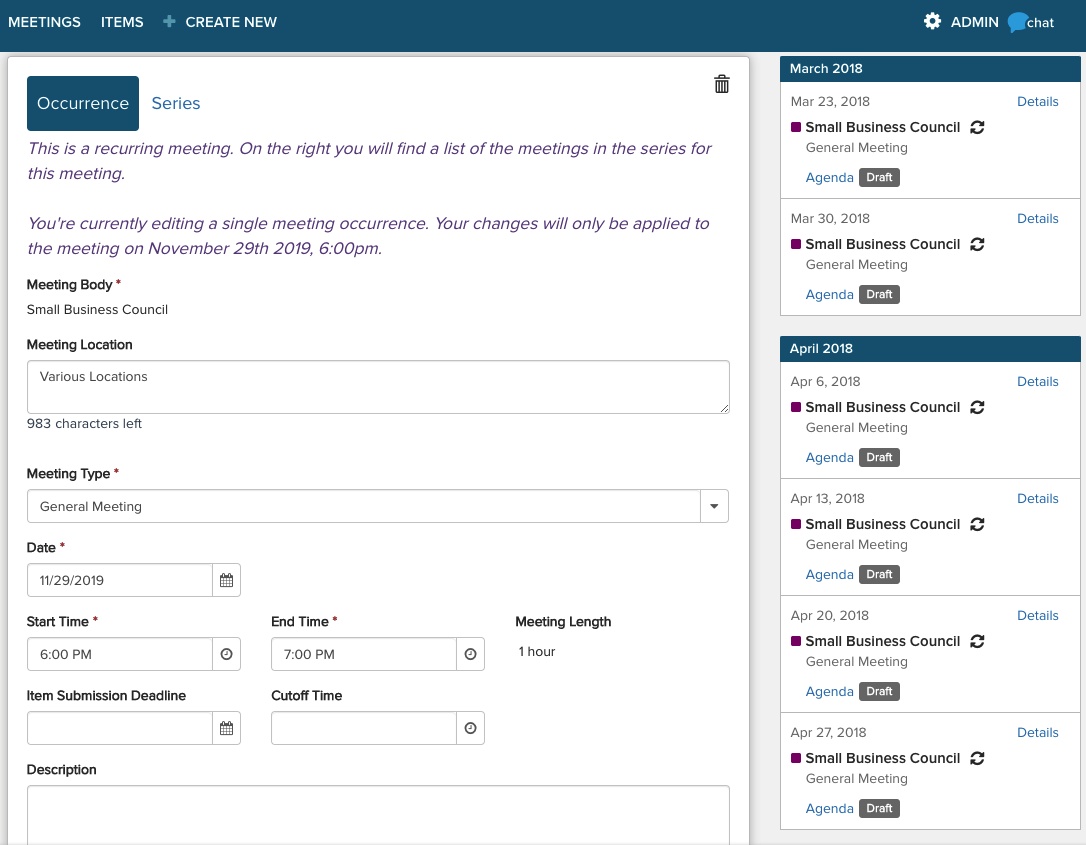
The following figure illustrates an example of the meeting details page:
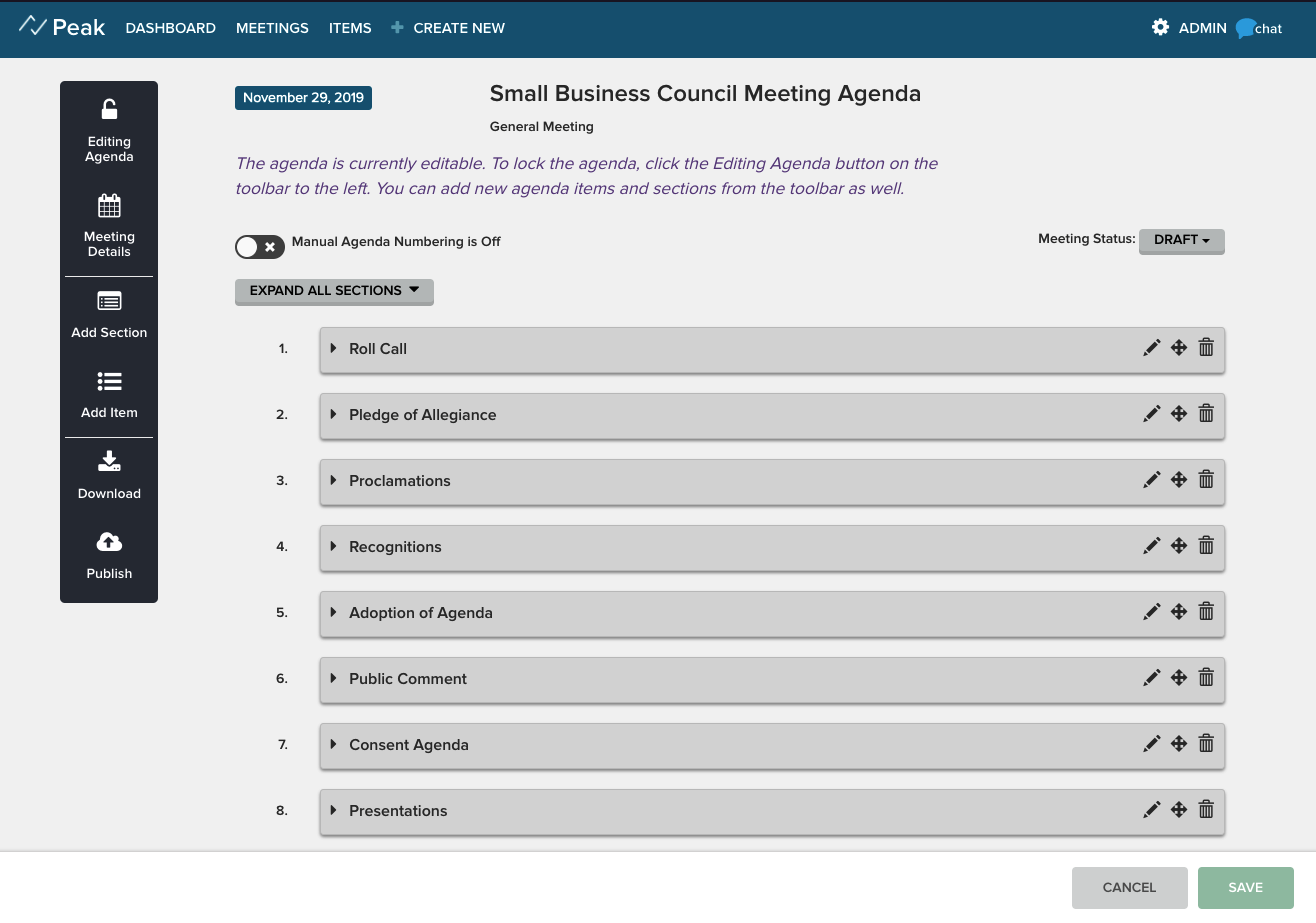
The agenda page (accessing by clicking Agenda on the meeting card) is pre-populated with sections according to the meeting type associated with the meeting. The agenda reflects any edits that have been made to the agenda and its status. The toolbar on the left gives you options to lock the agenda, view meeting details, add sections or items, and publish or download the agenda. The Manual Agenda Numbering toggle enables you to customize your agenda numbering scheme.
Toolbar Functions
The table below describes the functions of the items on the toolbar. These buttons are operational only for users with an Agenda Coordinator or Admin role:
|
Feature
|
Description
|
|---|
|

|
To edit details of the agenda, click the padlock. An unlocked padlock graphic indicates that editing is now possible. Agendas, when created, are unlocked by default; an Agenda Coordinator or Admin may lock the agenda at any time to prevent changes until the item is again unlocked.
|
 | Click Meeting Details to go the Edit Meeting Details page, where you can edit the location, date, time, or description of the meeting associated with this agenda. |
|

|
Click Add Section to create a new section for the agenda. You'll be able to edit, reorder, or delete sections after you add them.
|
|

|
Click Add Item to add an agenda item to this agenda. You'll be able to choose from existing items in Peak that are not already part of another agenda, or create a new item on the fly.
|
 |
Click Download to open a sub-window to generate and download either the agenda by itself or an agenda packet. You'll be able to choose between Word and PDF formats for your download.
|
|

|
Click Publish to publish the agenda to iLegislate, the Platform, or a public webpage.
|
 | The Send button allows Agenda Coordinators to send a notification to the public with a link to the agenda report. Citizens must have signed up to receive the notification for agendas. Note: The agenda must first be published in order to use the Send button functionality. Contact your Granicus Account Representative for more information. |
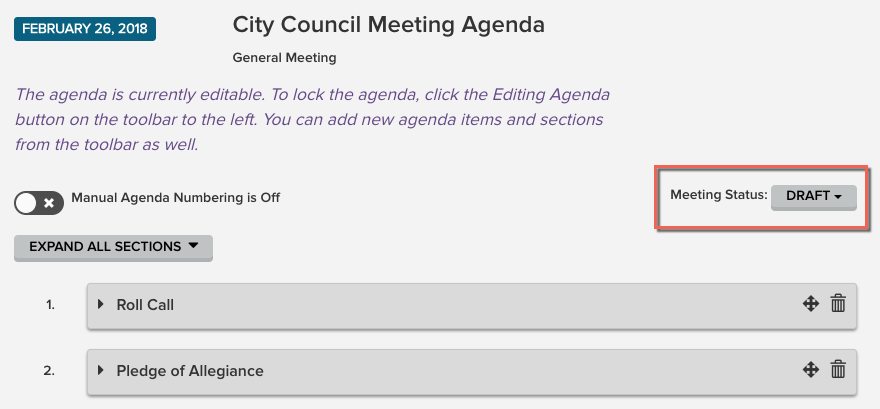
You can also change the status of the meeting by clicking the Meeting Status drop-down menu and selecting the status for this meeting. If the meeting is in not-final status, only Agenda Coordinators and Peak Admins can view it, while Drafters cannot unless a Site-Wide Setting is enabled. All users (except approvals-only users) can view details of agendas with a final status assigned. Status options are set up in admin by a user with the Peak Admin role.
From here, you can edit, delete, or rearrange the order of the sections. Use the trash can to delete a section, and the drag-and-drop handles to drag the section to a new location within the agenda. Be sure to click Save at the bottom of the screen to save your changes to the agenda.
You can edit an agenda section by clicking the arrow to expand it. Or, expand all sections at once by clicking the Expand All Sections button at the top. There will be agenda item cards for each agenda item. Item cards include the agenda item's name, ID number, status, version number, any associated attachments, and the current approvers. Read more about item cards here.
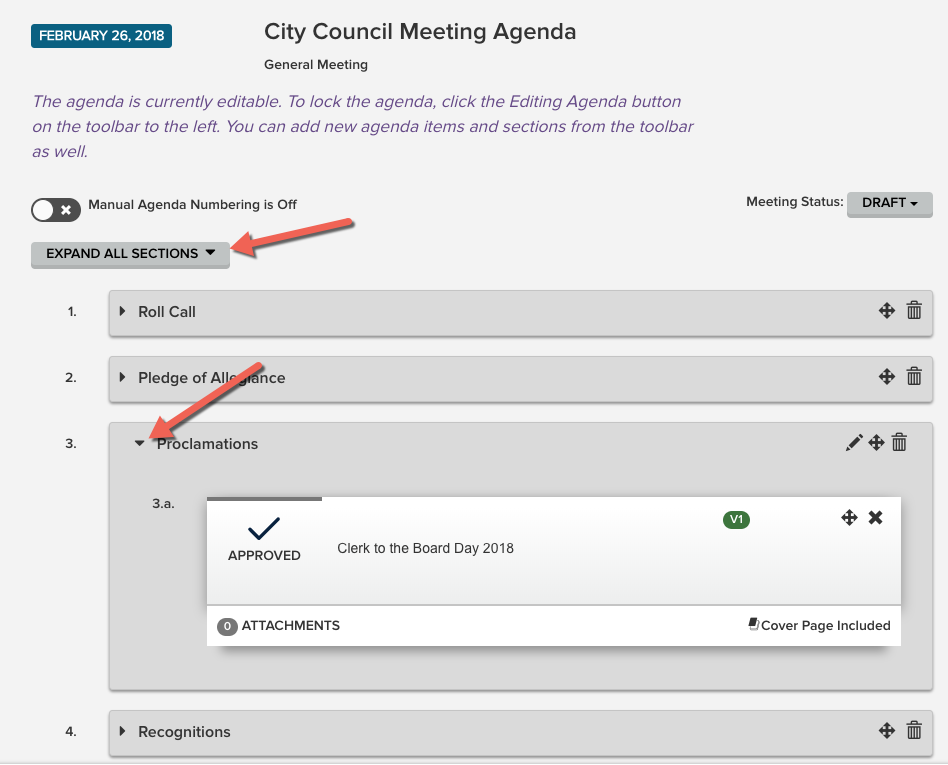
Use the pencil to edit details of the section such as the section title, the standard text, and whether the section is part of the numbering scheme. There is also a pencil for the agenda items themselves, and clicking it will take you to the Edit Agenda Item page. Use the drag-and-drop handles to reorder agenda items, and the x icon to remove an agenda item.
Removing an item removes it from this agenda, but it will remain in Peak and will be available for use elsewhere. You can also create a new version of the item.
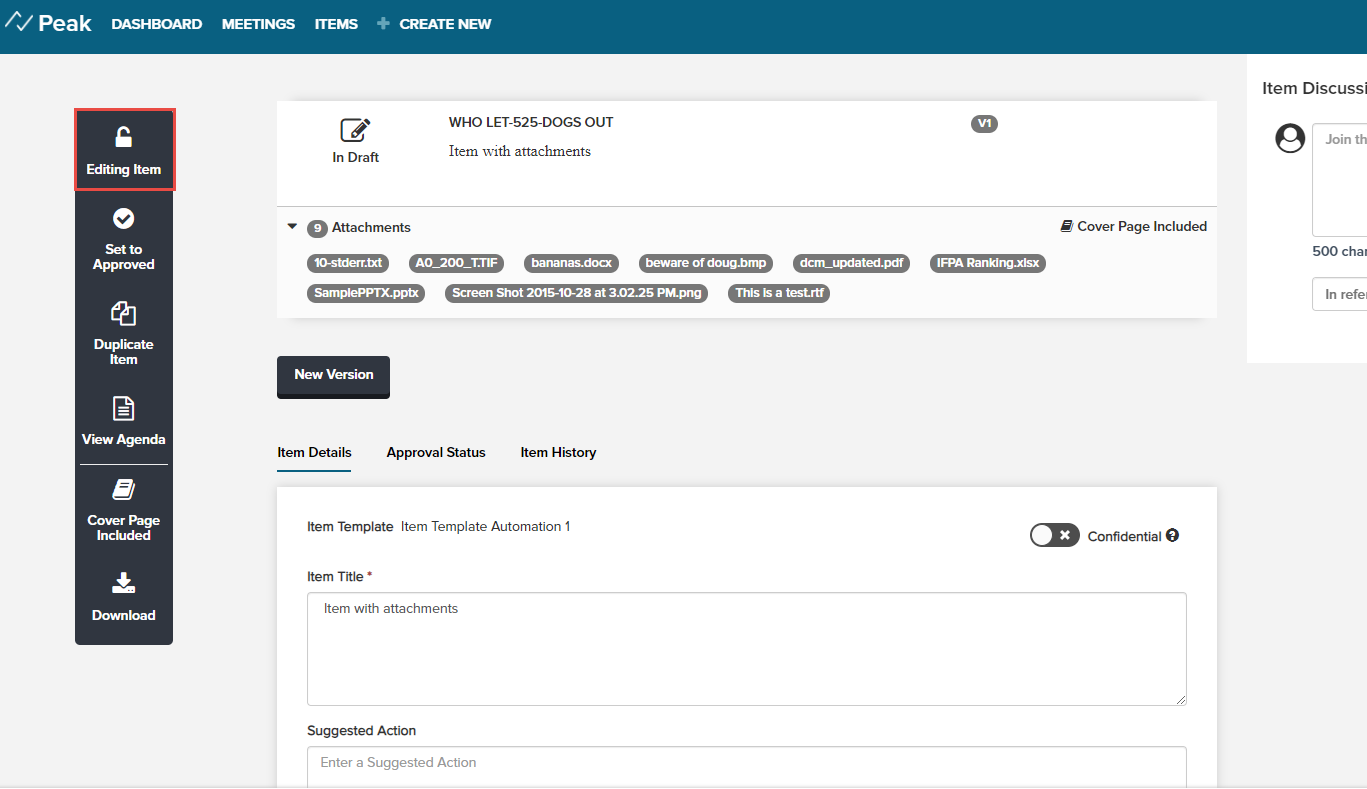
The following figure shows an example of an agenda item in edit mode. Note the padlock button on the left-hand side. After saving any changes you have made, click this button to lock the item, preventing further edits. This functionality is available to users with Agenda Coordinator or Admin roles, as well as the Drafter of this item.
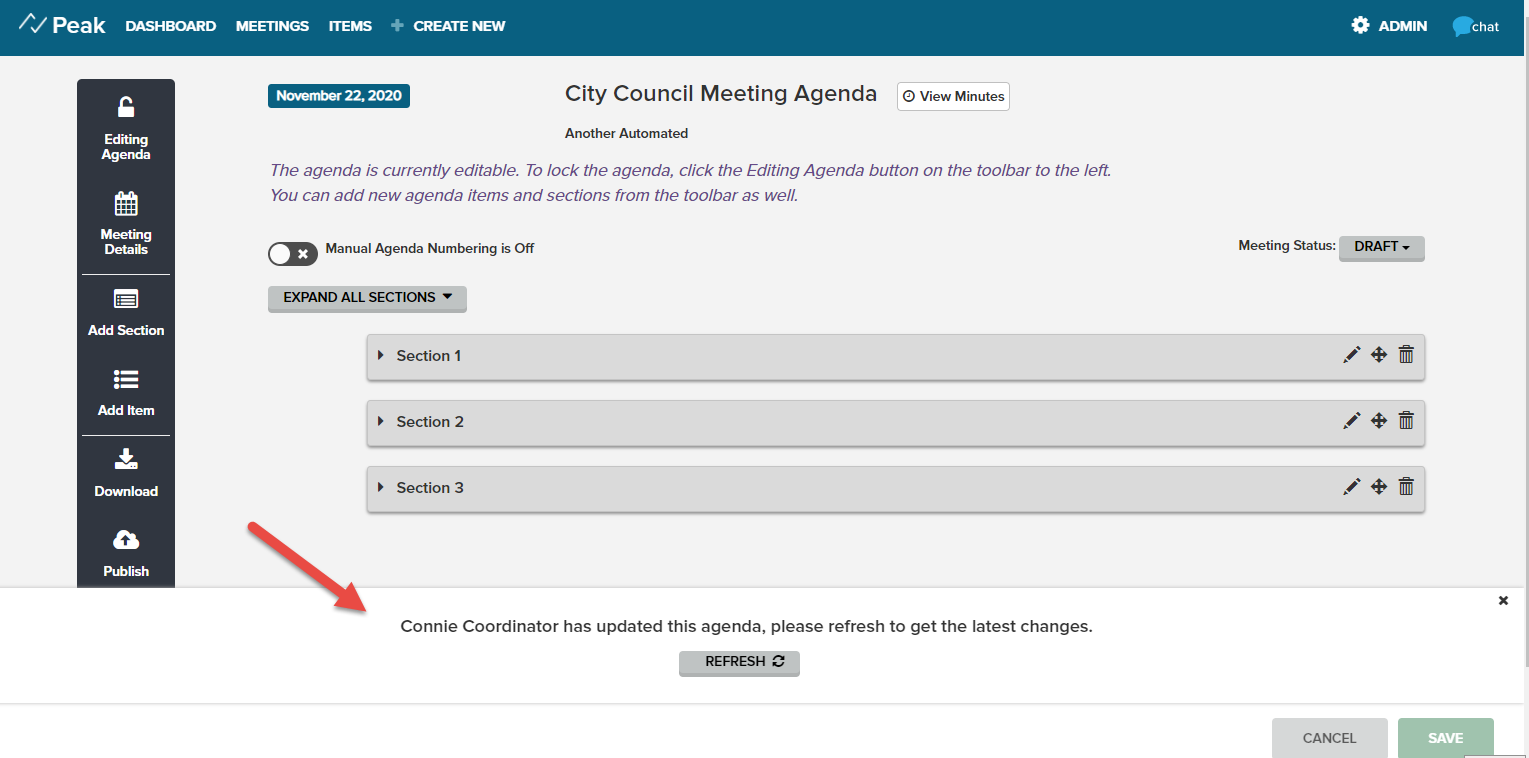
Concurrent Editing Notification
We've added a notification to prevent changes being lost when more than one user is editing at once. If you're viewing or working on a page and another user makes changes to and saves that page, you'll see a notification asking you to refresh. Once you've refreshed, you'll see the latest changes and will be able to add your own and save. Note: This feature will not be enabled for clients on Canadian domains.
This notification for concurrent editing applies to the following pages:
- Agenda Item Details
- Agenda Details
Assigning a Meeting Status, Meeting Body, and Type to a Platform Meeting
Typically, if you work with Peak you will be creating, editing, reviewing, and deleting meetings in Peak. In the rare case where your site also has purchased the Granicus platform and an event was created in the platform and you wish to use Peak with it, follow this procedure. By clicking the agenda details button on an event created at the platform level (denoted by a dark blue color assignment), you can assign a Peak meeting status, meeting body, and type to the meeting. You first will get prompted to add a meeting status. Typically one would enter "Draft" here. You'll get a message that the meeting does not have an associated body or type. Use the drop-down menu to choose a meeting body and type.
Note: You will not be able to examine the meeting details of said meeting until you provision a meeting status, body, and type as shown here.


