Peak now allows for multiple agenda item templates customized to a jurisdiction's needs. Admins will create and name the templates, choose which standard fields should be required, and add custom fields as needed. When creating agenda items, drafters will select an item template from the Create New menu using a new flyout that contains a list of available templates as specified by the Admin.
Drafters
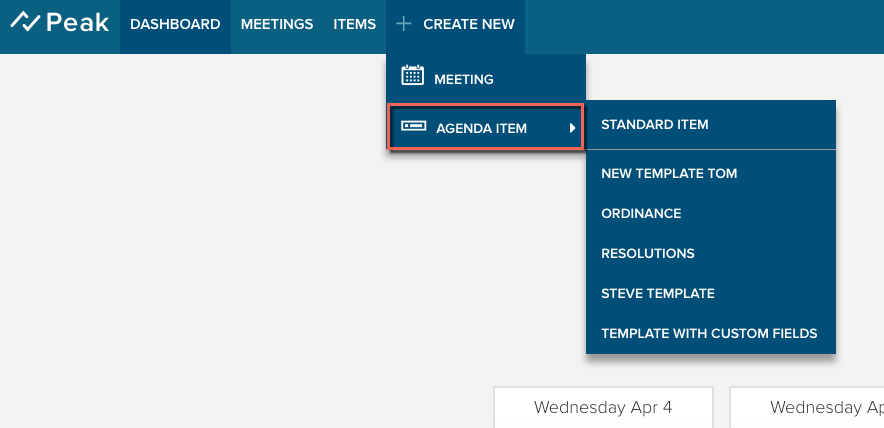
When drafting agenda items, you'll continue using the Create New menu found in the top navigation. Now, however, when you click the Agenda Item menu option, a flyout will display the list of available agenda item templates. Select a template from the list to create an item. The default item template displays at the top of the list. In the example below, Standard Item is the default template. (Note: If your Peak site has only one item template, you won't see item template flyout and will click Agenda Item to create an item.)

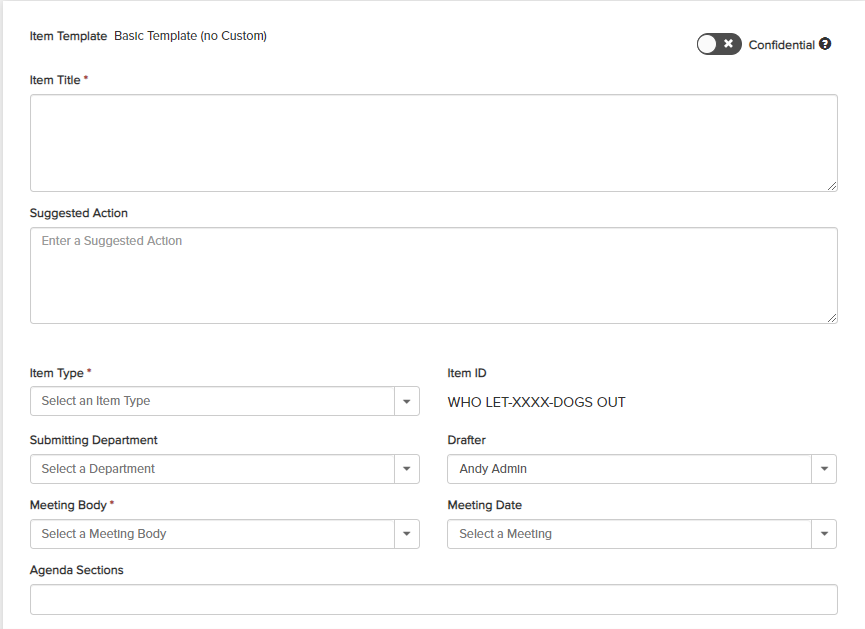
The item template name displays as a heading titled [Template Name] Details; for example, Ordinance Details:

Required standard and custom fields on the template behave as normal.
Note that if a new item is created from the agenda (see Adding an Agenda Item on the Fly), it will get the default template.
Admins
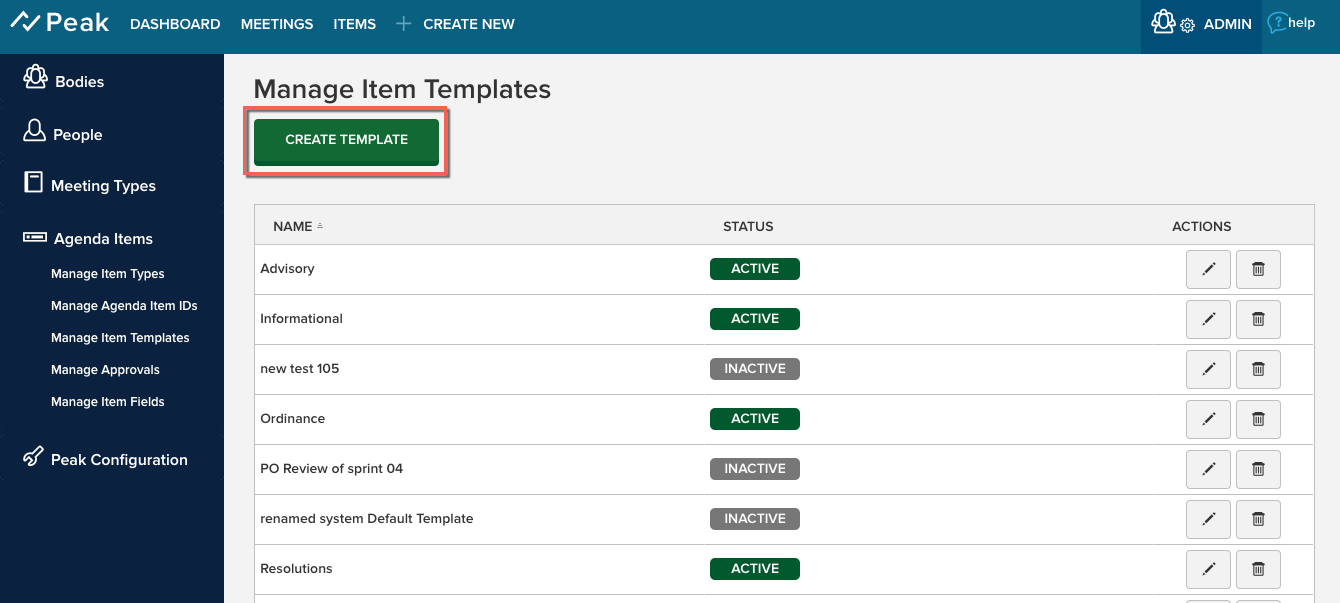
Admins will create and manage agenda item templates from a new page in Peak Admin. Navigate to the Agenda Items section in the left navigation, and select Manage Item Templates. The page displays a list of item templates once they have been created. Before you create any custom templates, a single default template containing the same data as your existing item template displays. Edit item templates using the pencil icon, and delete using the trash can. Note that only item templates that have no data in them (they are not used on any items) can be deleted.
Creating Item Templates
Create a template by clicking Create Template at the top of the page.

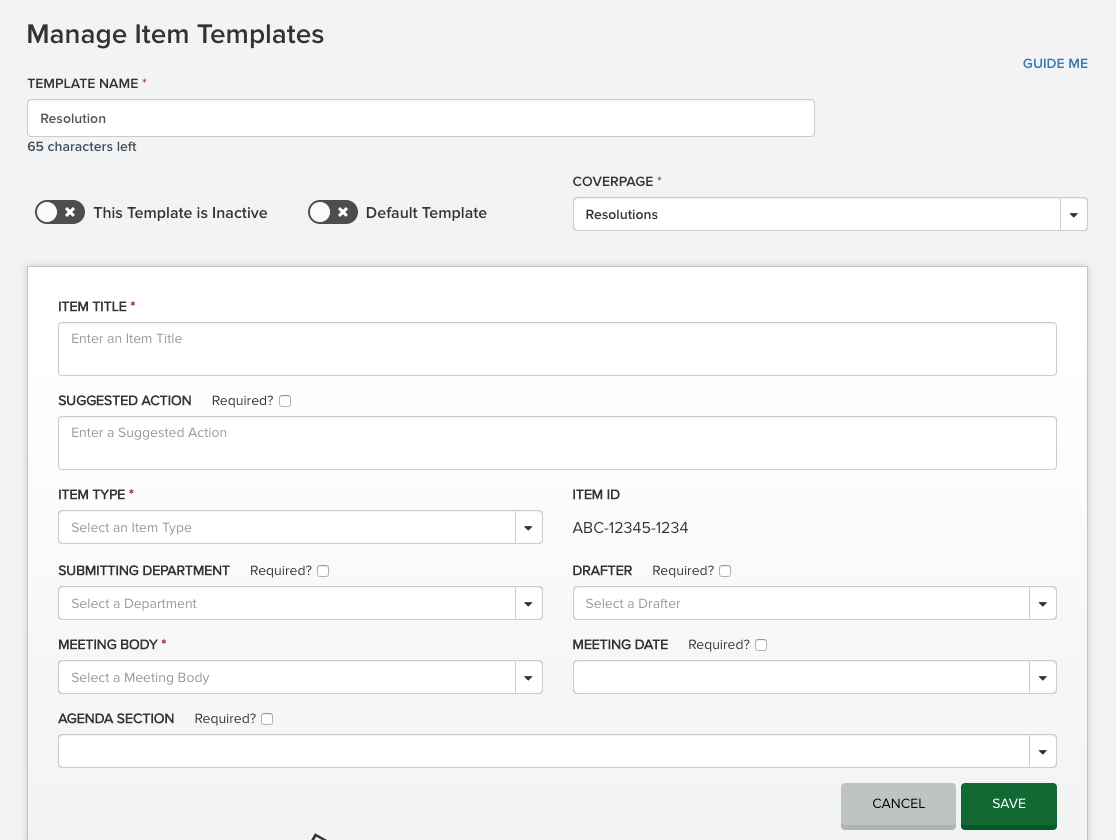
Give the template a name. Then use the toggles to indicate whether the template is active and whether it should be the default.
- Only templates designated as Active will display in the Create New > Agenda Item drop-down list for drafters.
- The default template will display at the top of the drop-down list and will be applied to any items created from the agenda.
You'll also see a Coverpage drop-down menu; use this to select which coverpage will be applied to all items created using this template. (Contact Granicus Customer Care to inquire about adding additional coverpage templates.)
Select which of the standard fields should be required by selecting the checkbox next to the field's name. Save the template using the green Save button.

Once you save, you can add custom fields as needed using the Add Field button. Custom fields can be removed from an agenda item template only if no agenda item ever used the custom field.
Managing Custom Fields
The custom fields to add to agenda item templates are controlled from the Manage Item Fields page in Admin, also found under the Agenda Items section in the left menu.
The page will display a list of existing custom fields. Use the Add Field button at the bottom of the list to create additional fields.
Just as when there was only one item template, the following types of custom fields are available:
- Text Field
- Date Picker
- Meeting Body Dropdown
- Department Dropdown
- People Dropdown
- Radio (Yes/No)
- Text Area
- Custom Dropdown
You can also edit and delete custom fields from this page, but only those fields with no data associated with them can be deleted. Once a field is saved, it will be available in the Add Field drop-down menu for all item templates.
Custom fields can be marked as required or hidden on a per-template basis. The hidden option is useful if the field is no longer needed, but it has data associated with it and thus cannot be deleted. Making a field hidden or required will make it so for only the current template.


