
New Video button
-
-
-
WMV (Windows Media)
|
|
|
|
|
|
|
|
|
|
|
|
|
|
|
|
|
|
|
|
|
| | Codec: Windows Media Video 9 |
-
-
-
-
-
Making a Meeting Visible on the View Page
To make your meeting visible on the View page, complete the following steps after your meeting ends:
- Navigate to the Archives tab in MediaManager and open an archive for editing by selecting the archive and then clicking Edit. The Basic File Properties page opens.
- Find the Status drop-down menu and select Public. This adds the meeting to your View page so that anyone can view the video and see the attached agenda and minutes documents.
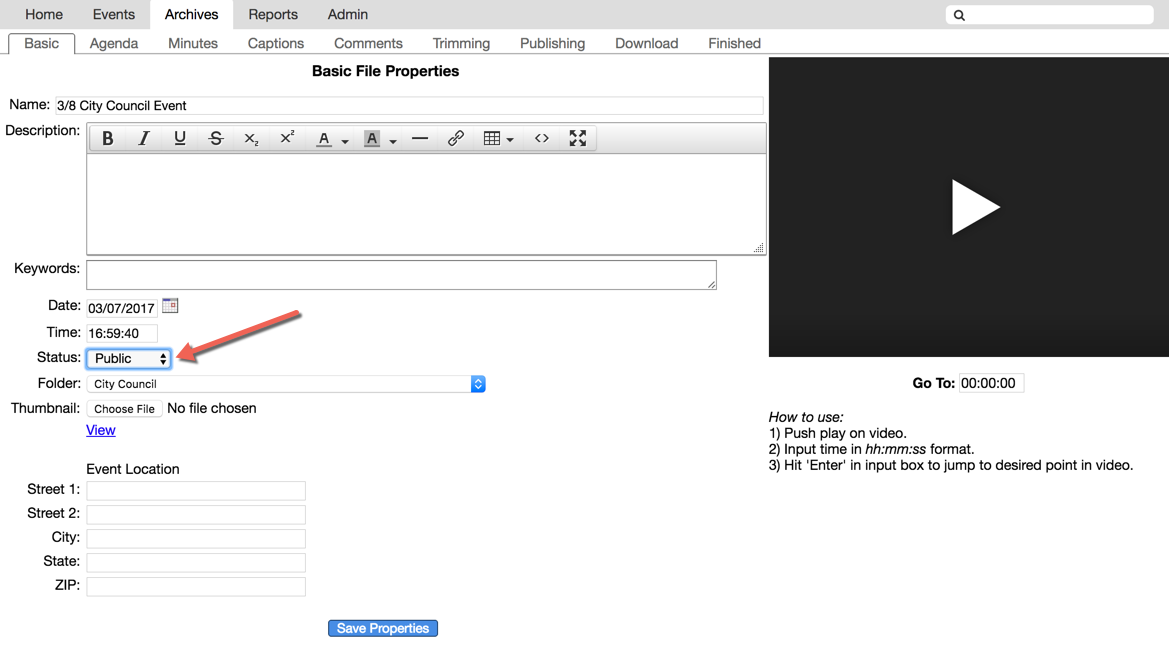
3. Click
Save Properties.
Note: If you set the status to Not Public or Pending, the archive (including the video) will be visible only to internal viewers. Use Not Public for internal-only archives and Pending for archives you wish to edit before posting to your view page.

