This article explains how to create a meeting body in Peak Agenda. You can either follow the video or written instructions below.
Meeting Bodies in Peak are the groups of elected or appointed officials that conduct public and non-public meetings. The Manage Meeting Bodies page displays existing meeting bodies set up in Peak.
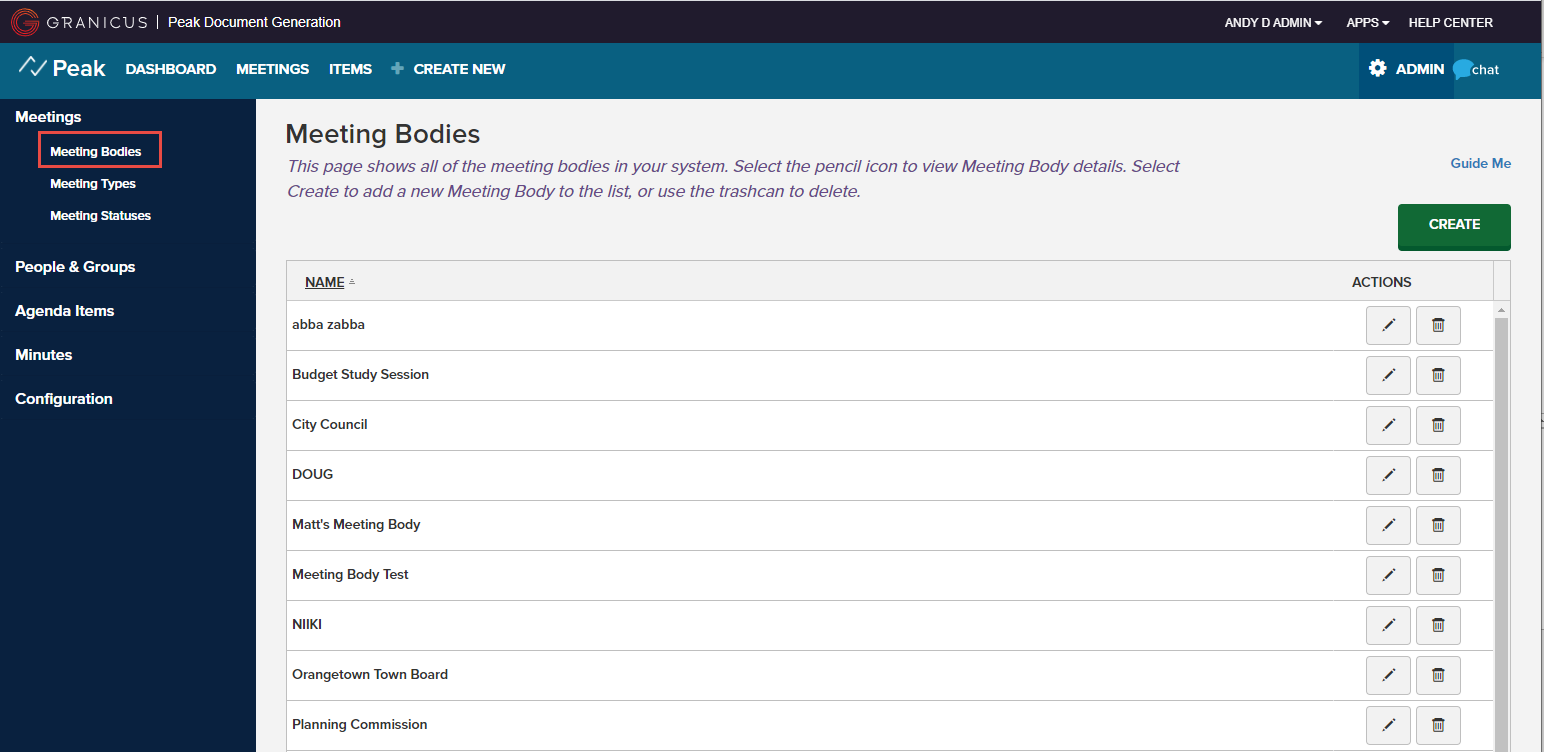
To work with meeting bodies, click Admin in the upper right-hand corner. Choose Meetings from the menu on the left, then select Meeting Bodies. Note: Only users with the Peak Admin role (or a platform administrator) will have access to the Admin portion of the application.

From here, you can edit, delete, or create meeting bodies.
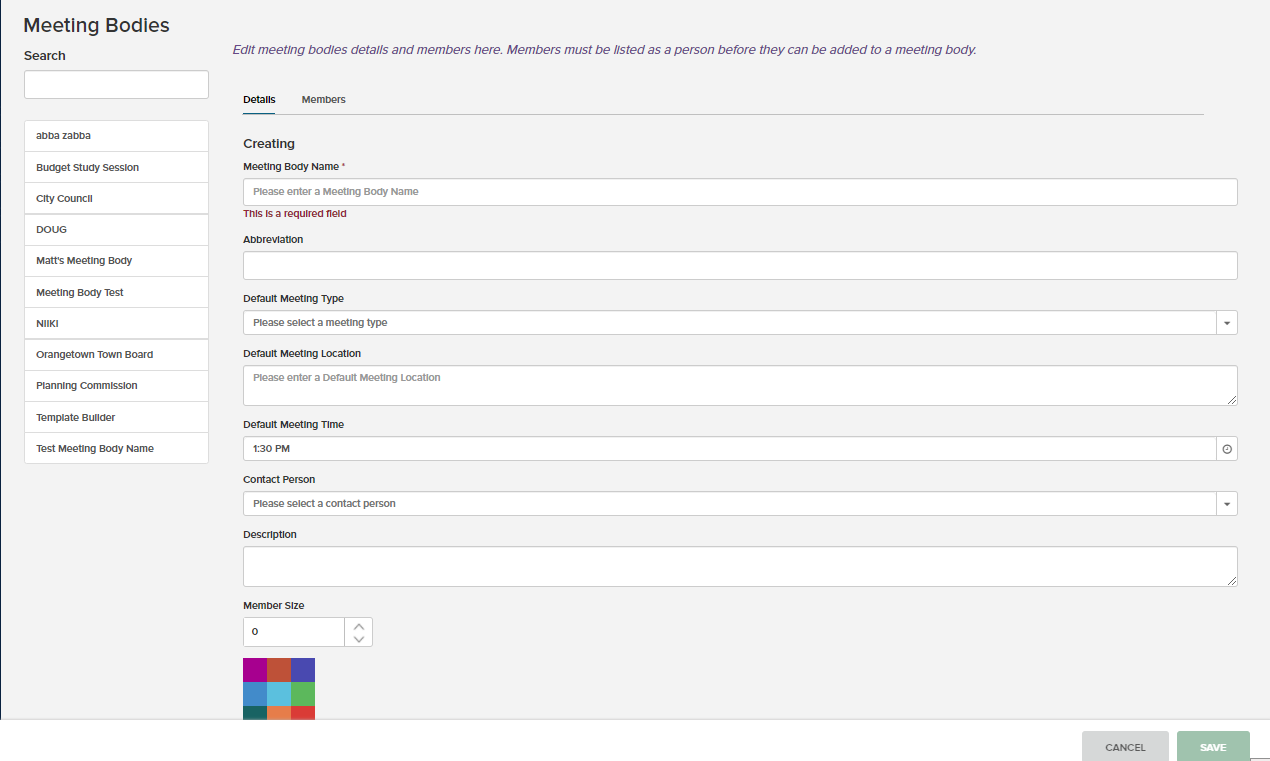
The Create button will take you to the Meeting Bodies Details page. A list of existing meeting bodies appears on the left. To search for a meeting body, enter the name in the Search field. To edit a meeting body's details, click the name of any meeting body in the list. To create a new meeting body, enter the details in the fields on the right side of the screen. Meeting Body Name is a required field:

Enter details for the new meeting body:
| Field | Description |
|
|
|
|
Abbreviation
|
Click the field, then enter an abbreviation.
|
|
Default Meeting Type
|
Choose a default meeting type from the drop-down menu. Read more about creating and managing meeting types.
|
|
Default Meeting Location
|
Click the field, then enter the name of the room or chambers where this body will typically meet. This can be changed for individual meetings as needed. This field can contain multiple lines and has a one-thousand-character limit.
|
|
Default Meeting Time
|
Click the clock ( ) and select a time. You can also type directly in the Default Meeting Time field. This is set up as a 12-hour clock; be sure to use the format H:MM AM/PM for single-digit hours and HH:MM AM/PM for double-digit hours, leaving a space between the minutes and AM/PM designation. ) and select a time. You can also type directly in the Default Meeting Time field. This is set up as a 12-hour clock; be sure to use the format H:MM AM/PM for single-digit hours and HH:MM AM/PM for double-digit hours, leaving a space between the minutes and AM/PM designation.
|
|
Contact Person
|
If you want to designate a contact person* for the meeting body, select a name from the drop-down menu.
*This list is populated by the People records in Peak, which includes pre-existing applicant and people records from the Boards & Commissions application as well as records set up in Peak. You can also leave this field blank and add a contact name later by editing the meeting body details.
|
|
Description
|
Click the field, then enter a short description of this meeting body.
Some customers use this field to state the draft or final status of the meeting agenda. This is because the agenda status is not currently available for an agenda template to pick up, but it can pick up the meeting description and put it on an agenda report.
|
|
Member Size
|
Click the arrows to increase or decrease the number of members for this body. You can also type directly in the Member Size field.
The Member Size is not currently used in Peak and does not auto-adjust based on the number of members added to the meeting body on the Members tab. If the jurisdiction also has Boards & Commissions application, Meeting Bodies in Peak are Boards in Boards & Commissions. This is why a Peak customer may see meeting bodies they don't recognize. In this case, the Peak Admin should adjust the member size of their meeting bodies to either match the number of members added or increase the value to allow for vacancies which will be reflected on the respective board in Boards & Commissions.
Note: Members added to the roster in B&C will show as members on the corresponding meeting body in Peak and vice versa. ( add a link to the Members tab support article in this section)
|
|
Color Palette
| Click on any color to associate it with the meeting body. Meetings for this body will show up on the calendar in this color, helping you quickly identify them. If a color is not selected for a body, any meeting created for it will default to dark blue on the calendar. |
Click Save at the bottom right to save the new meeting body to the system. The meeting body now displays in the list.
Note
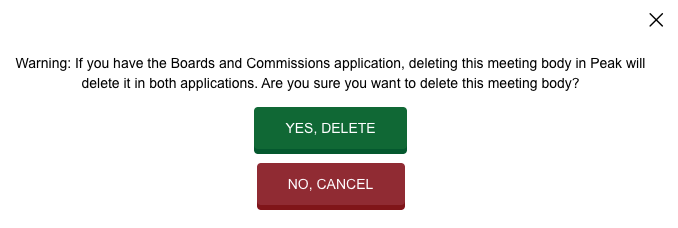
Peak meeting bodies are saved behind the scenes as boards in Granicus's Boards & Commissions application. When attempting to delete a meeting body from Peak, you'll be prompted to confirm or cancel the deletion. This helps to prevent deletion of corresponding boards in Boards & Commissions. In addition, deleting a meeting body from Peak is not allowed if the meeting body has been used for any meetings in the system.


