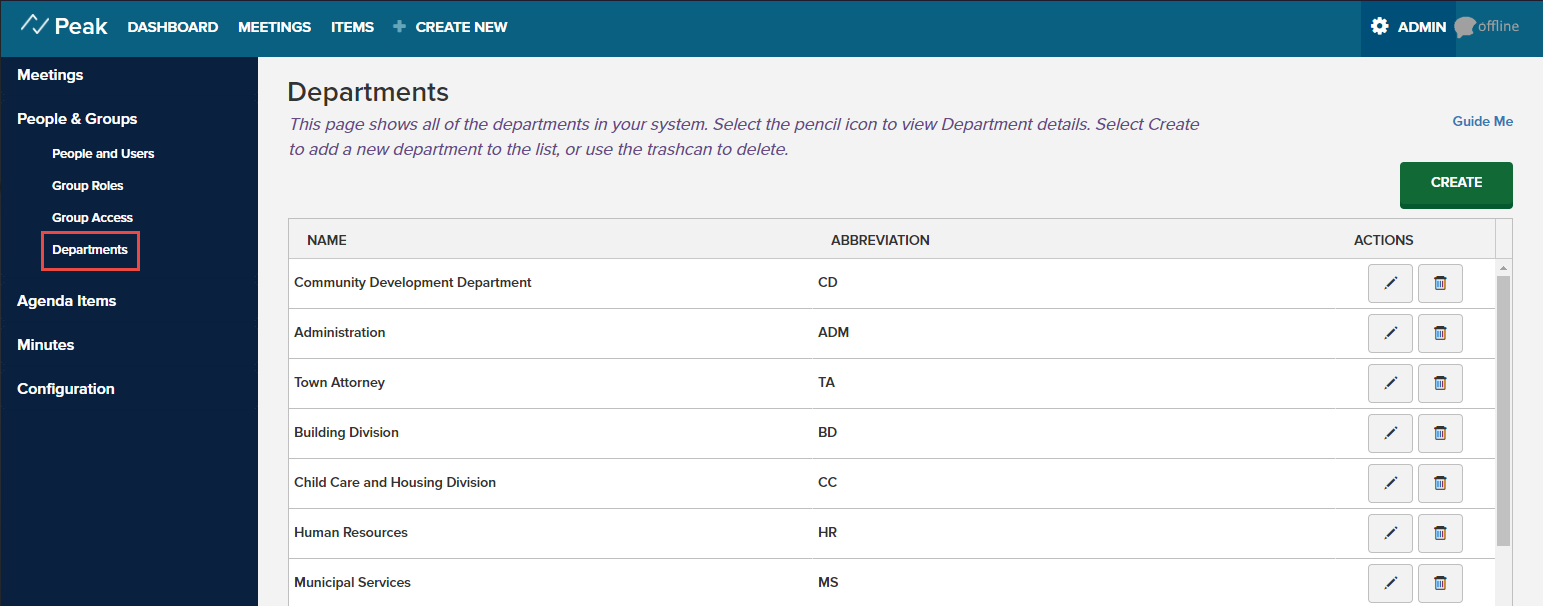
Departments in Peak are used to track from where agenda items are submitted in the agenda process. They can also be used to assign a person to a department and their corresponding user can use or be blocked from selecting an Approval Workflows to add to an agenda item. The Departments page displays existing departments set up in Peak.
To work with departments, click Admin in the upper right-hand corner. Choose People & Groups from the menu on the left, then select Departments. Note: Only users with the Peak Admin role (or a platform administrator) will have access to the Admin portion of the application.

From here, you can edit, delete, or create departments.
 |
|
 |
To delete a department, click the trash can.
|
 |
To create a new department, click the Create button.
|
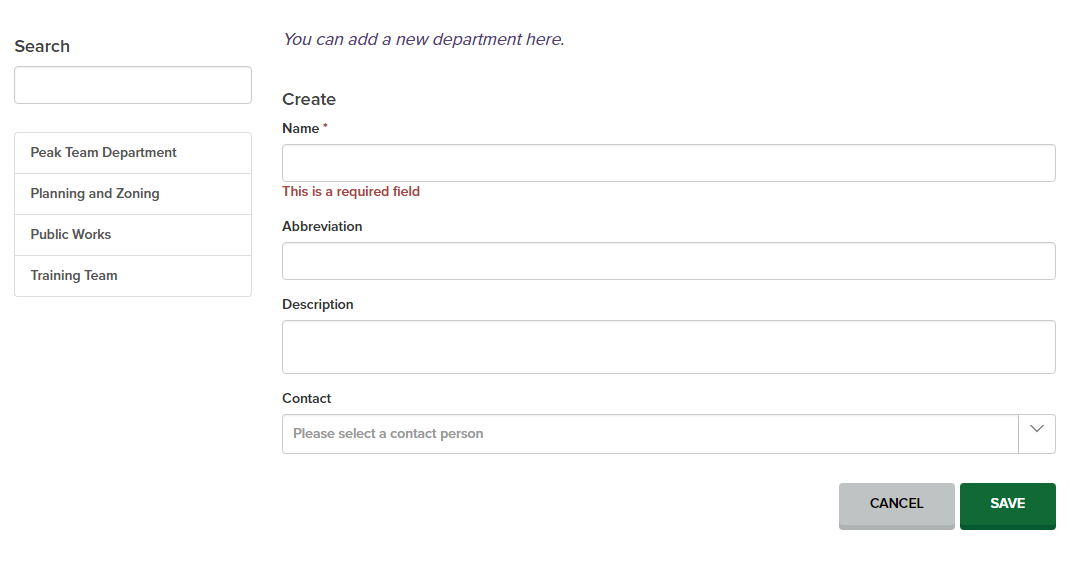
The Create button will take you to the Department Details page. A list of existing departments appears on the left. To search for a specific department, enter the name in the Search field. To edit a department's details, click the name of any department in the list. To create a department from scratch, enter the details in the fields on the right side of the screen.

Enter details for the new department. Name is the only required field:
| Field | Action |
|
|
|
|
Abbreviation
|
Click within the field, then enter an abbreviation.
|
|
Description
|
Click within the field, then enter a short description of the department.
|
|
Contact
|
If you want to designate a contact person* for the department, select a name from the drop-down menu.
*This list is populated by the People records in Peak, which includes pre-existing applicant and people records from the Boards & Commissions application as well as records set up in Peak. You can also leave this field blank and add a contact name later by editing the department's details.
|
Click Save at the bottom right to save the new department to the system. The department now displays in the list.


