With the govDelivery Auto Response feature, your organization can instantly trigger an automatic message to any subscribers who reply to bulletins sent from your account. govDelivery provides a basic Automatic Response message that you can use. You edit this message, changing the text or adding contacts and resources for your organization.
The basic Auto Response message reads as follows:
"Please do not reply, this email box is not monitored. To contact [YOUR ACCOUNT NAME] please follow this link.
You may update your subscriptions, modify your password or email address, or stop subscriptions at any time on your Subscriber Preferences page. If you have questions or problems with the subscription service, please visit Subscriber Help."
(The first link in this message goes to your Contact URL, which is set in your Account Settings.)
Determining When an Auto Response Message is Used
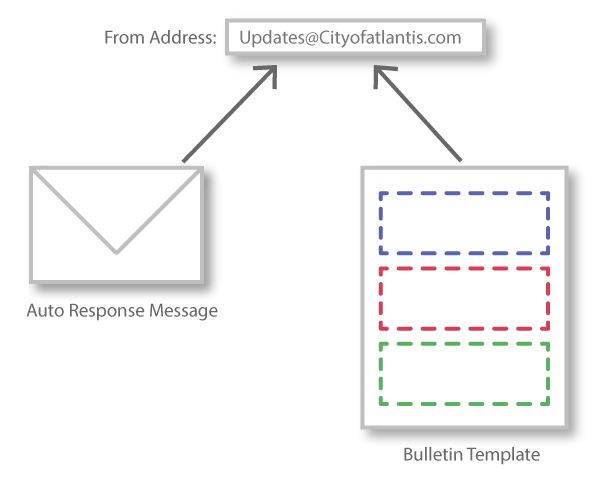
You must have one Default Auto Response message. You can also have other Auto Response messages and set them up to be used for a From Address in your account. Auto Response messages are connected to bulletins through the template used for that bulletin. If a template has the same From Address as Auto Response message A, any bulletin created from that template will be assigned Auto Response message A.


The Default Auto Response message is used for any From Address that has not been assigned another Auto Response message.
To Create or Edit an Auto Response Message
Note: If you can not find this feature in your settings, it is possible that you do not have this feature enabled in your account. Contact Granicus Customer Support to have this feature turned on.
- In the left navigation menu, click Templates.
- On the page menu to the right, click Auto Responses.
- Click Create Auto Response or click on the title of the message you want to customize.
- Select a From Address.
- Customize the fields for your message. Use the default text to get an idea of what kind of content should go in each field.
- A list of field definitions can be found at the bottom of this article for reference.
- Click the Preview link at the bottom of the page to see your changes in action.
- Choose whether this should be the default Auto Response message.
- When you are done, click Save.
Tip: To learn how you can monitor all auto response activity for your account, see this article on the Auto Response Report.
To Set Up Different Auto Response Messages
Auto Response messages are assigned to a From Address. If your organization uses multiple From Addresses, you can set up a different Auto Response message for each address. These messages can be assigned only by the sending address, not the Display Name (recall that a From Address can have multiple Display Names).
For example, if you would like a topic to have a particular Auto Response message, you would use the following steps:
- If the topic does not already have its own From Address, contact Granicus Support using the link at the bottom of this page for help with adding a new From Address to your account.
- Assign that From Address to your topic using the article for Setting Default Bulletin Templates.
- Create a new Auto Response message (see instructions above), assigning the new From Address to that message.
Editable Fields
| Field | Description |
|---|
| From Address | Select a From Address from the drop-down box. |
| Subject | Subject line for the auto response message. |
| Body | The body of your email message. |
| Footer | The footer appended at the bottom of your email. |


