When you are editing agenda details in Peak, you have the option to add an agenda item on the fly rather than going through the standard process to create an agenda item.
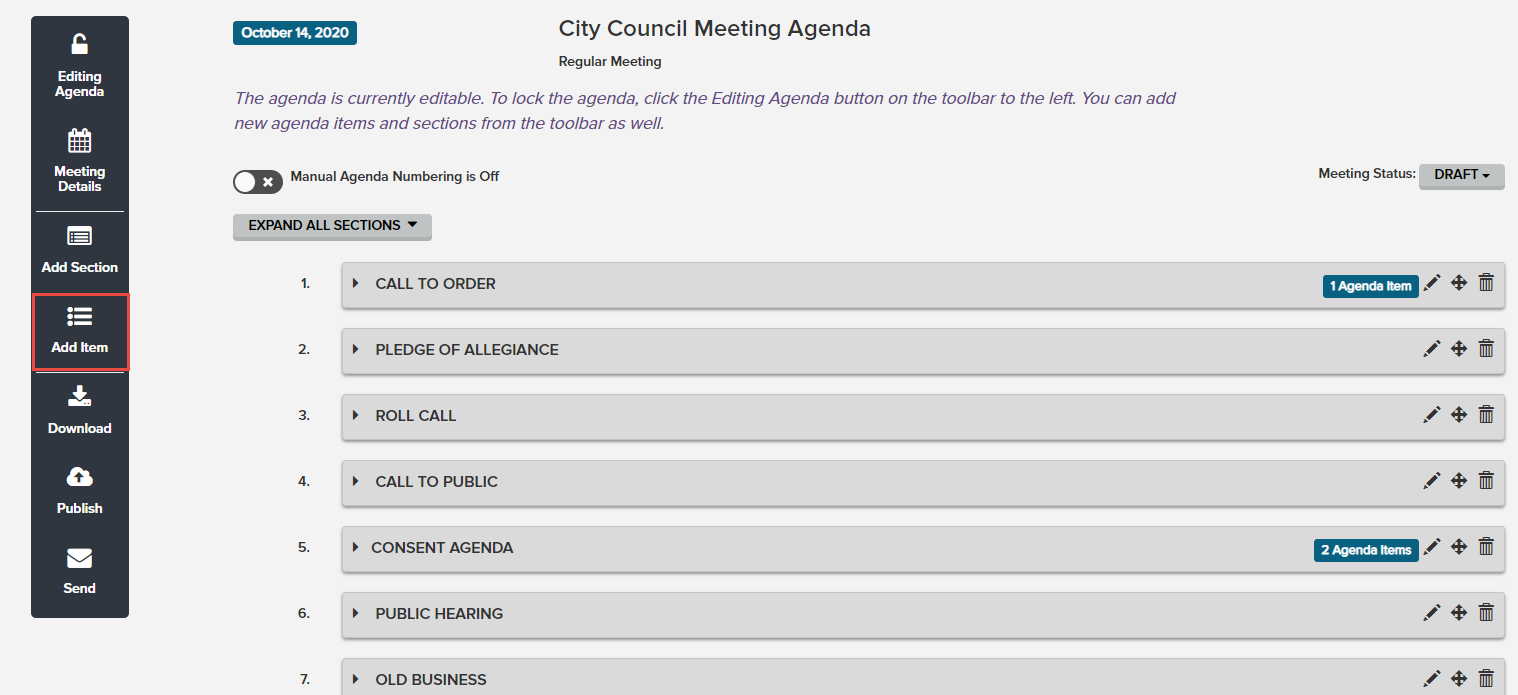
1. To add an agenda item to the agenda your working with, click the Add Item button on the left-hand side of the Edit Agenda Details page.
2. The Add an Agenda Item modal will appear, as shown below. Select Add Existing Items to choose from existing agenda items, or Create New to create a new item from scratch.
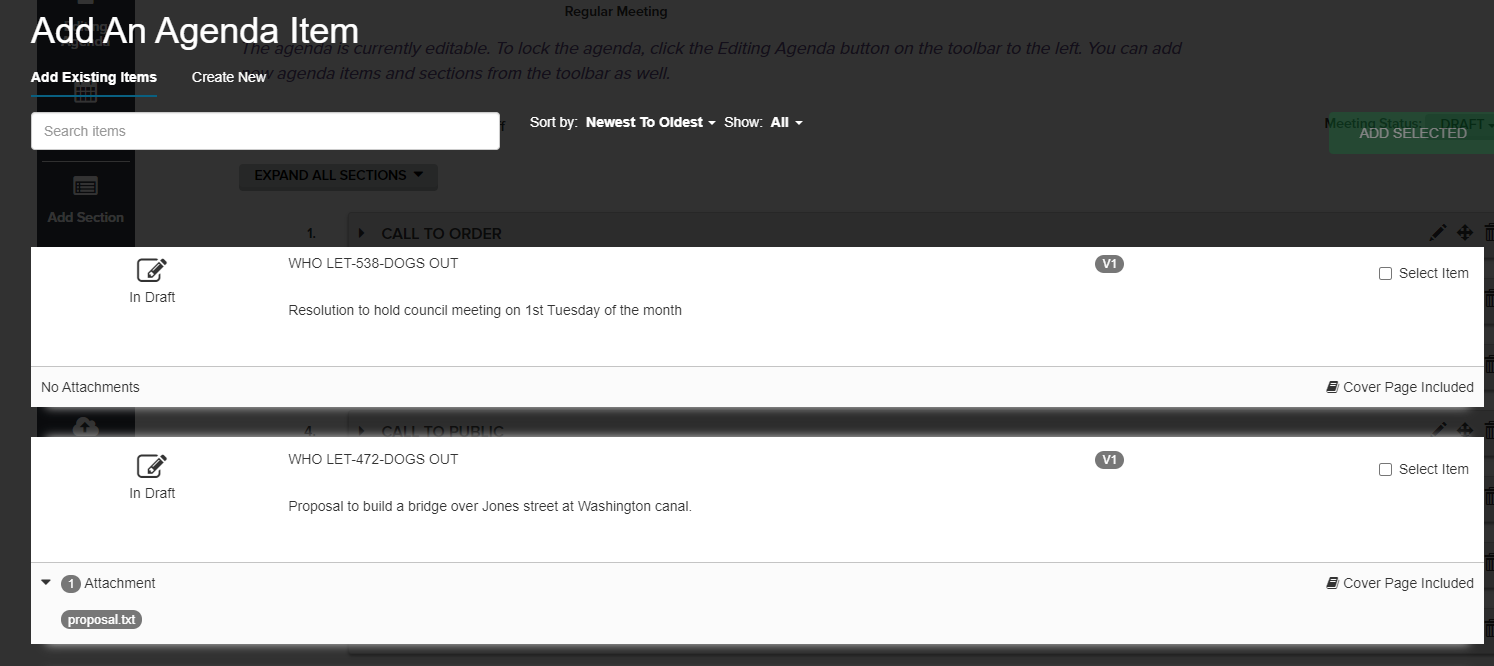
3. To add items from the list of available agenda items in the system, use the Search Items field to look for specific names, keywords, or agenda item IDs. You can also use the Sort by drop-down menu and select Newest to Oldest, Oldest to Newest, or Item ID; or filter the results by using the Show drop-down menu, which is populated by all the different item types in your system.

4. Click the checkbox on the right-hand side of the item card for all the items you wish to add. Once you have checked the box, the Select Section drop-down menu appears below the checkbox. The menu is populated with the sections from the agenda you're working with. Add as many items at once as you need, selecting a section for each.
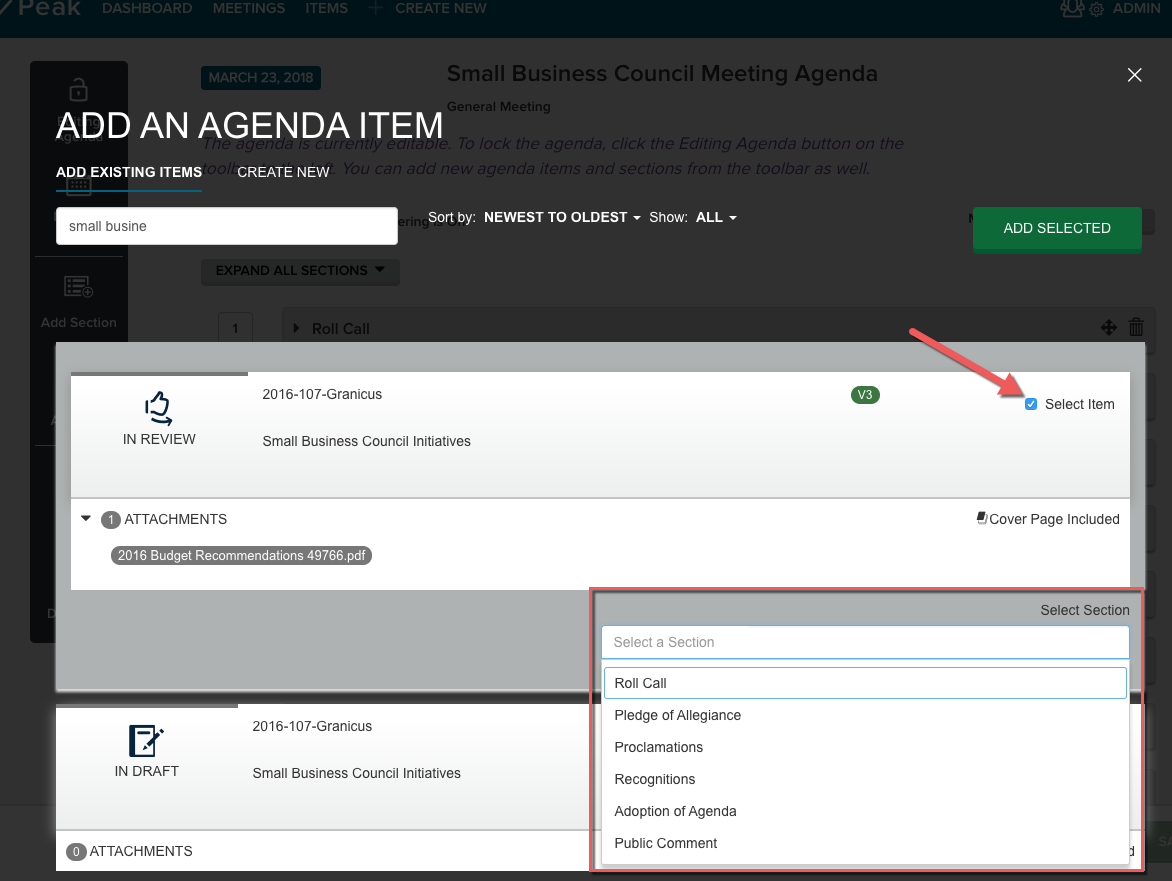
4a. You can add the item to multiple sections by choosing additional options from the drop-down menu. To remove a section, click the x next to its name.

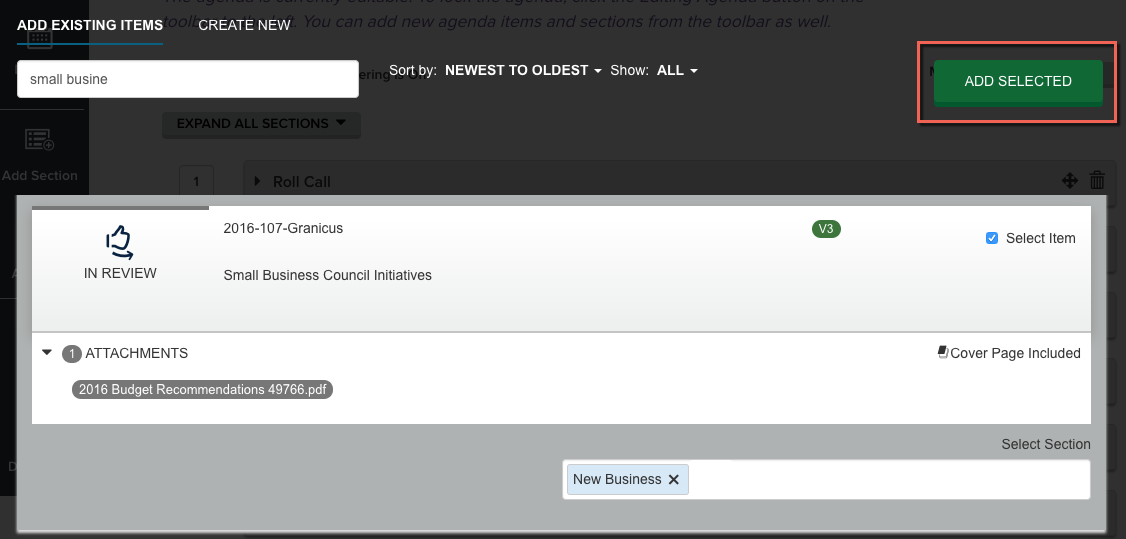
5. Click Add Selected button to add the item to the agenda section or sections you've chosen.
6. The agenda item(s) now appear on the agenda. You can now edit, rearrange, and remove items.
To add an item from scratch, go to step 2 and choose Create New. The process from here is the same as the standard process to create an agenda item, except that the Meeting Body and Meeting Date fields will be filled with the information from the agenda you're working with:
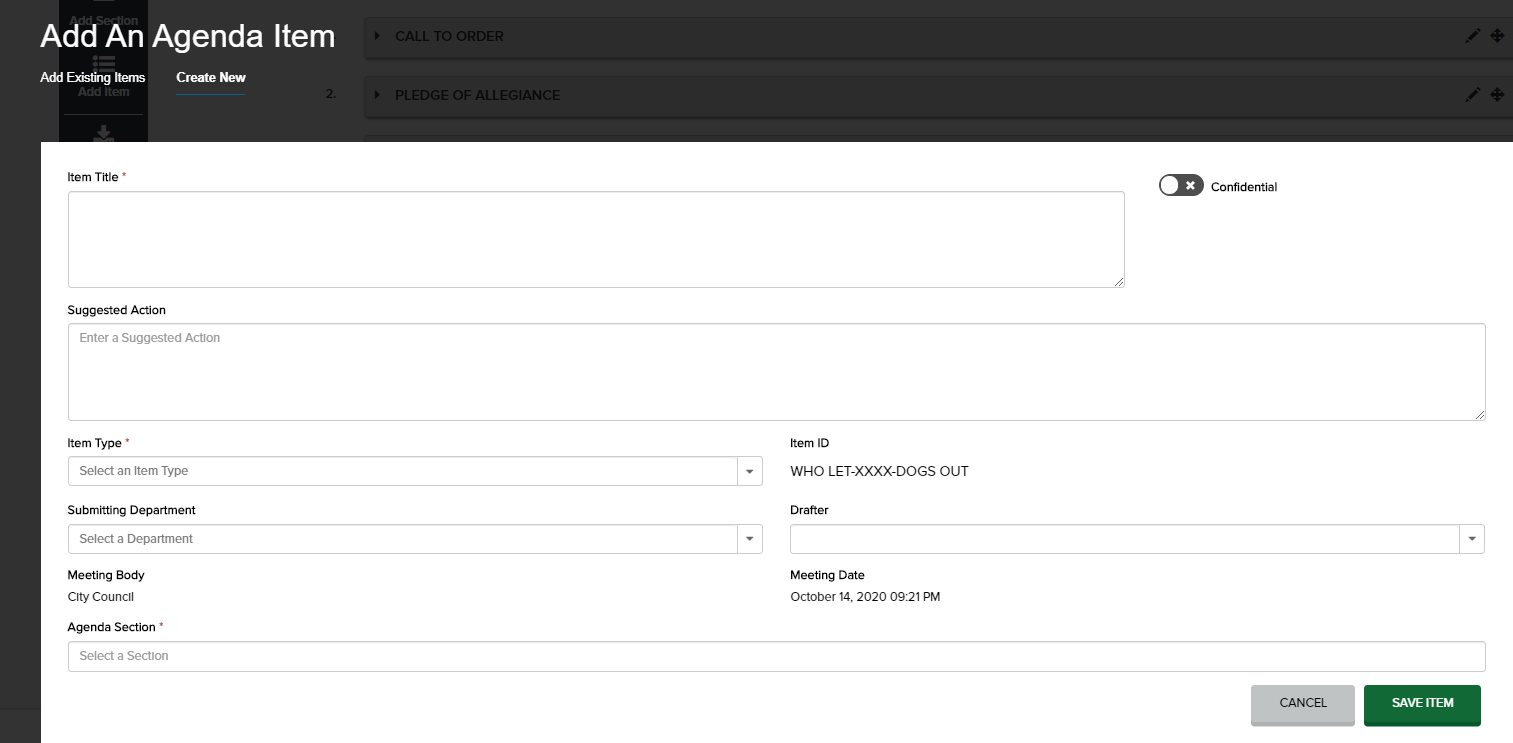
Choose the appropriate agenda section or sections from the Agenda Section drop-down menu. If you wish to make the item confidential (meaning it will only appear on the council agenda packet and not be available to the public), toggle the confidential switch. Click the Save Item button, and your item displays on the agenda. To enter information into any custom fields, add attachments, and create an approval workflow, click the pencil on the item card to edit the agenda item once you have added it.
Note: The item is added to the agenda and will be set automatically to Approved. This provides a quick and easy way to add an item to an agenda and bypass the workflow process. If you need a workflow on the item, use the Set Status to In Draft button, and add a workflow via the item details page.


